Quantcast
Channel: DrivingLine: RSS Feed
Viewing all 5095 articles
Browse latest View live

The Rimrocker Trail: 160 Miles of Dirt and Adventure From Montrose to Moab

$
0
0

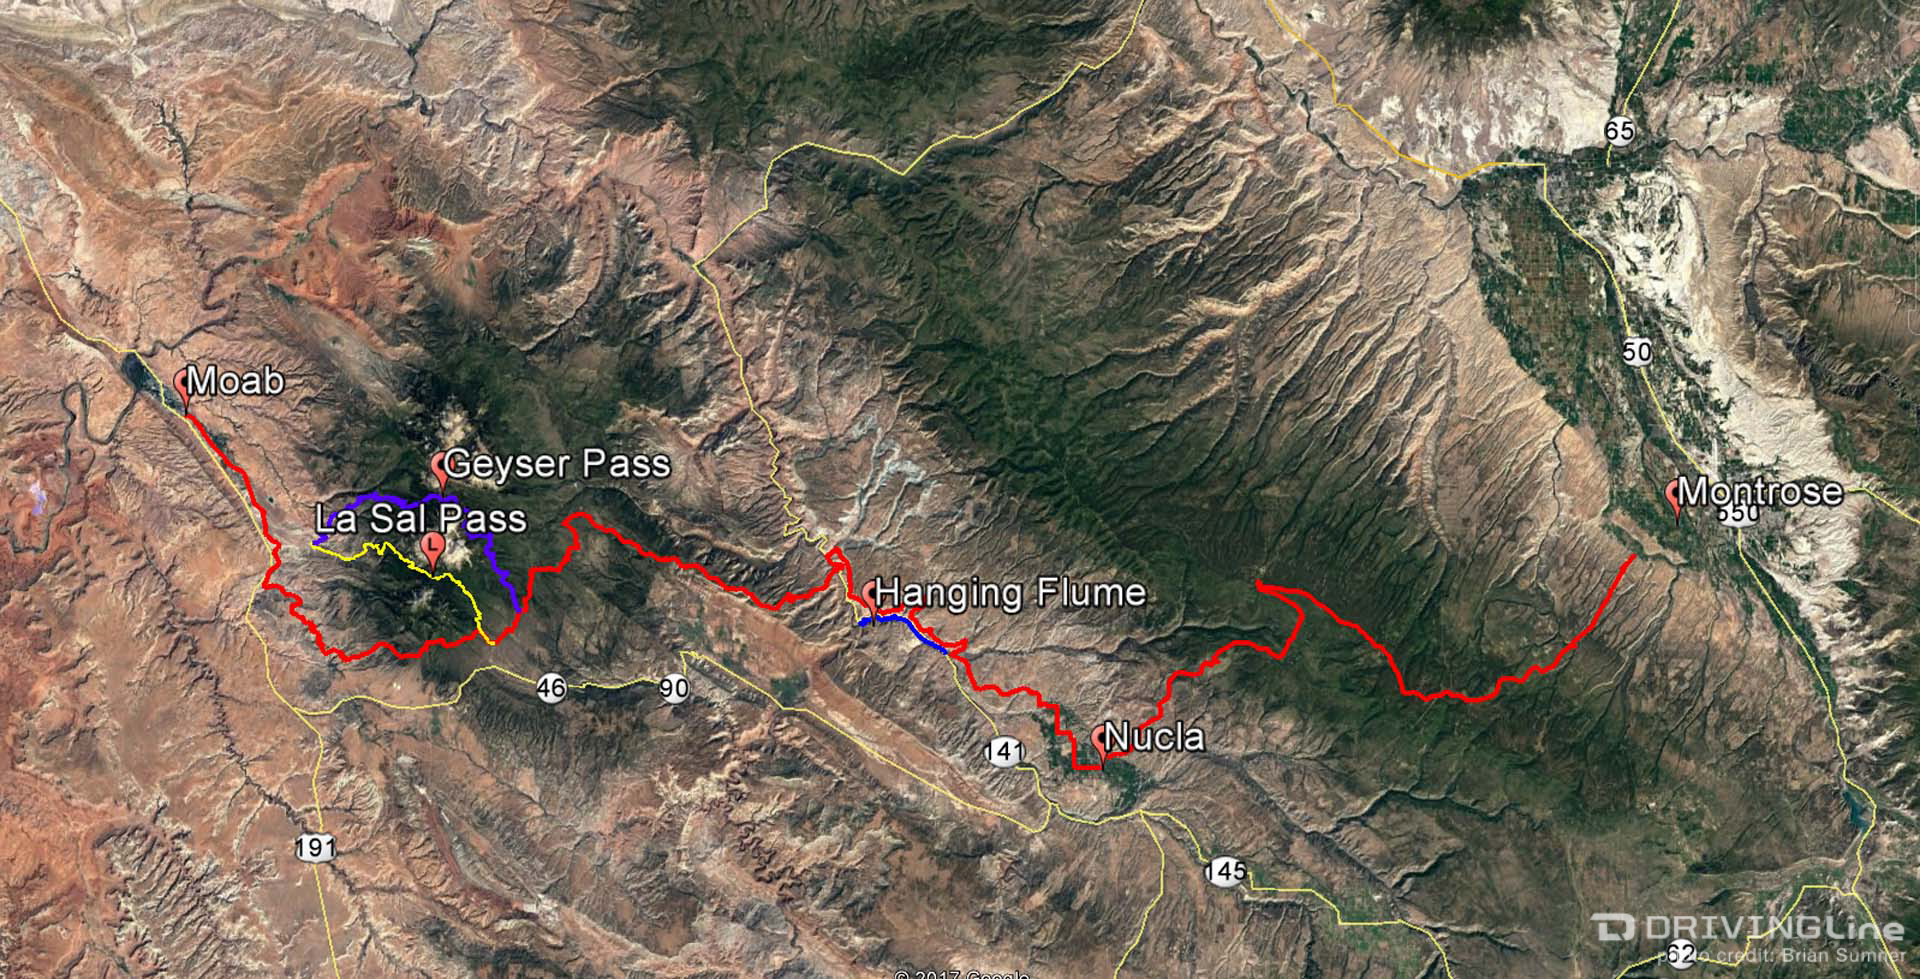
Moab is always a popular destination for adventure and four-wheeling, but with soaring temps in the Moab valley during the middle of summer, we were looking for a cooler adventure and to try something new. During our time at the Easter Jeep Safari this year, we picked up some trail information at the vendor show on a trail called Rimrocker. While the various roads and trails have always been there, the recently developed Rimrocker Trail strings them all together in a 160-mile route from Montrose, Colorado, to Moab, Utah.

We left Highway 550 with a full tank of gas and proceeded west along Main Street in Montrose and then turned on State Road 90 towards the trailhead for Rimrocker. The first part of the trail crosses the Uncompahgre Plateau along a smooth graded dirt road. The plateau itself is 25 miles wide and 100 miles long and is at an elevation of 9,000 feet. Once in the forest, there are many spots for camping and other forest roads to explore. The trail soon drops in elevation as it winds into the small town of Nucla where there is gas and other services.

Leaving Nucla

After leaving Nucla, the trail zig-zags before making a left turn on a lesser road across an area known as Second and Third Park. There is private property in this area, so stick to the designated road. The La Sal Mountains near Moab come into view here as well as views of the plateau we had just crossed. This stretch of the trail offers very little shade and is rough enough that the pace becomes slower.

Once the trail dropped down into a canyon, we found a nice shade tree backed up with a cliff wall and flowing stream to stop for a lunch break. There is an option here to continue out to Highway 141 and a developed campsite and picnic area, but we stopped here instead to avoid as much blacktop as possible. At this point we were roughly 70 miles into the route.

Immediately after our lunch stop, we encountered the first of several water crossings on our adventure. This is the only one along the Rimrocker that is known to get deep during spring runoff. In July it was less than a foot deep at the time of our crossing. When the water is rapidly flowing and deep, heed the warning on the sign and backtrack to 141 until the next access point to return to the trail.

What Is a 'Rimrocker'?

After a gradual climb, we were on top of Spring Creek Mesa and driving along a shelf road with great views along the valley and of the San Miguel River far below. We started to think Rimrocker gets its name from following the edge of so many different mesas and plateaus! We later learned that, according to one account, a Rimrocker was an outlaw who would hide out in the valley after robbing banks in Telluride to the east.

Soon we began to see evidence of mining along the trail from the late 1800s into the 1970s near Uravan. This area is rich in radium, vanadium and uranium. Another source lists a Rimrocker as a person who worked in the many mines scattered around this area.

The Hanging Flume

A great detour to take is to see the hanging flumes along the canyon wall high above the San Miguel River. Take an access road to 141, cross over the river and follow the dirt for a few miles. Soon you will see a reconstructed portion of the flume which transported water over 10 miles, seven of which were along canyon walls for use in hydraulic mining. It was quite the engineering feat in the 1890s. The reconstructed flume box was completed in 2004.

Farther down the canyon past the hanging flumes is the confluence of the Dolores and San Miguel rivers. The fast-moving San Miguel empties into the slow-moving Dolores. The road continues down the canyon from here into Paradox Valley, but we returned to the Rimrocker from this point.

The trail begins a steep descent into southwestern Colorado’s canyon country and the Dolores River running along Highway 141. The switchbacks curved between the canyon walls and large boulders, eventually leading us into a short stretch of pavement and a bridge to cross the river before returning to dirt. This area has a layer of Navajo Sandstone that is the same type of rock found in Utah.

As the trail steeply climbs out of the valley, it becomes rougher with rocks and small sandstone slabs dispersed within the dirt road. A hidden Navajo Sandstone rock formation appears below. The road begins to smooth out again near the Colorado and Utah border.

The La Sal Mountains

We reached a fork in the Rimrocker Trail late in the day and decided to detour once again and head high into the La Sal Mountains via Geyser Pass. We found a campsite for the night near the Gold Basin fork. The next morning we made our way down the western side of the La Sals and got our first sight of Moab.

To return to the Rimrocker Trail, we headed up La Sal Pass. From the start, this trail required four low and was the most technical trail we encountered our entire trip. A few miles from the top we crossed a talus shelf road. The loose rocks constantly shifted below our vehicles as we crossed. Having tires with aggressive sidewalls like Nitto Ridge Grapplers is beneficial here to defend against the sharp edges of the rocks.

At the top of La Sal Pass the road becomes a graded dirt road down the other side. Mount Peale rises from a large meadow at the pass and offers a few hiking trails to explore. We continued on, working our way back to the Rimrocker Trail.

The Final Push Into Moab

We rejoined the Rimrocker at the bottom of La Sal Pass and continued west. The trail once again became very rocky with ruts and tight brush lining both sides. The navigation became tricky with several hidden turns. Eventually we came out to Highway 191 passing by Area BFE and into Moab to finish up our trip. We would recommend bypassing the final section and either taking La Sal Pass into Moab or out Two Mile Road to Highway 46. Our route as described with the side trips was approximately 215 miles.
Travel Tips

  • The trail is well marked with sign posts. A GPS came in handy a few times.
  • Maps and an informational brochure can be picked up at the visitors center in Montrose or Naturita.
  • The entire trail usually opens by June depending on snowpack.
  • Best time to travel would be early summer for wildflower viewing or during the fall colors.
  • The trail is suitable for stock high-clearance 4x4 vehicles with good tires.
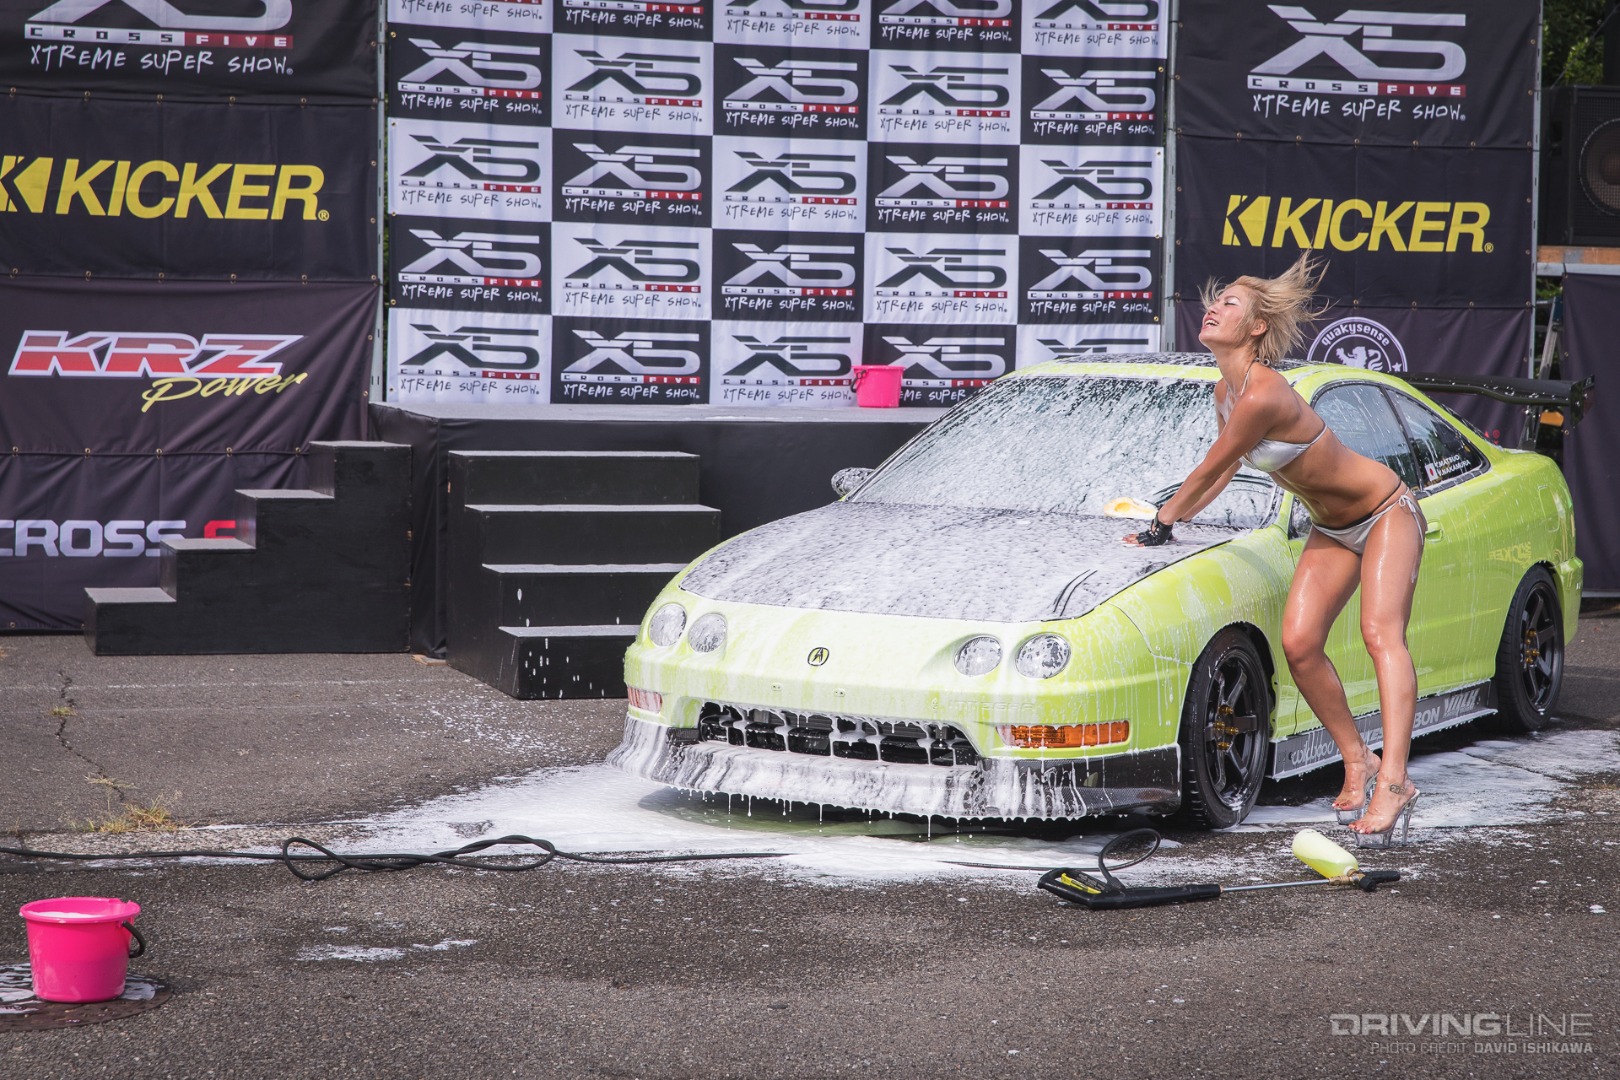
Cross Five: Cars, Trucks, Bikes and Bikinis [Gallery]

$
0
0

Deep in the northwestern suburbs of Tokyo is a little city called Chofu, and for a day it was transformed into one of five stops across Japan called "Cross Five." Dubbed the "Xtreme Supershow," it is an event dedicated to the American style of customization with a mix of cars, trucks, bikes and bikinis.

While the freestyle motocross jump was jaw dropping, the highlight had to be the bikini car wash competition. Foam, bubbles and a DJ... Let's just say one had to claim a spot early in order to get a good view. The show was great, but we could not confirm or deny if the cars were actually cleaner afterward.

Cross Five

With approximately 200 cars and trucks on display and so much more going on at the event, there's only one best seat in the house to take it all in — right here on Driving Line.

Check out the photo gallery above to see what this Xtreme Supershow is all about.

Pros and Cons of Exploring the Road Less Traveled

$
0
0

It doesn't take long exploring off-road before you come across an unmarked trail you have no idea about and can't find on your guide book, GPS or whatever other mapping device you're using. While there are many positives to exploring off the beaten path, there are certain risks too. Exploring the unknown isn’t for everyone. Let's go over some of the pros and cons so you can decide what's right for you on your next off-roading adventure.

CHOOSING A ROUTE

The Mojave Desert has a vast network of Jeep trails. Many of them date back to the days of Westward Expansion and were the overland routes used by emigrants and pioneers in the 1800s. There are dedicated off-road trails created by Jeep clubs working with the various land agencies. Still others are routes created by miners and prospectors seeking gold during the Gold Rush era. And some, like the famed Mojave Road, were originally ancient trade routes used by Native Americans.

Even the most complete trail guide book or web site can only cover a fraction of the routes, including back country road guides for popular locations such as Death Valley. These roads often don’t even show up on GPS or navigation maps (although they are shown on true topographical maps). With so much open desert to explore, it would be a shame to limit yourself only to trails that have write-ups in books and on forums.

If you’ve followed me for any length of time, you probably realize that I love to explore the trails that aren’t often traveled. If I spot a turn that looks interesting, I'm bound to say, “Hey, let’s go check out that trail.” Sometimes it’s a bust, and sometimes I hit the jackpot. That’s what keeps it interesting.

GOING OFF GRID

Pro #1: Some of the best sights in the Mojave Desert are still well-preserved secrets.

Despite this being the age of the internet and social media, there is an unwritten code that there are some locations people won’t share online because they don’t want to make them too easy to find and risk vandals accessing the sites. This is especially true for places such as well-maintained cabins and archaeological sites. If you want to find them, you have to get out there and explore on your own. Turning down random unmarked side trails is how we found the well-kept cabin in the salt flats outside of Death Valley, and we found the Kopper King mine and cabin purely by chance when we decided to take a trail that looked interesting.

Kopper King

Con #1: You need the skills to venture out, and there are instances where you might have to turn around.

You can easily get lost if you don’t have good navigation skills, and the Mojave Desert is not a good place to be lost. You won’t know the condition or technical difficulty level until you actual travel the trail. It’s important to know the capabilities of both you and your vehicle. Don’t let your ego get in the way of making a decision to turn around if the trail gets too sketchy.

We managed to find ourselves at a dead end surrounded by mountains and with no option but to backtrack 20+ miles while exploring the El Paso Mountains. When we decided to explore the trail beyond the Death Valley Mine in the Mojave National Preserve, we had no idea what we would find because most people turn around after visiting the mining camp. We reached a section of trail that was so steep, rocky and off camber that there was no way we would chance it alone.

Death Valley Mine Trail

Pro #2: It’s the best way to find solitude.

Trail runs as a social event are a lot of fun, and there is safety in numbers (the best advice is to never 'wheel alone), but sometimes we just want to find some peace and quiet in nature. The better known a trail is, the more likely it is that you will run across other people. We often spend days traveling more than a hundred miles on little-known Jeep trails without every seeing another person. There are times when we feel like we are the only people alive on the planet.

Grass Valley Trail

Con #2: Solitude has its downside.

If you run into trouble, there is significantly less chance of someone passing by to rescue or assist you. That is a very big risk to take on if you are ignoring common advice to never go alone. You need to make sure that your vehicle is in good working condition, and you need to make sure you are well-prepared for anything that could happen — not just with gear, but also mentally.

rock crawling spotter

Pro #3: There’s a great sense of adventure in not knowing what lies ahead.

Some people like to stay in their comfort zone, but some of us thrive on the rush of always experiencing something new.

Con #3: You could drive right past something interesting and never even know it.

We’ve done that more times than I’d like to admit. I typically find out when I get back home and start researching the area we visited. We've missed out on many significant petroglyph sites and even drove right past a large crater when we took a trail that turned out to lead into Bendire Canyon.

Explore while you still can! Off-Road Travel Management Plans are being implemented across the Mojave, and many sub-regions now have stricter regulations about trails. If a trail in these areas isn’t marked with Open Route signage, it is a closed trail. Make sure to check on any restrictions before you head out.

50 Years Later, Camaros and Firebirds Are as Awesome as Ever

$
0
0

Whether you're a GM-brander or an all-out pro-touring fan, you're probably aware that 2017 holds a special note in the automotive world. It is, after all, the 50th anniversary of the Chevy Camaro and Pontiac Firebird. Both vehicles shared the F-body platform, up until the fifth-generation Camaro.

While one model may not officially exist today (and the other may have taken a short hiatus on assembly lines in the early 2000s), no single-bodied platform in the history of automobiles has ever struck fear in Ford, Plymouth, Dodge or AMCs quite like the GM F-body has.

Built to compete against Ford's flagship muscle car, the Mustang, GM F-bodies debuted in 1967. Competitive both in looks and performance, and available in just about any desired trim level, the F-bodied cars quickly took the world by storm. Now one of the most recognized muscle cars, even by non-gearheads, the classic Camaros and Firebirds continue to make their presence known.

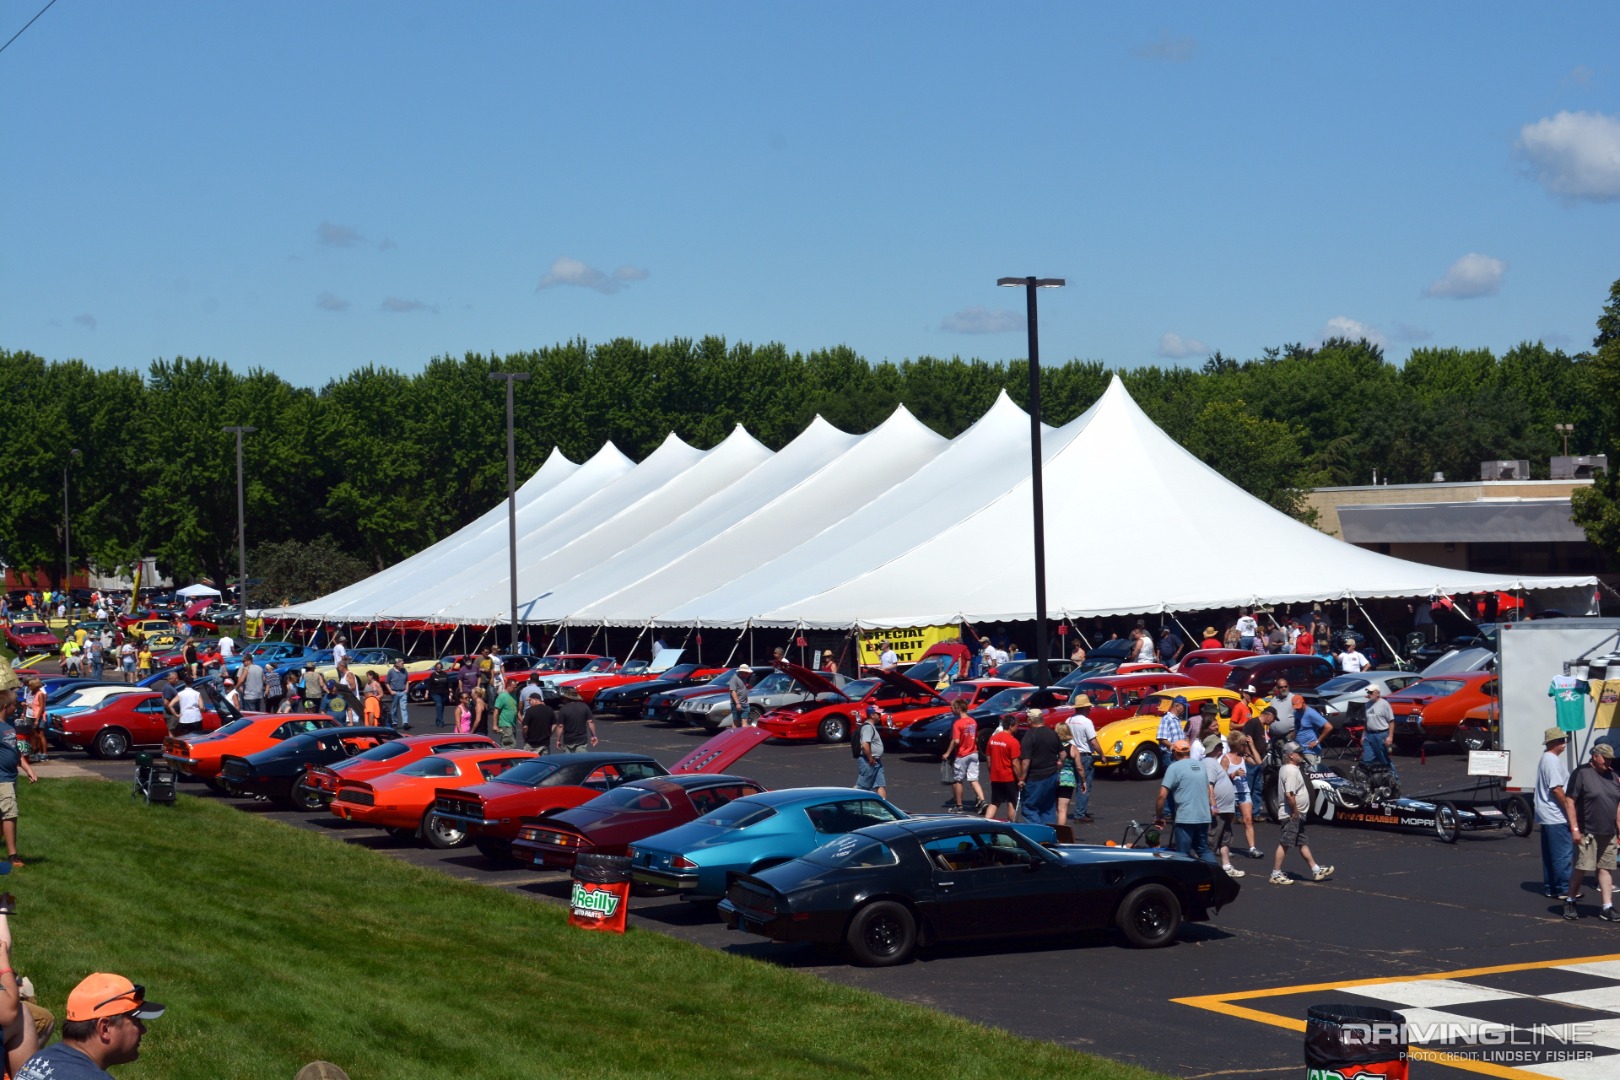
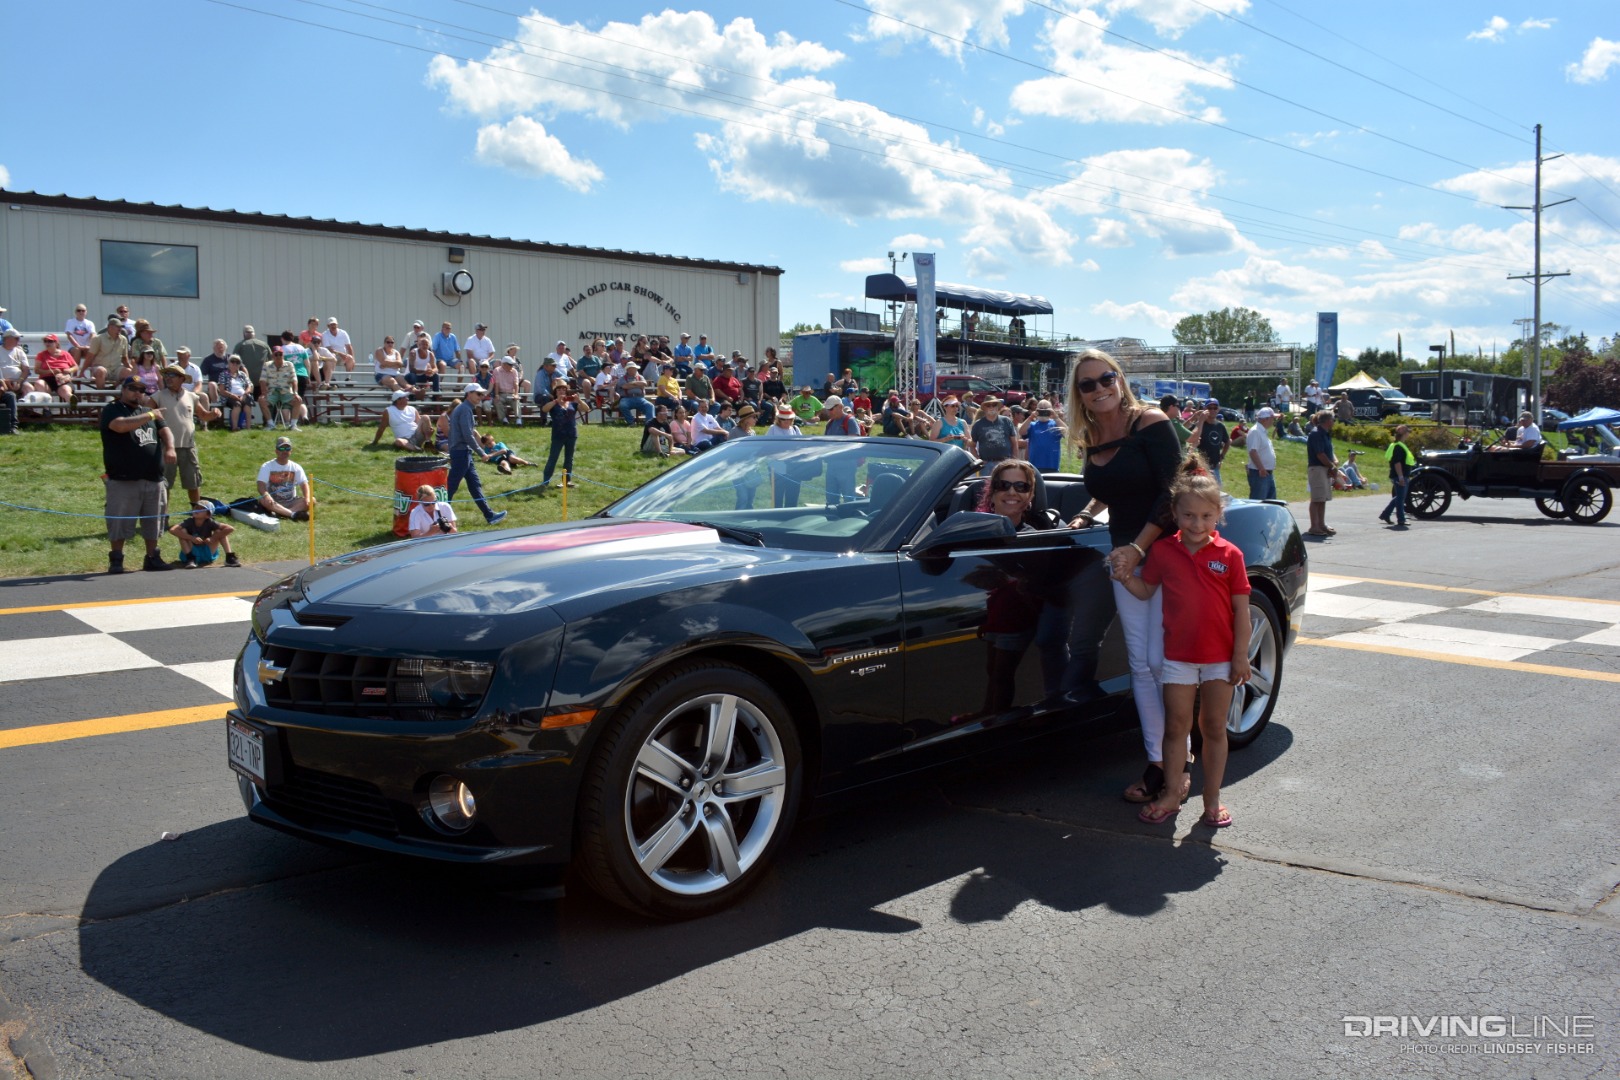
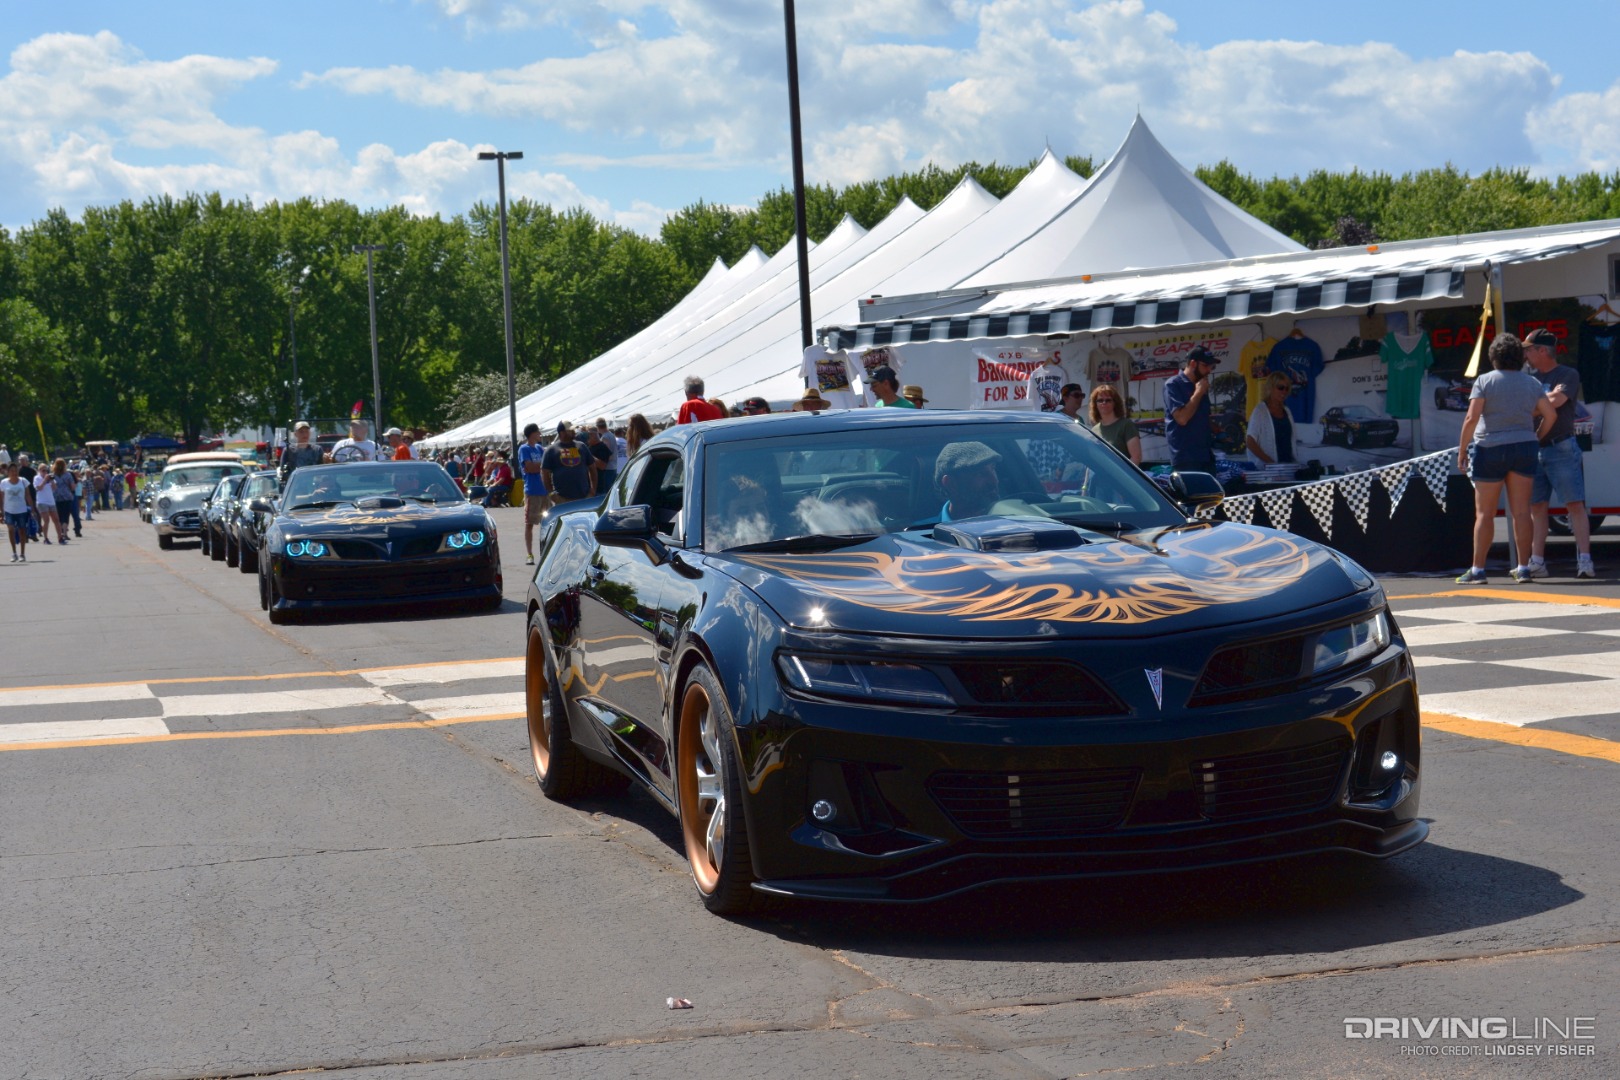
The 45th Annual Iola Car Show celebrated the half-century birthday of the F-body by making Camaros and Firebirds (and a handful of their Trans-Am Racing counterparts) the stars of their event. We've never seen so many F-bodies in a single place outside of an all-Camaro or all-Firebird event — which inspired us to reflect on the last 50 years of the famed Chevy and Pontiac pony cars.

With that said, take a look around the show and revisit some of the F-body's history with us:

1st Generation (1967-1969)

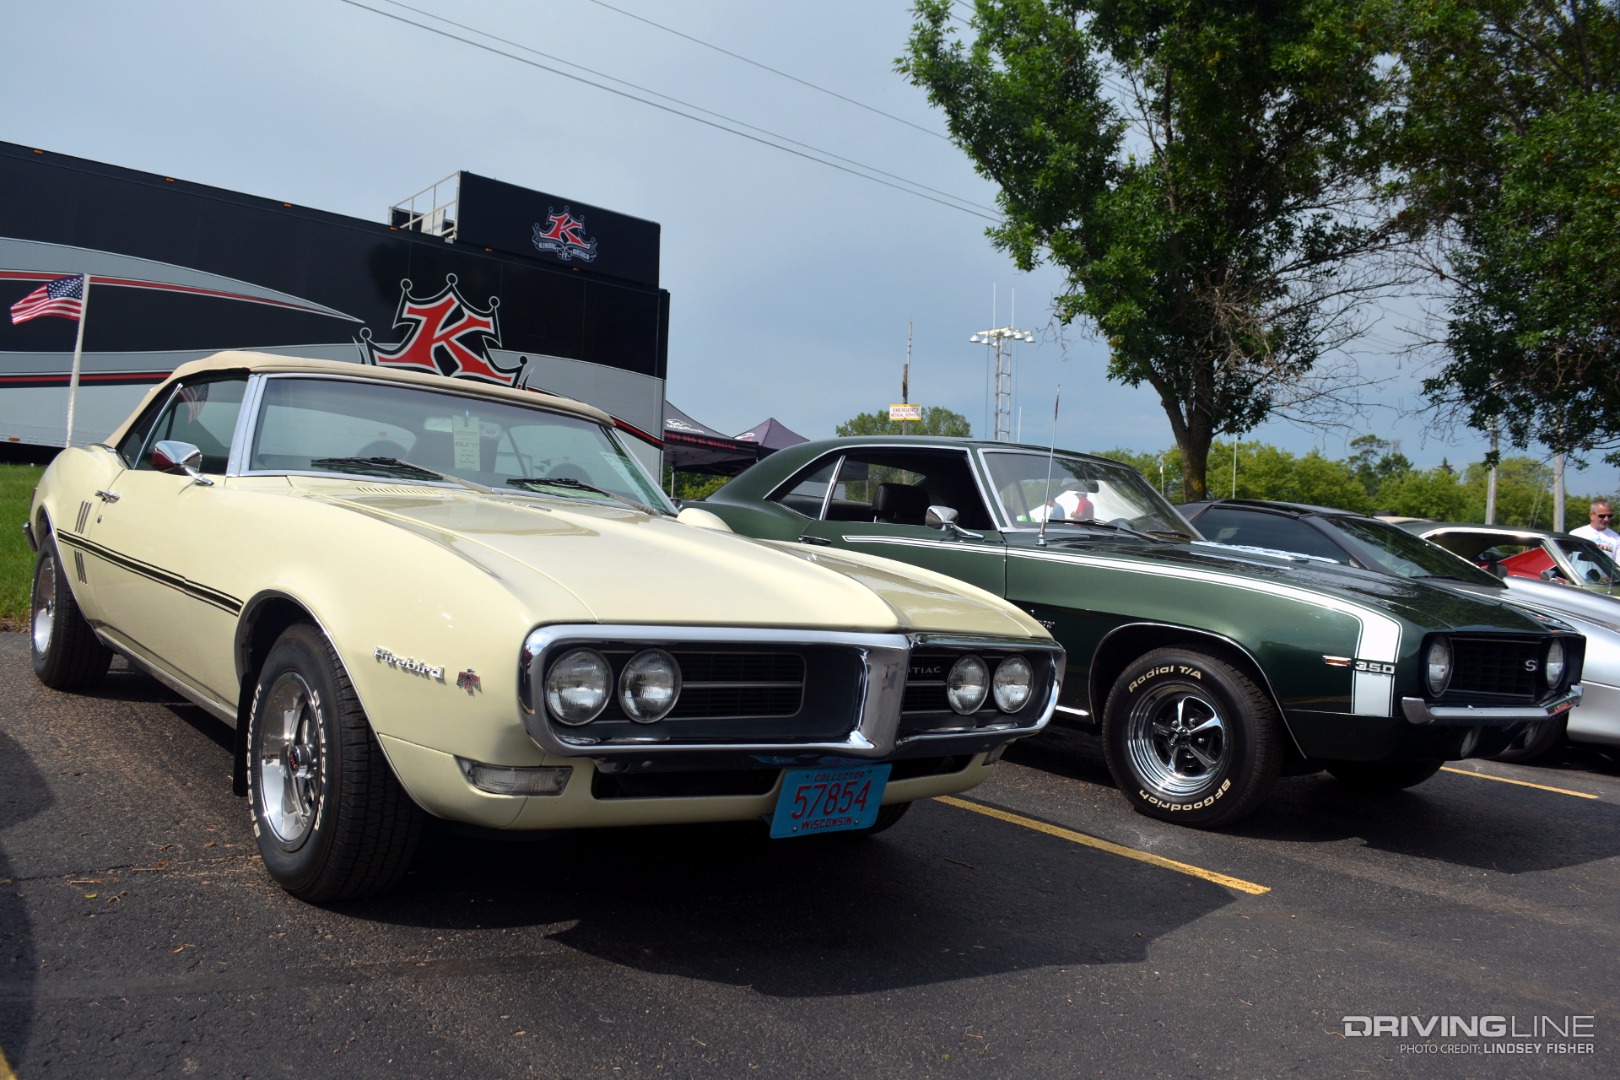
Shortly after Ford released the first Mustang in '64½, rumors began that Chevrolet was working on producing their own version of the pony car. At that time, the project was code-named "Panther." It would be September of '66 when the first Camaro debuted, the '67 model — followed by its cousin, the Pontiac Firebird, in February of '67.

In June of '66, a number of automotive press writers got the confirmation they'd been waiting for: The "Panther" car was in production and would be named the Chevrolet Camaro. The car hit dealerships in late September, just three days after its official public reveal. The Firebird, based on the same GM F-body platform but with a handful of differences, followed less than six months later.

Engine choices for the first-generation cars ranged from a 230ci "base" engine to a 396ci V8 for the Camaro, and a 400ci V8 for the Firebird. Several trim and performance levels were available for each, such as the Z/28, Rally Sport, Super Sport, Sprint Six, Ram Air, Ram Air IV and Trans Am.

N100001 "Pilot Prototype" Camaro

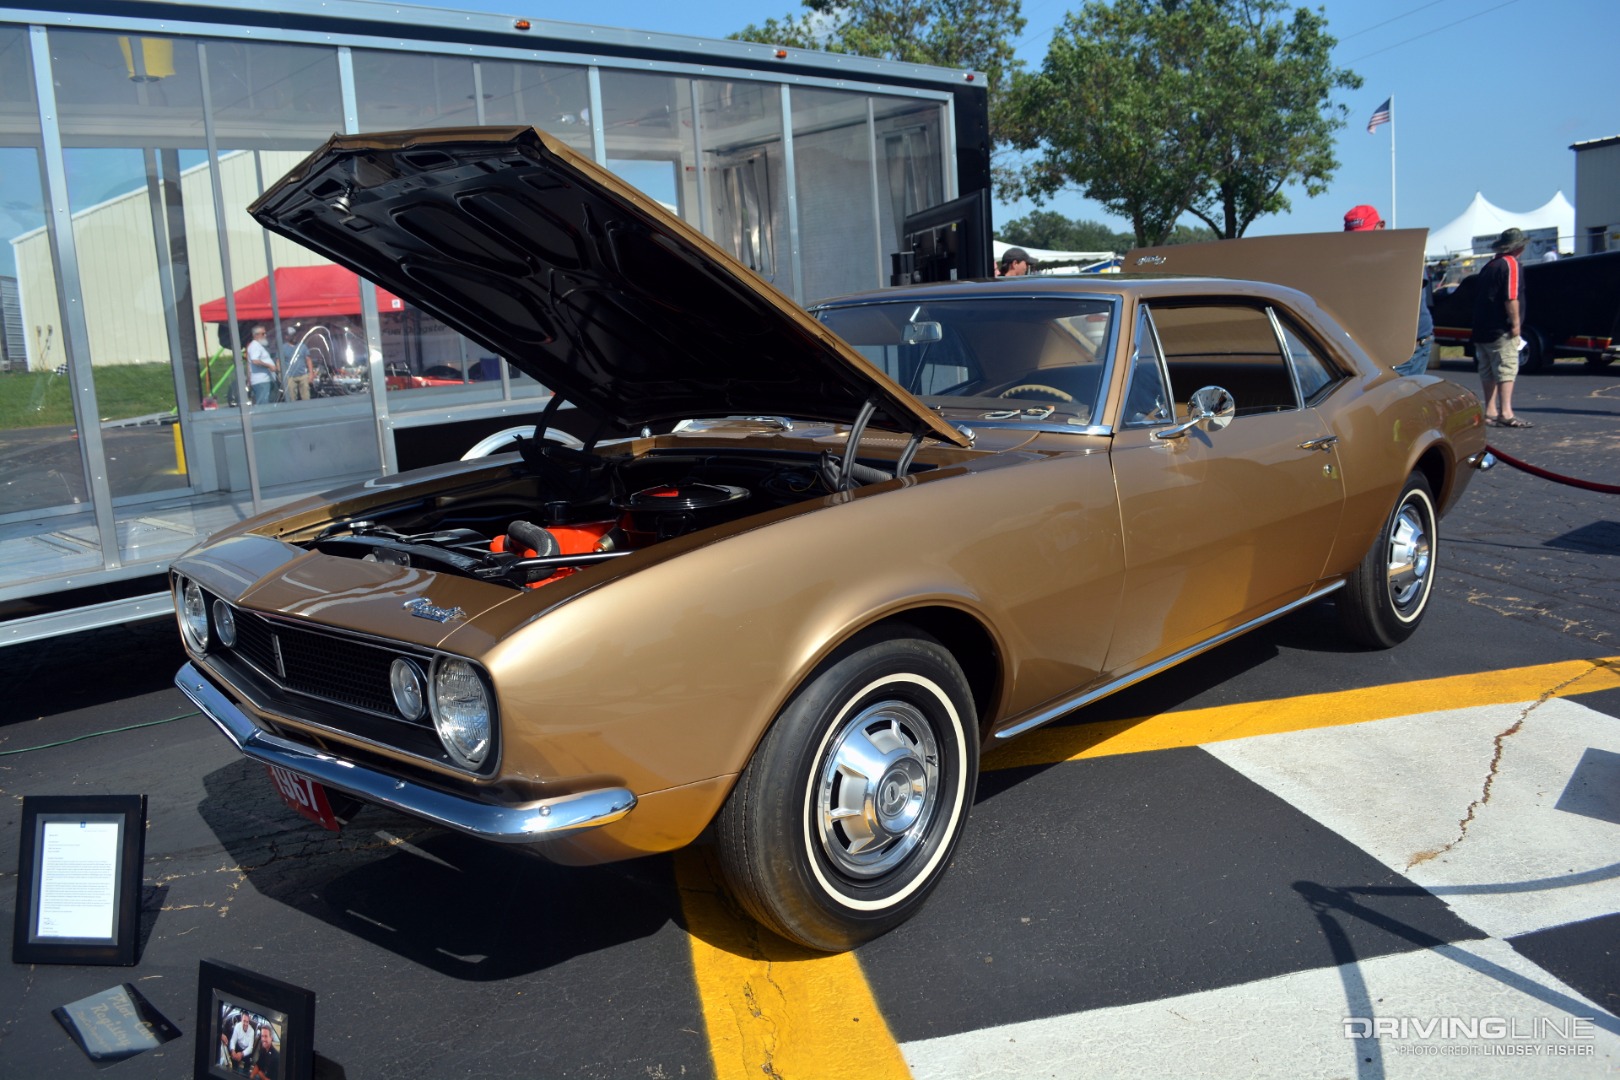
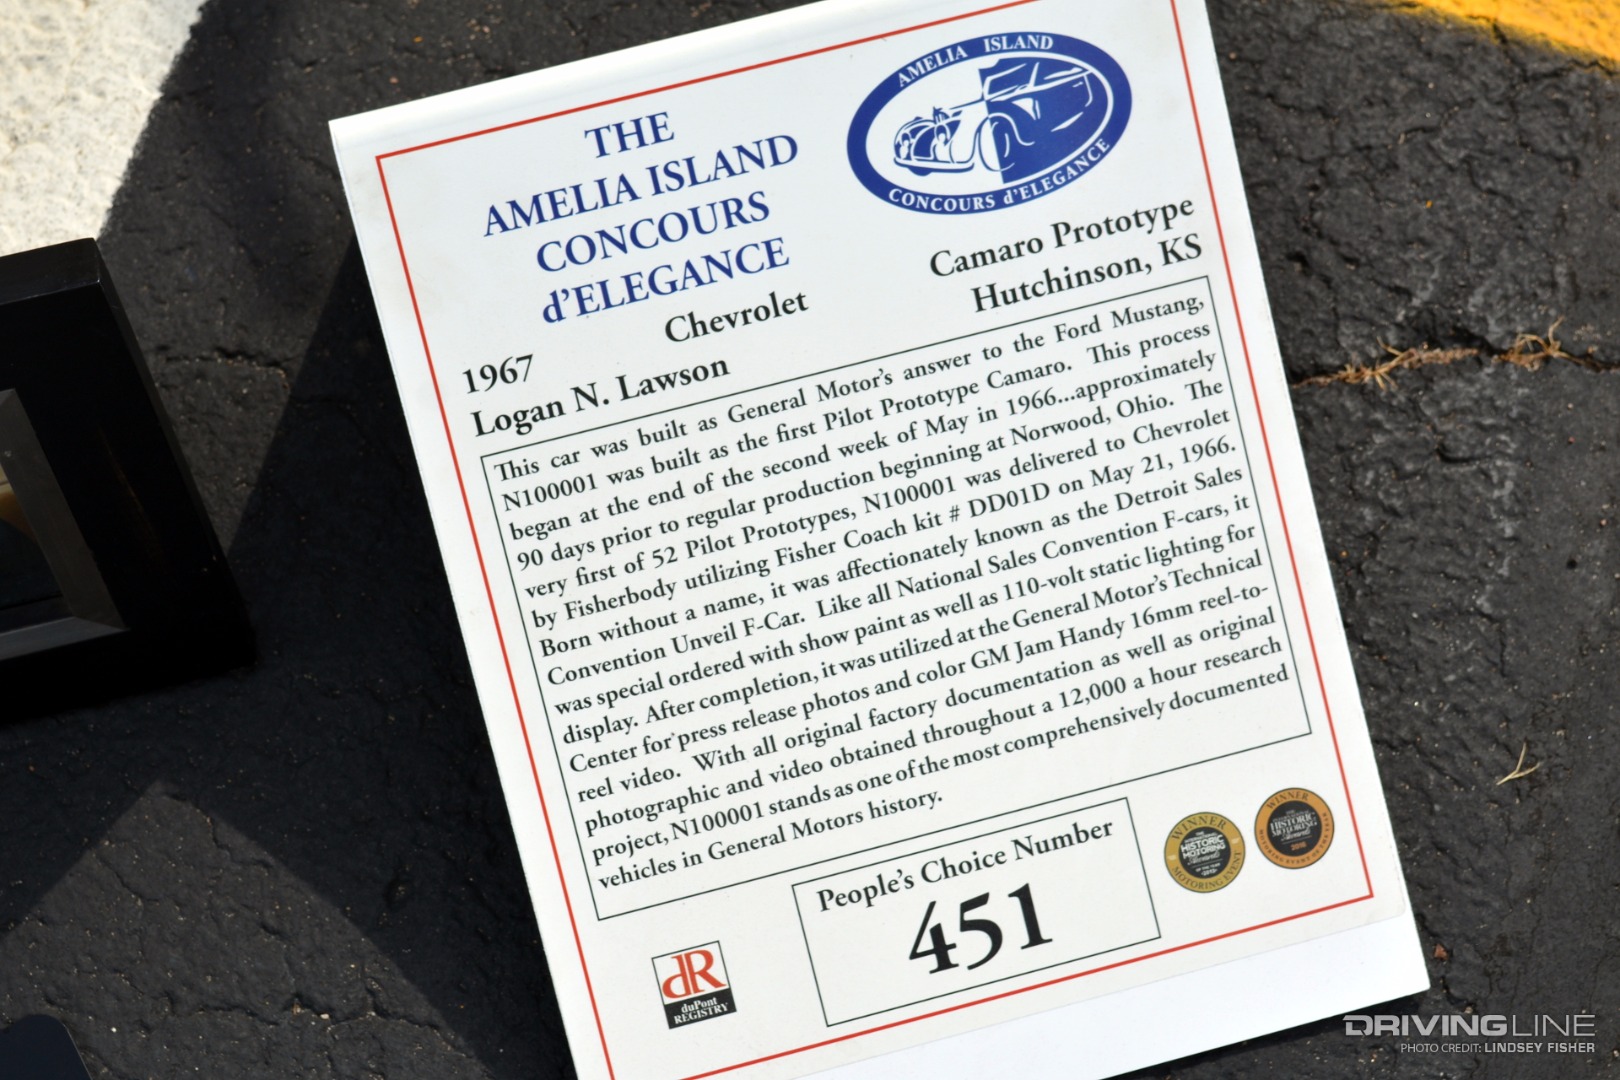
Typically the most popular of the classic F-bodies, the first-generation Camaro was represented en masse at the Iola Show, right down to the very first Camaro ever produced. That's right — this year, as part of the show's celebration of the GM F-body, the Iola Car Show hosted the original N100001 “Pilot Prototype” Camaro.

N100001 was produced months before the first actual production Camaros. Discovering the forgotten prototype on an automotive message board, Logan Lawson began digging to figure out what he had found. His dad Cory agreed that it could be something special, and the pair purchased it and began the process of restoration. The very first of 52 Pilot cars, this Camaro featured a L/6 230ci V6 engine, three-speed transmission, whitewall tires, disc brakes, 110-volt wiring, deluxe seat belts and Granada Gold “Show Paint.” It was used for press purposes leading up to the unveiling and consequent sale of the very first Camaros.

N100001 is as original as it gets. While the car had been owned by a number of individuals, eventually being turned into a V8-thumping drag car, all of the original prototype components were kept by a previous owner. Once Logan and Cory confirmed the car's provenance, the sale of all the original parts was negotiated.

After over 12,000 hours of research, impeccable attention to detail, great care and expense paid to keep all of the car's original sheet metal, as well as a passion to preserve this amazing car, the restoration of N100001 was completed in May of '14. It now makes special appearances at events, such as this 50th anniversary celebration in Iola.

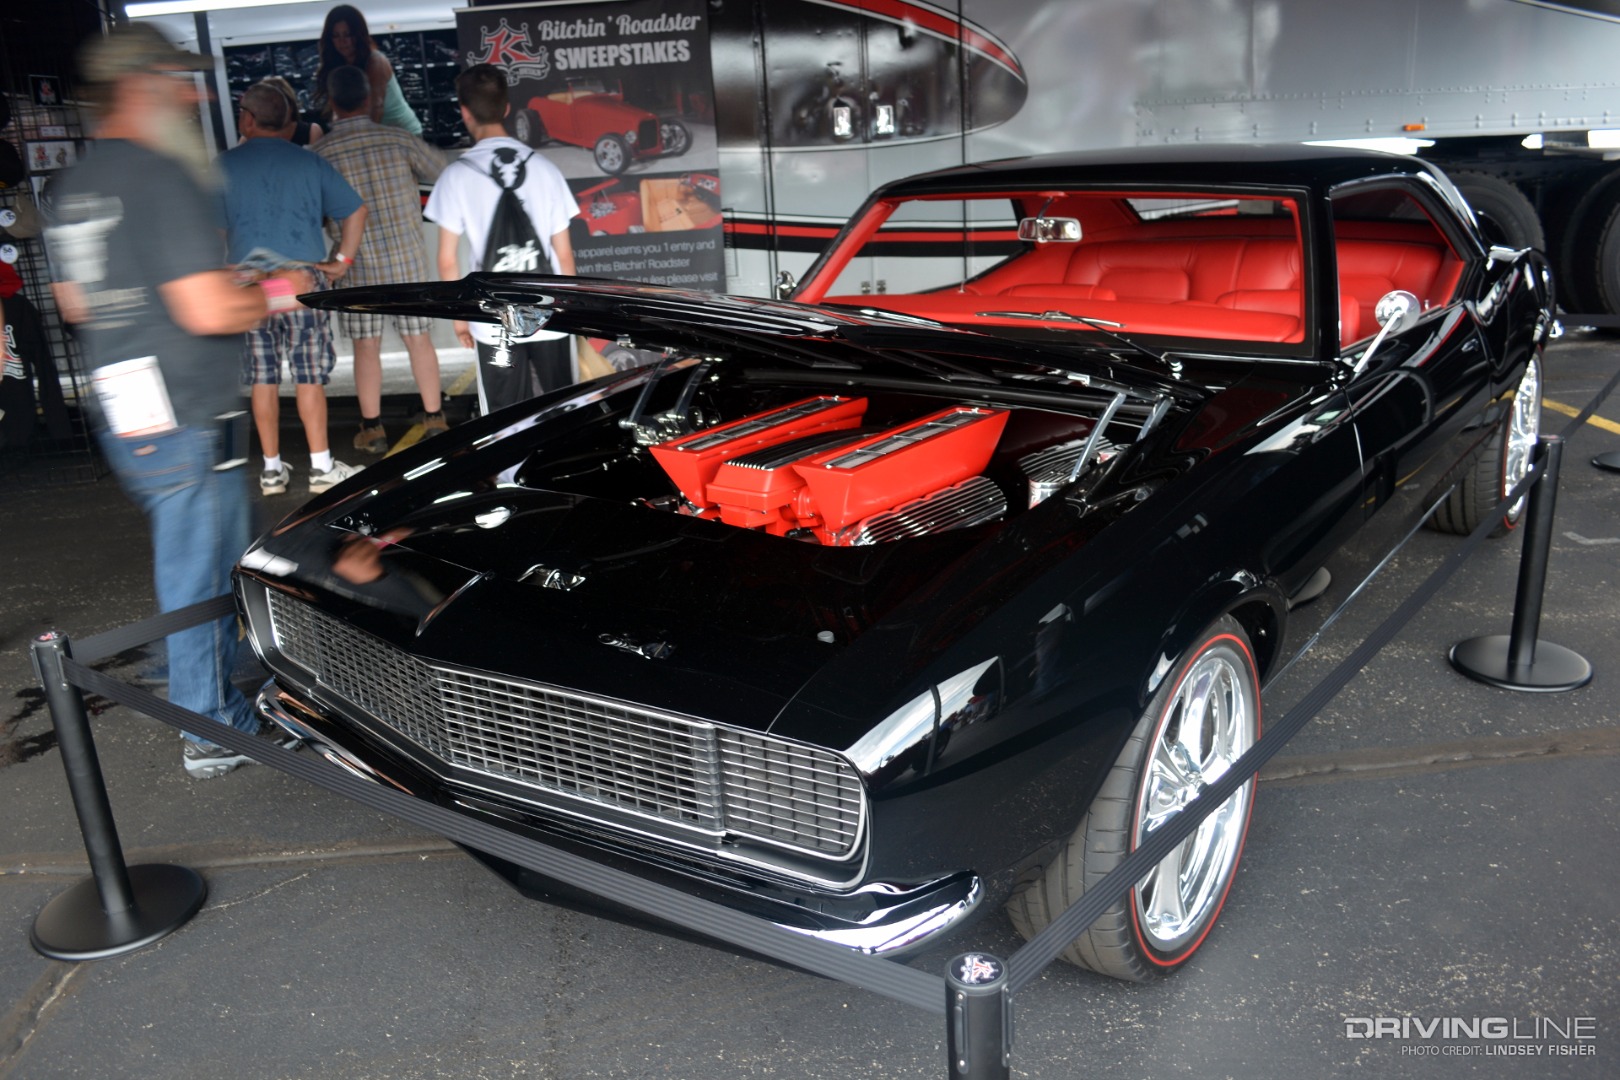
While this special First-Gen certainly took the cake for the best story at the show, we found countless other F-bodies with notable pasts — from first cars turned into life-long dream restorations to cars driven all over the country having never seen a trailer. Of course, we also found our fair share of pro-touring beauties in the mix!

2nd Generation (1970-1981)

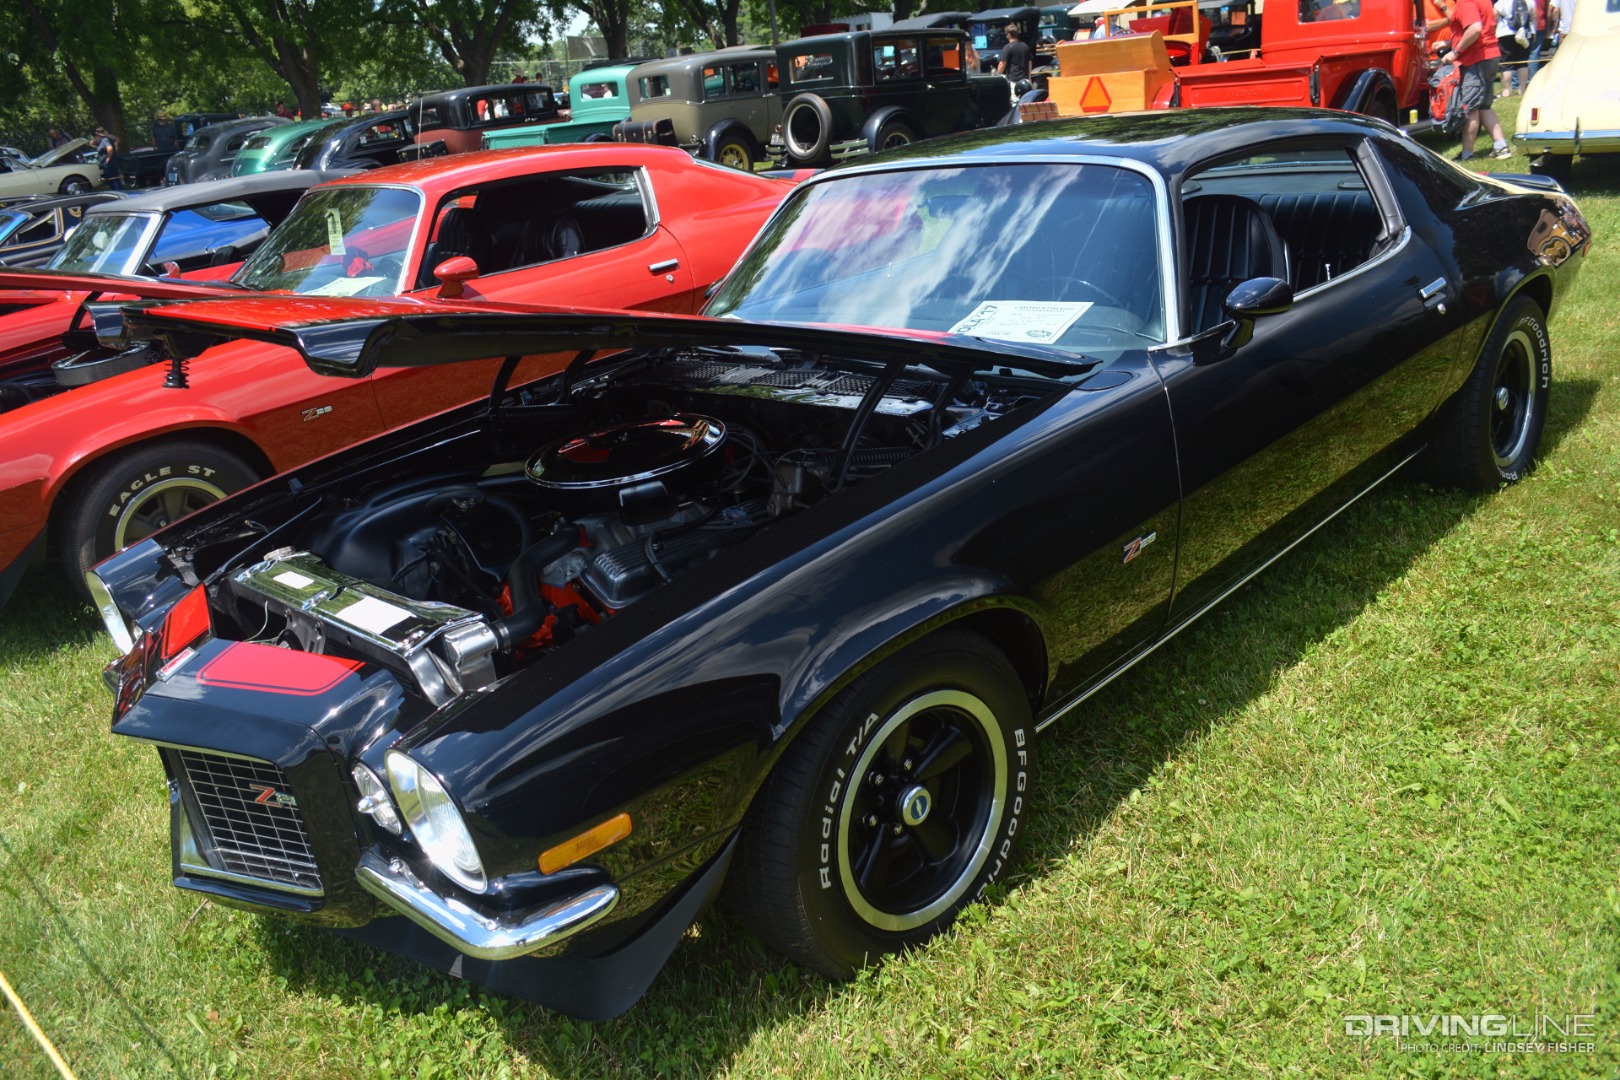
GM completely redesigned the look of the Camaro and Firebird for its second generation. No longer were the squared-off body lines and "Coke Bottle styling" the defining aesthetics. These were replaced with more elongated and curved contours, a wider, lower stance and a more pronounced nose. Second-Gens were only sold in coupe form but with significantly more powertrain options, and were meant to be more driver friendly.

Over the course of 12 years, the F-bodies were offered with 14 different engine options, four different transmissions and four distinct trim/performance levels per car. Engines ranged from a 230ci engine all the way to a 455ci in Firebirds. The second generation of the F-body also brought with it a number of special edition cars — including the 10th Anniversary cars and the famous “Smokey and the Bandit” Trans Ams

In the second-generation crowd, we found just about every period-acceptable color imaginable in Iola: from understated “base” models to top-of-the-line Z/28s and Trans Ams, complete with paint schemes you'd recognize from a mile away. Surprisingly, Second-Gens seemed just as popular as the First-Gens on the show grounds. There were also plenty of them for sale in the Car Corral for those looking to join in on the fun.

3rd Generation (1982-1992)

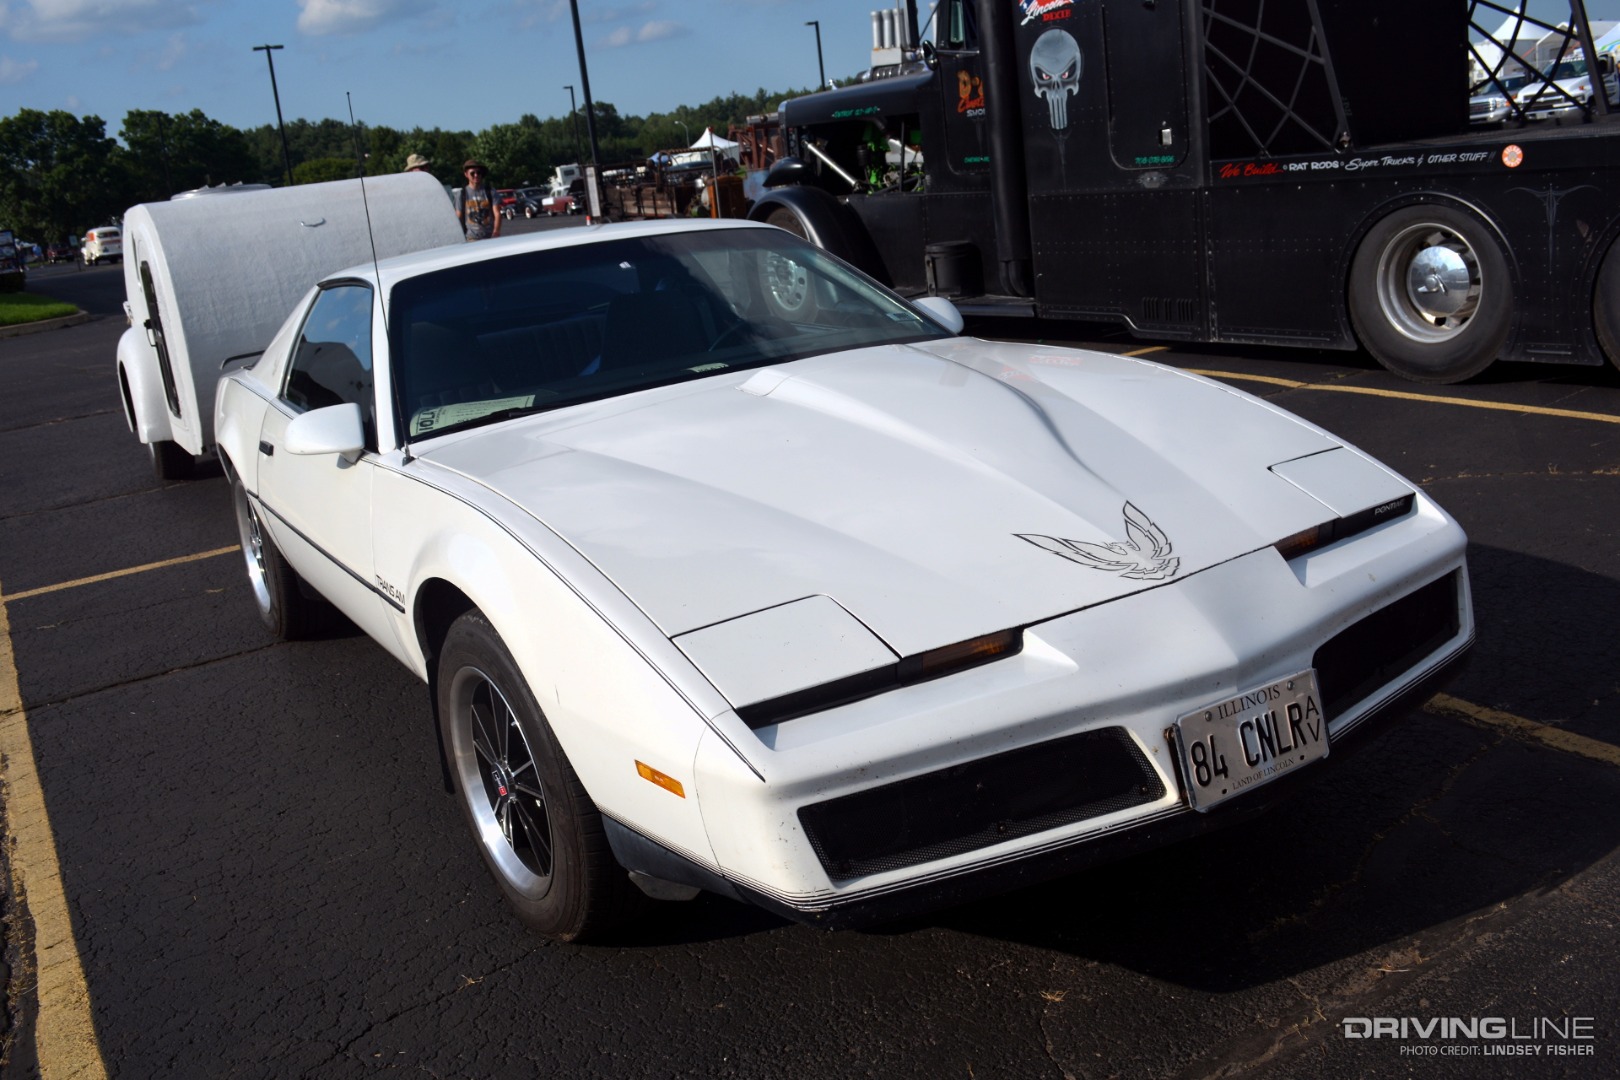
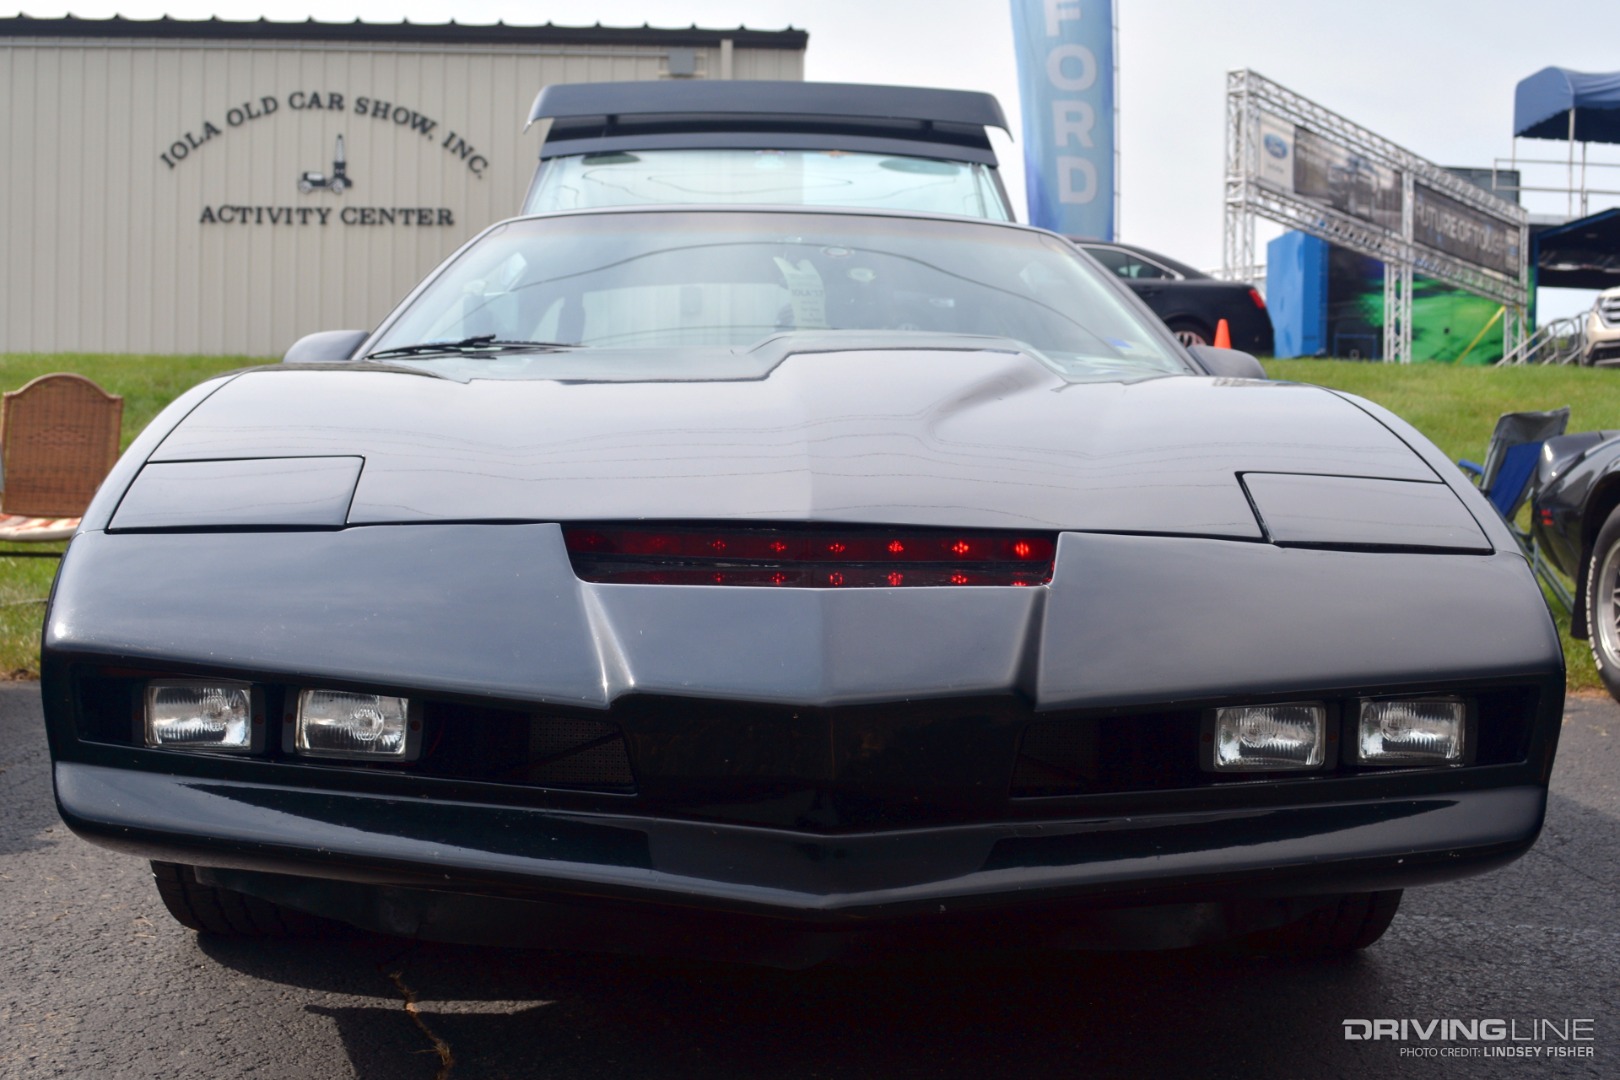
Redesigned once again for the third-generation, the Camaro and Firebird varieties took a turn towards being an “everyman's car” with the introduction of the first standard 4-cylinder engine. For the Firebird, the S/E model was introduced between the base Firebird and the Trans Am, taking the place of the Formula Firebird until 1987 when it was retired and the Formula returned. For Camaro, Berlinetta entered the picture with a standard V6 and an optional V8.

The big upgrade to the lineup for Camaro in the '80s was the introduction of the IROC-Z in '85. Additionally, the 1LE was introduced in '88, geared mostly towards those interested in stock racing. Unfortunately, all of the higher displacement engine options disappeared with the second-generation cars — limiting the F-bodies to, at largest, a 350ci option.

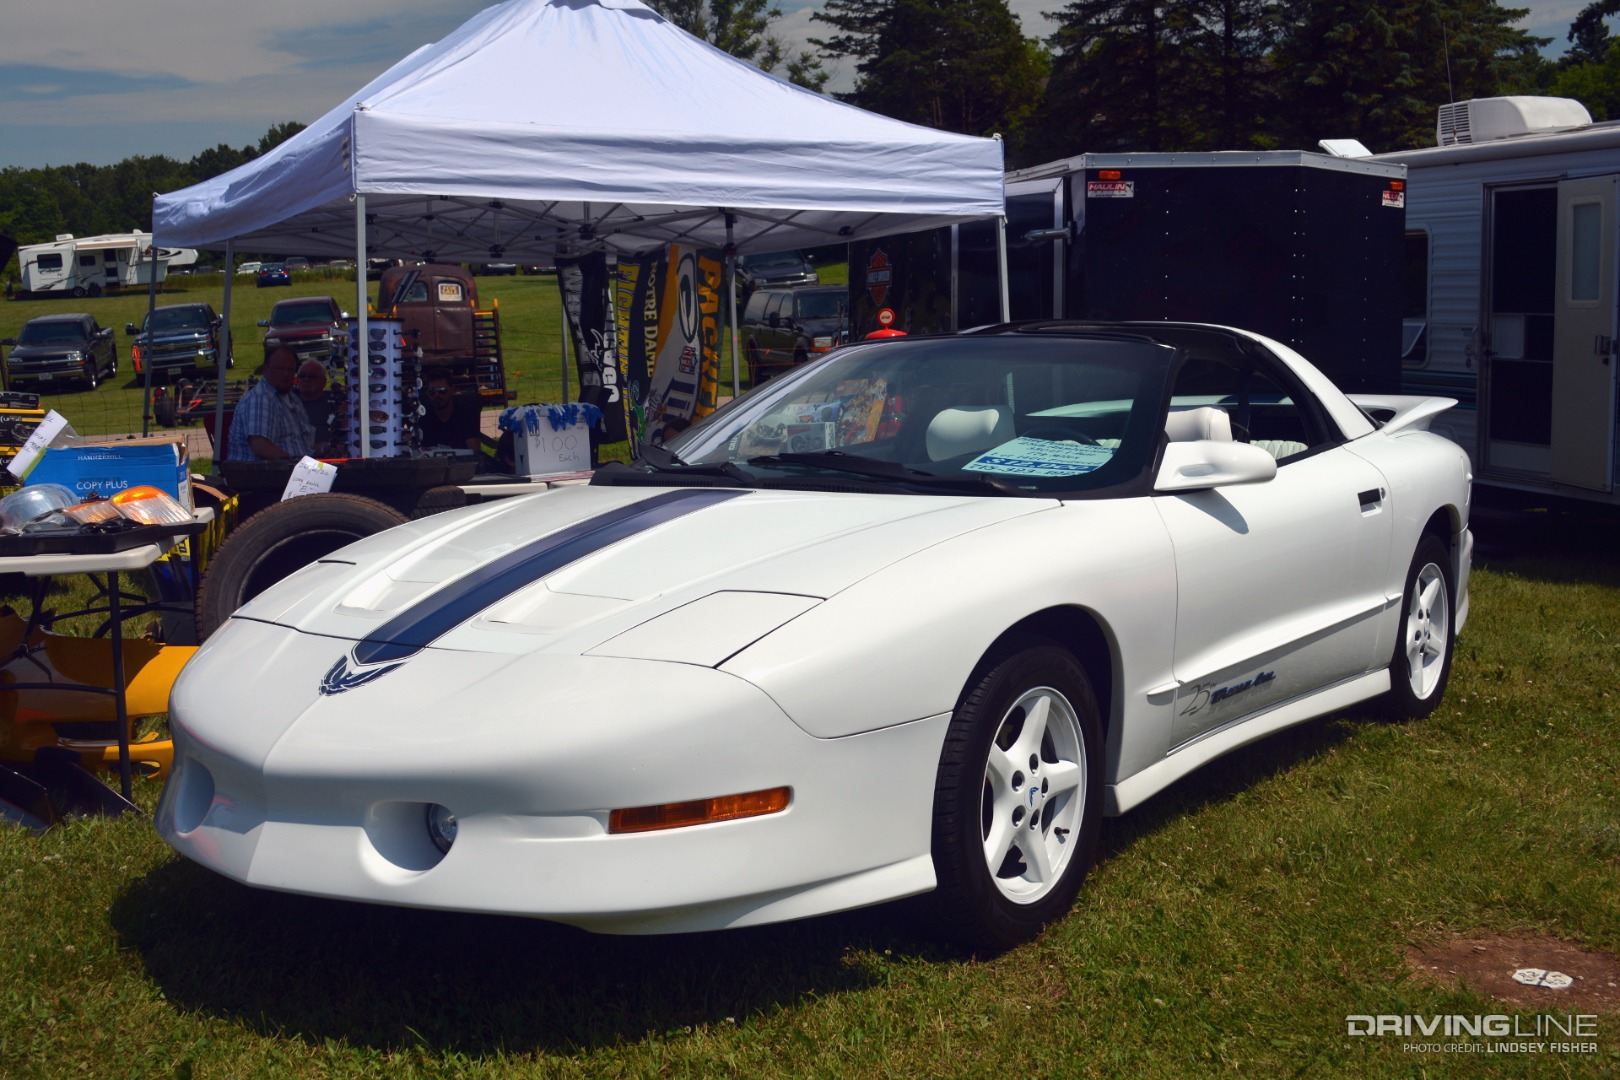
The convertible body style was reintroduced as an option for both the Camaro and Firebird. Special styling and performance packages like the Firebird GTA, Firebird 15th Anniversary Edition, Camaro 15th Anniversary Edition and the Firebird 25th Anniversary Daytona 500 Limited Edition cars were among those “extras” marketed for sale to the public. IROCs, GTAs and even a 25th Anniversary Daytona 500 Trans Am, among other more standard '82-'92 F-body models, were also on hand in Iola. With their popularity growing more and more these days among enthusiast builders, there were a number of super clean Third-Gens on display and available for purchase.

4th Generation (1993-2002)

GM once again redesigned the Camaro and Firebird, giving it a wider and more rounded appearance. Eliminated from either lineup was the 4-cylinder engine option, with the V6 used as a standard equipment, and a V8 option available.

For the '98 model year, the car received another revamp — incorporating more body swoops, different headlights, taillights and hoods. That year also saw the switch from the LT1 to the LS1 V8 in its top-of-the-line models.

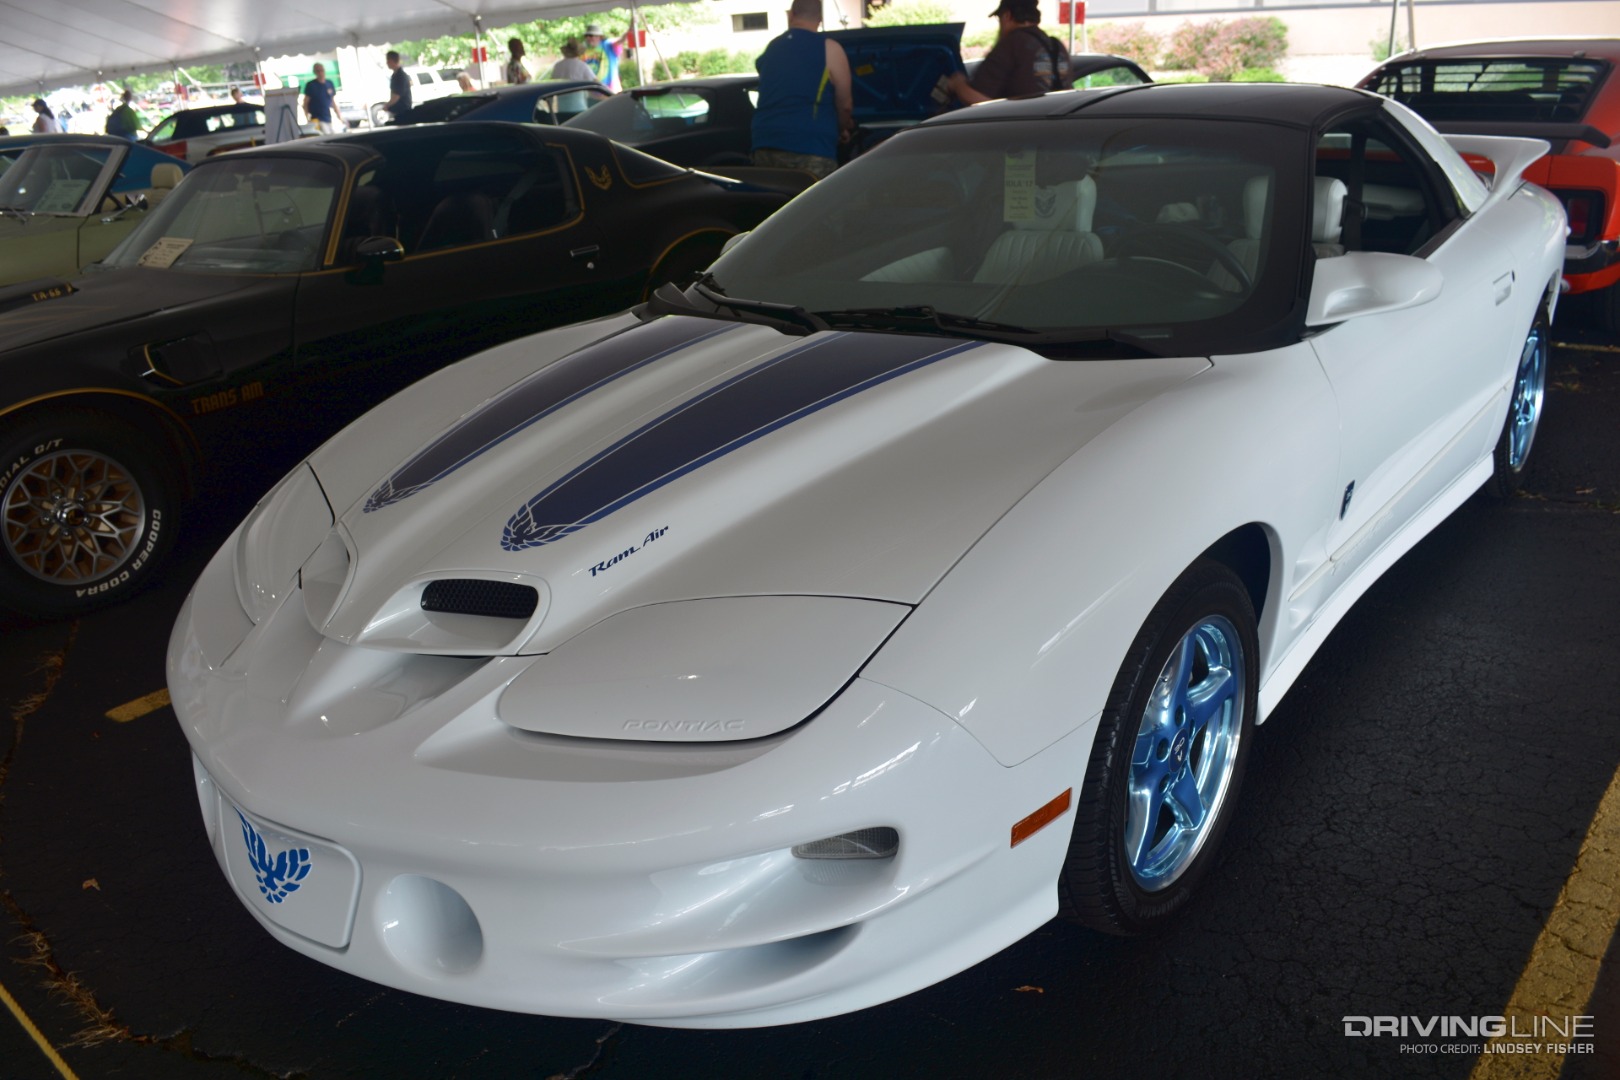
Fourth-generation cars were undoubtedly the underdogs at the Iola Car Show grounds. Only a handful were present, most of those either in the Swap Meet or Car Corral areas. There were, however, a couple of notable Fourth-Gens on hand: a 30th Anniversary Special Edition Firebird and a 35th Anniversary Special Edition Trans Am.

Production of the F-body was shut down, seemingly for good, in 2002. Sales had progressively declined, and GM was ready to move on to new things. The Pontiac brand went under completely in 2008, squashing any dreams of the Firebird ever being resurrected. It seemed that the Camaro and Firebird were both gone for good, but that all changed eight years later.

5th Generation (2010-2015)

In '10, Chevrolet reintroduced the Camaro title to its car lineup, going with a throwback, retro-styled version to return it to market. While built on GM's Zeta platform rather than the F-body, the car was based on some of the best aspects of the classic Camaro.

The new version included the Camaro's unique looks and performance roots as a direct competitor of the modern Ford Mustang. Engine options varied from a 3.6L V6 up to a 7.0L LS7. Based on the '06 and '07 Camaro concepts, the car instantly gained popularity, appearing in feature films, commercials, TV shows and in many notable car guys' collections, including Rick Hendrick's and Jay Leno's.

Helping the fifth-generation Camaro gain notoriety was its many releases of limited and special editions: Transformers Special Edition, Synergy Green, Indianapolis Pace Car Edition, 1LE, NASCAR, Hot Wheels and 45th Anniversary Edition Camaros. Of course, most notable was the reintroduction of the COPO Camaro in '12.

While Fifth-Gens are more commonly seen on the roads and highways, they weren't nearly as prevalent as previous generations at the Iola Car Show.

6th Generation (2016-Present)

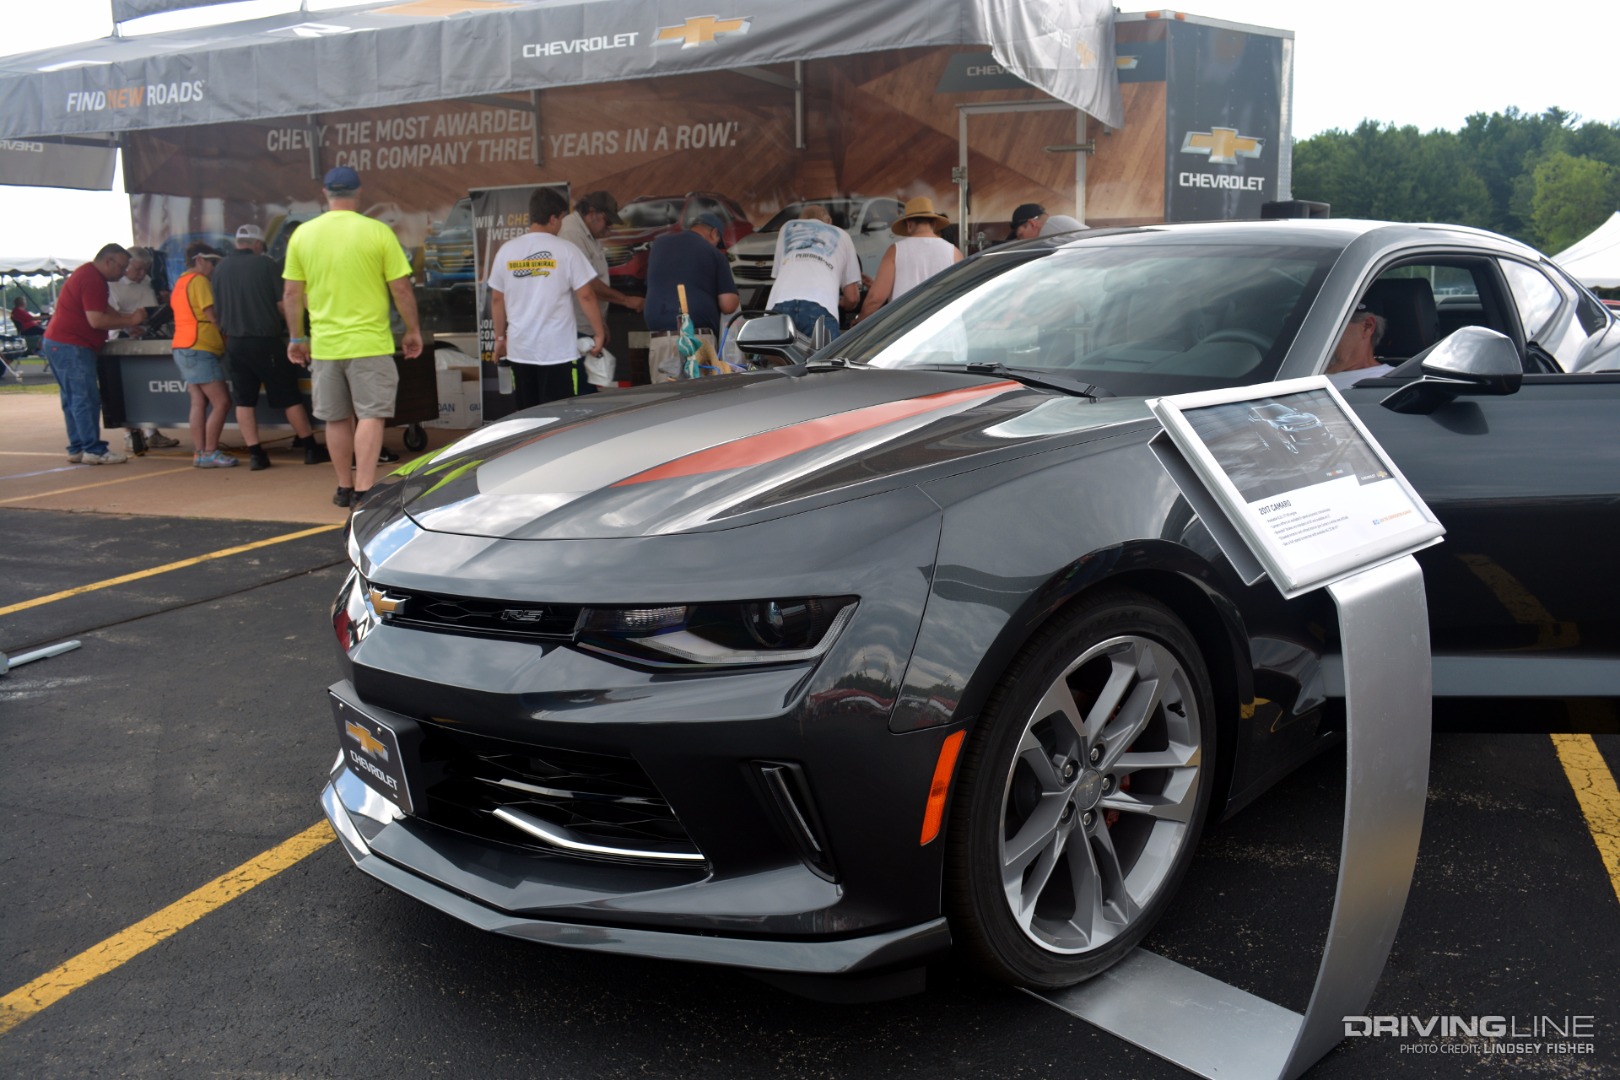
In 2016, Chevrolet introduced their sixth and current Camaro generation. Built on GM's Alpha platform, the car is offered with everything from a 2.0L Turbo Inline-4 engine to a 6.2L LT4 V8 under the hood. Once again, the SS and ZL1 Camaros are available, as is the 1LE for 2017, along with 1LS and 1LT trim levels. Also for 2017, Chevrolet has released their special 50th Anniversary Edition car, one of which appeared in the Chevy booth at the Iola Show. Only time will tell what else Chevrolet releases in the car's sixth generation.

With Camaros and Firebirds of all generations, trim levels and build types, as well as countless special edition cars you hardly ever see, the F-body turnout at the Iola Car Show was impressive to say the least. We certainly enjoyed the unique showing for the Camaro and Firebirds' special half-century anniversary.

Browse the gallery for even more F-body goodness. Here's to another 50 years!

Fabtech Flagship: Battleship Jeep Wrangler Unlimited JK Build

$
0
0

As a high-profile business in the off-road aftermarket, it is important to walk the walk that you are talking about. Fancy parts on display and gorgeous show vehicles aren’t enough, especially when the parts you're slinging are top-quality suspension parts. Here's where a flagship vehicle is needed.

Fabtech Motorsports has been building Jeep components for years and has several flagships to show off parts, but none of them were quite like this one. The black 2015 JK Wrangler Unlimited Rubicon went from stock to beast-mode in under a month, start to finish and was dominating the Moab, Utah, trails a couple weeks later. For Fabtech, the Jeep in the above video is a battleship.

The company has other Wranglers to show off various components, but this one reigns over them all as the Alpha of the pack. Huge stance, massive tires, long travel suspension and low gearing allow it to be a point-and-shoot Jeep. There aren’t many things that slow this battleship down.

Ride height and shock damping duties are handled by four Dirt Logic stainless steel coilovers that are specifically designed and valved for the weight of a Wrangler Unlimited. Fabtech spent an enormous number of hours fine tuning the lengths, valving and spring rates to provide optimal ride and performance characteristics.

Under the front end of the Jeep is a Dynatrac ProRock 60 stuffed with a 5.38:1 ratio gear set and ARB Air Locker. The differential housing is set up much wider than stick at 68.5 inches, using 3.125-inch-diameter axle tubes and 35-spline 1.5-inch-diameter axle shafts with 1480 axle u-joints. The heavy duty steering is supplemented with a custom built hydraulic ram assist system using a prototype Dirt Logic steering ram with a PSC Motorsports steering box and pump.

Out back lives a Dynatrac ProRock 80. The full-float differential matches the front 5.38:1 ratio gear set and ARB Air Locker, stepping up the game with 40-spline 4130 chromoly axle shafts, which are a massive 1.71 inches in diameter. Both front and rear differentials use Dynatrac’s nodular iron diff covers to protect the internals.

The Jeep rides on a Fabtech Motorsports 4-Link Long Arm Suspension. Each link is built from 2-inch outside diameter DOM tubing that is .313 inches thick, some of the strongest links on the market. The 4-Link design offers less caster change through the suspension cycle and benefits from heavy duty 5-ton rated flex joints. The underbelly of a Jeep usually tells the true story of the vehicle. The Rock Hard 4x4 skid plates on this one have protected the fuel tank, transfer case and transmission on multiple trips through the toughest trails in Moab, on Fordyce Trail while on the Sierra Trek as well as all the rig-abusing trails in The Hammers.

The occupants are protected by a custom built an interior roll cage from 1.75-inch 0.120 wall DOM tubing. To do so, the dash was removed and then reinstalled after the ‘cage was built so the driver and passenger have ample leg room. An sPOD distribution system was installed, with the control panel sitting just above the rearview mirror for easy access to the lockers, as well as Rigid Industries LED lights and an ARB dual pump compressor system for airing up tires. A Race radio and CB radio provide comms.

Giving the Jeep traction to the ground are a set of 40x13.50R17 Nitto Trail Grapplers wrapped around beadlocks from Ultra Wheel. The 5-inch Crawler suspension is designed for 37s with stock fenders and can run a 39- or 40-inch tire with high clearance fenders like the Poison Spyder Rock Crusher fender flares.

A Poison Spyder Rock Brawler II rear bumper with tire carrier holds a spare 40-inch Nitto on the backend. The rear corner panels of the Jeep are protected by Crusher Corners, also from Poison Spyder.

The front bumper is a BFH unit with optional Brawler Bar from Poison Spyder. Fabtech added heavy duty shackle mounts to the bumper as well as a Warn Zeon 10-S Platnium winch, complete with synthetic line.

Fabtech’s battleship Jeep is obviously capable — apparent even when the Jeep is sitting in a parking spot outside the company’s Chino, California, which also happens to be were nearly all Fabtech components are built. Fabtech takes the Jeep out regularly to events, test runs and even regular street driving to prove its parts work.

Impressive Lineup: Street Car Takeover 2017 Denver [Gallery]

Street Car Takeover 2017 Denver: Daily Drivers and Dyno Runs

$
0
0

Introduced to Indianapolis Street Car Takeover earlier this year, I was eager to visit its stopover in Denver. The first event had demonstrated just how competitive street car drag racing has become. What blew me away most this time around was the magnitude and diversity of both domestics and imports that had come to prove their mettle.

This Nova on NT555 G2s was the winner of the show and shine

Never having been to Denver, I wondered how the guys were tuning their vehicles differently in Denver. Being 5,000 feet up, the thinner air poses a challenge for getting the right air to fuel mixtures to keep the engines running at full tilt down the drag strip. When I got off the plane, I was surprised to notice how humid Denver was — another factor to consider when tuning a car.

A fully built AWD Mitsubishi EVO

As they did in Indy, the Street Car Takeover crew fenced off the local Twin Peaks restaurant parking lot for the Friday night meet and greet. It looked to me like the night might be ruined by rain, but after about half an hour the weather tapered off. It became apparent that Denver weather served up unpredictability during this time of year, switching being sunny skies and thunderstorms quickly. 

The crowd was around the dyno all night.

By 5:00 p.m. there wasn’t a single parking space left in the huge lot. The Denver street car scene was showing off its wide range of interests. Bug-eye Subarus were parked across from a bone stock Lamborghini, sitting next to a fully built Jeep Grand Cherokee SRT8. The Denver crowd seamlessly mixed; it seemed different from some of the clique-like car meets I find in California.

There were many different types of cars at the meet

Talking to car owners, I got a few insights that contrasted with the crowd I’d met in Indianapolis. It seemed the Denver enthusiasts all drove their cars daily, and planned to track them the next day.

A clean CTS-V

Soon after the mobile dyno guys showed up, a line of cars and trucks formed behind it to see what kind of numbers they’re putting down. Kody Kleman’s run of his 2003 Duramax on Nitto NT420S tires caught my eye. Black clouds of soot combined with power numbers in the four-digit range are always crowd pleasers.

Kody Kleman's Duramax on NT420s

Street Car Takeover founders Justin Keith and Chase Lautenbach had their own cars on display as well. (Remember Justin's Sinister C7?) These guys launched this event due to their own heavy involvement in the scene, and they continue living the lifestyle themselves as the event has grown to be a nationwide series.

Driving Line Issue 11 in the Street Car Takeover booth

Said to be one of the fastest cars at this event, this highly built Nissan Skyline GT-R, owned by “Scuba Steve,” may not look like much on the outside, but the details are all under the hood. Scuba Steve is rolling on Nitto NT555Rs, a tire he can drive on both the street and track, with comfort and performance.

Scuba Steve's Skyline

Under the hood of Scuba Steve's Skyline

It seemed that “run what you brung” was the common theme for Denver — an event where local car enthusiasts cruise down to the meet then wake up the next morning to drive the same car to the track, without changing a single thing. 

Imports and domestics alike lined up for the dyno

There wasn’t an empty parking space at the Twin Peaks until after 10:00 p.m., and the dyno runs ran through the end of the night. Meanwhile, 30 miles south, Bandimere Speedway lay dormant, ready to take on over 500 cars and 3,600 spectators the following day in what would be the biggest Street Car Takeover to date.

The sun setting over the Twin Peaks Flatiron in Denver

There's so much more to see, so make sure you check out our SCT Denver photo gallery.

Street Car Takeover 2017 Denver: Separating the 'Go' From the 'Show'

$
0
0

While Street Car Takeover's Friday night car meet gave a pretty good idea of what Denver’s street car scene is all about, Saturday’s race day at local drag strip Bandimere Speedway would really separate the "go" from the "show." I expected there to be more cars at the Friday night meet, with the serious competitors showing up the following day at the drag strip... boy, was I dead wrong. This event would prove to be the largest Street Car Takeover to date — with hundreds of racers and car show entrees as well as over 3,600 spectators in attendance.

Corvette Stingray

Constructed in 1958 against the foothills of the Rocky Mountains, the historic Bandimere Speedway offered stunning views of the Denver metropolitan area from the stands. As soon as the gates opened, cars began pouring into the pits — I realized just how much bigger this event would be in comparison to the Indy one.

Two turbocharged Mustangs from different eras

An old Trans Am lines up in tech

As cars rolled through the gates, the amount of imports showing up made me take notice. Last night’s meet at Twin Peaks had its share of import vehicles, but I lost count of the front-wheel-drive cars that were prepping for the drag races. But it didn’t end at imports — American muscle cars, European luxury vehicles, diesel trucks, track cars, even a Mini-Minor fitted with a Honda D15B was getting groomed for the strip.

Mini-Minor prepares for racing

Two MKIV Supras line up at tech

The fun stuff began with roll racing. Two by two, class competitors rolled through the staging lanes, hitting full throttle as they passed the light tree. Roll racing has its advantages and disadvantages for all kinds of cars, but across the board it takes away the fear of botching a launch during traditional drag racing. Cleetus McFarland from 1320Video was the emcee for the day, waging bets with fans for which lane might take the win, for either a dollar or a run up and down the steep stairs of the grandstands. SCT rules are single round eliminations — meaning if you lose a race, you’re out.

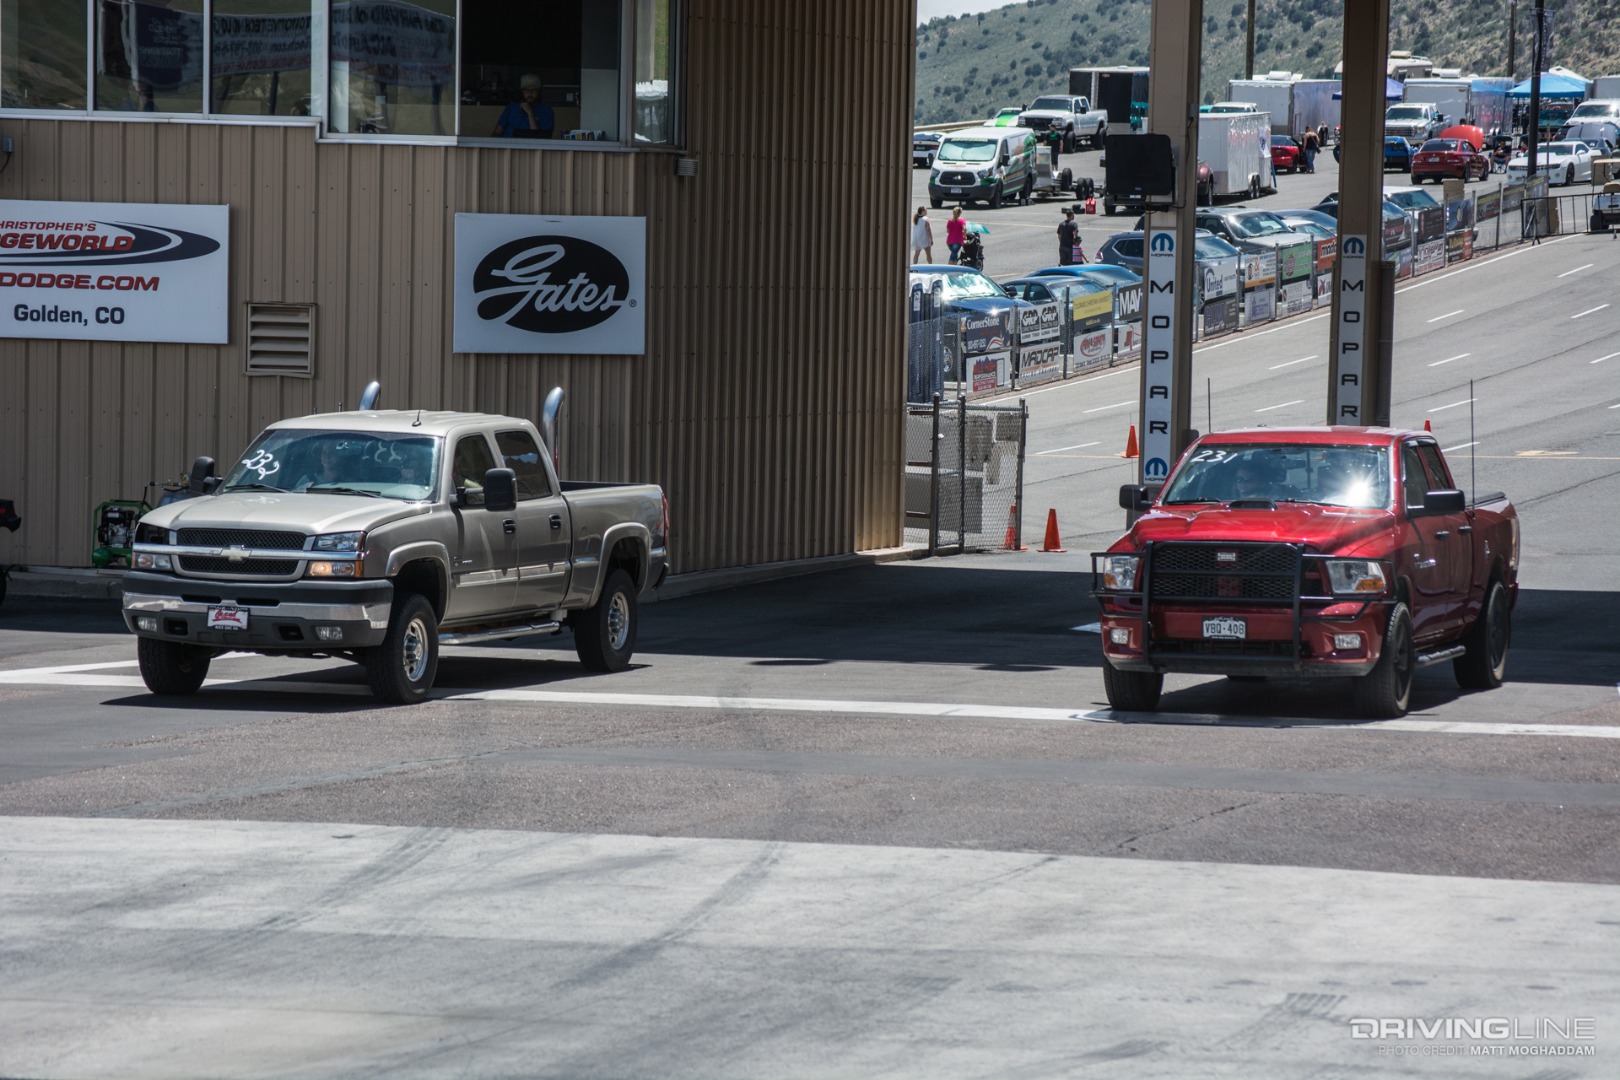
A Duramax and a Hemi Ram go head to head on a roll race

Roll racing winded down as the afternoon monsoon rolled in. Once it had passed cars gathered in the staging area — eight lanes wide, and 20 cars deep — the staging lanes became a spectacle in itself.

The staging lanes were full to the brim

As the sun was setting, the all-too familiar smell of burning rubber, sound of turbo spool and the feeling of hot side exhaust pipes engulfed the drag strip. Bandimere had really come alive. Getting all these cars down the track before the midnight track curfew seemed like an impossible task, but thanks to the incredible organizational effort and track crew, things moved smoothly throughout the night.

A new Camaro vs a Fox Body

Much more than money and parts go into these cars, I love that drivers gain a significant edge over their competition with careful launching skills during drag racing. All it takes is a nanosecond of hesitation to lose a race, even if your car outperforms the one in the next lane.

GOZIRA is Scuba Steves incredibly fast GTR

Most of the night went on without incident, but there was one launch nobody there will soon forget. A drag-ready, nitrous-equipped Z28 Camaro had burned out in the water box and was pulling up to stage, it’s hood scoop looked like it belonged on the wing of an airliner. When the classic Corvette in the opposite lane was staged and ready, both cars revved up to launch. At that exact moment, there was an explosion that shot the red hood scoop from the Camaro into orbit.

Reaching about 100 feet into the air, the scoop came back down to earth, landing on the drag strip in front of the car. Fire crews quickly doused the engine bay to prevent any flames from starting. It was said to have been the nitrous igniting which caused the sudden explosion, breaking the hood scoop and shattering the polycarbonate windshield. Incredibly, nobody was seriously hurt in the blast — except of course the Camaro's engine bay, which looked like it had seen better days.

Nothing else like that happened throughout the night, but each class brought along its own style of action. There were some very worthy opponents, with huge front tires, in the front-wheel-drive class that surprised many people. In the street class, everything from an S-class AMG to a Chevy Trailblazer SS ran down the track, showing that you can never judge a car by its badge. Always a hit with the crowd, the Diesel truck class brought a good smoke show.

Motorcycle class was a fun way to change things up

A turbo FWD Civic CRX lines up at the tree

Like clockwork, the final rounds of each class went down the track just minutes before the midnight curfew, with the final battle of the night taking off at exactly 12:01 a.m. Winners claimed their cash prizes and headed home. “Thriving” would be an understatement for the street car scene in the Mile High City; I can’t wait to see what surprises are in store at the next city Street Car Takeover visits.

Check their website to see where they're headed to next at streetcar-takeover.com.

A Mustang warms up its tires in the water box

See more photos from SCT Denver in our full event gallery.


The Happeningest Show on Earth: SPOCOM Super Show Anaheim 2017 [Gallery]

$
0
0

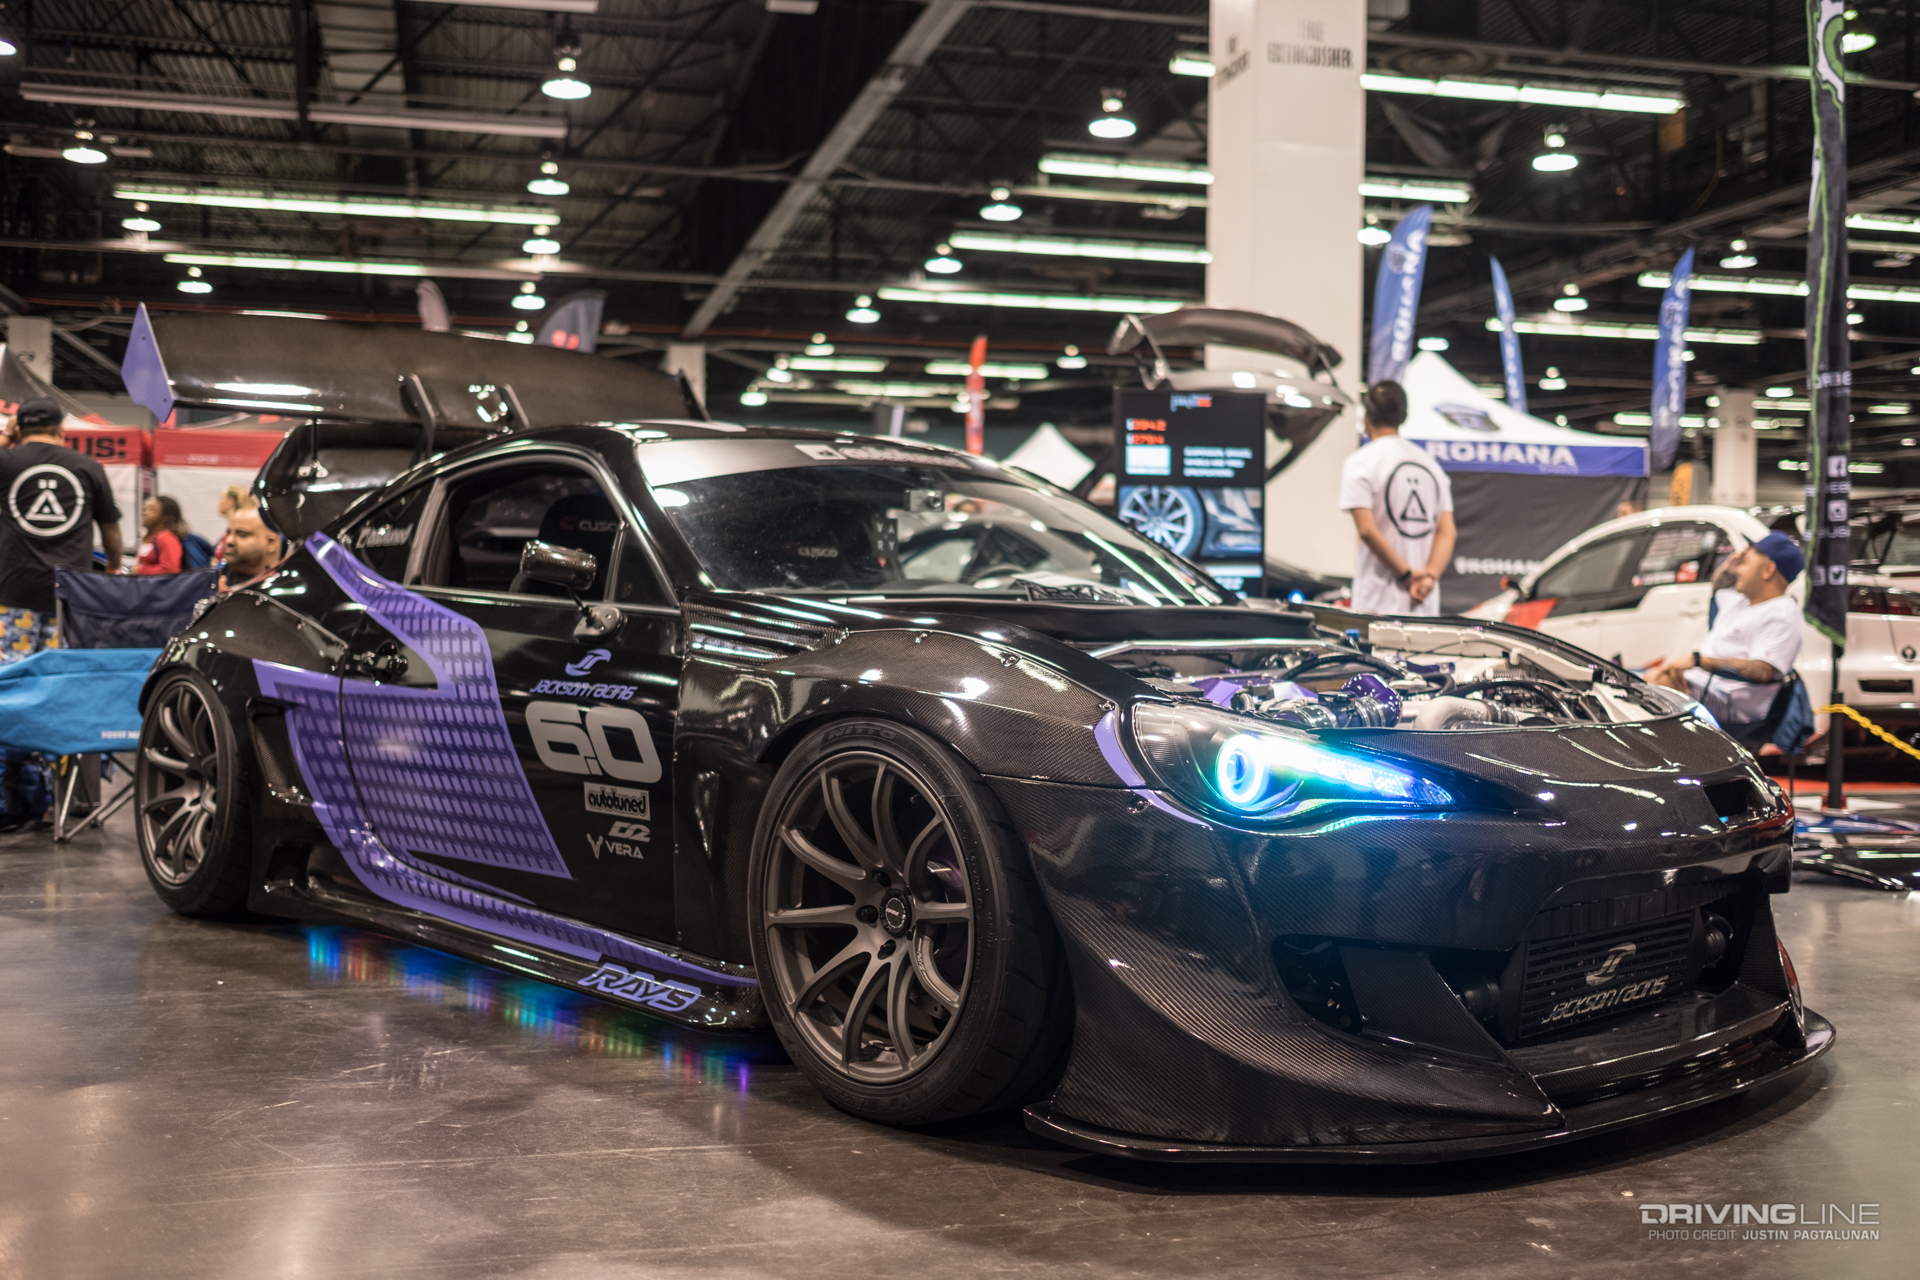
On the corner of Mickey Mouse and Donald Duck is the Anaheim Convention Center, host to a wide range of events, from anime to zombies. On this particular weekend SneakerCon, the U.S. Open Badminton Championships and the SPOCOM Super Show were designated to specific halls. Even though signs were everywhere, we knew exactly where we were headed. (Hint: It didn't involve soles or serves.)

Year in and year out, there are always so many things happening at SPOCOM. When you're at a show for 6+ hours, you tend to appreciate the constant high-energy atmosphere the staff is able to create. As always the cars are great. It takes two, maybe three walks around — depending on if we get stopped to catch up with friends — to really get a good lay of the land.

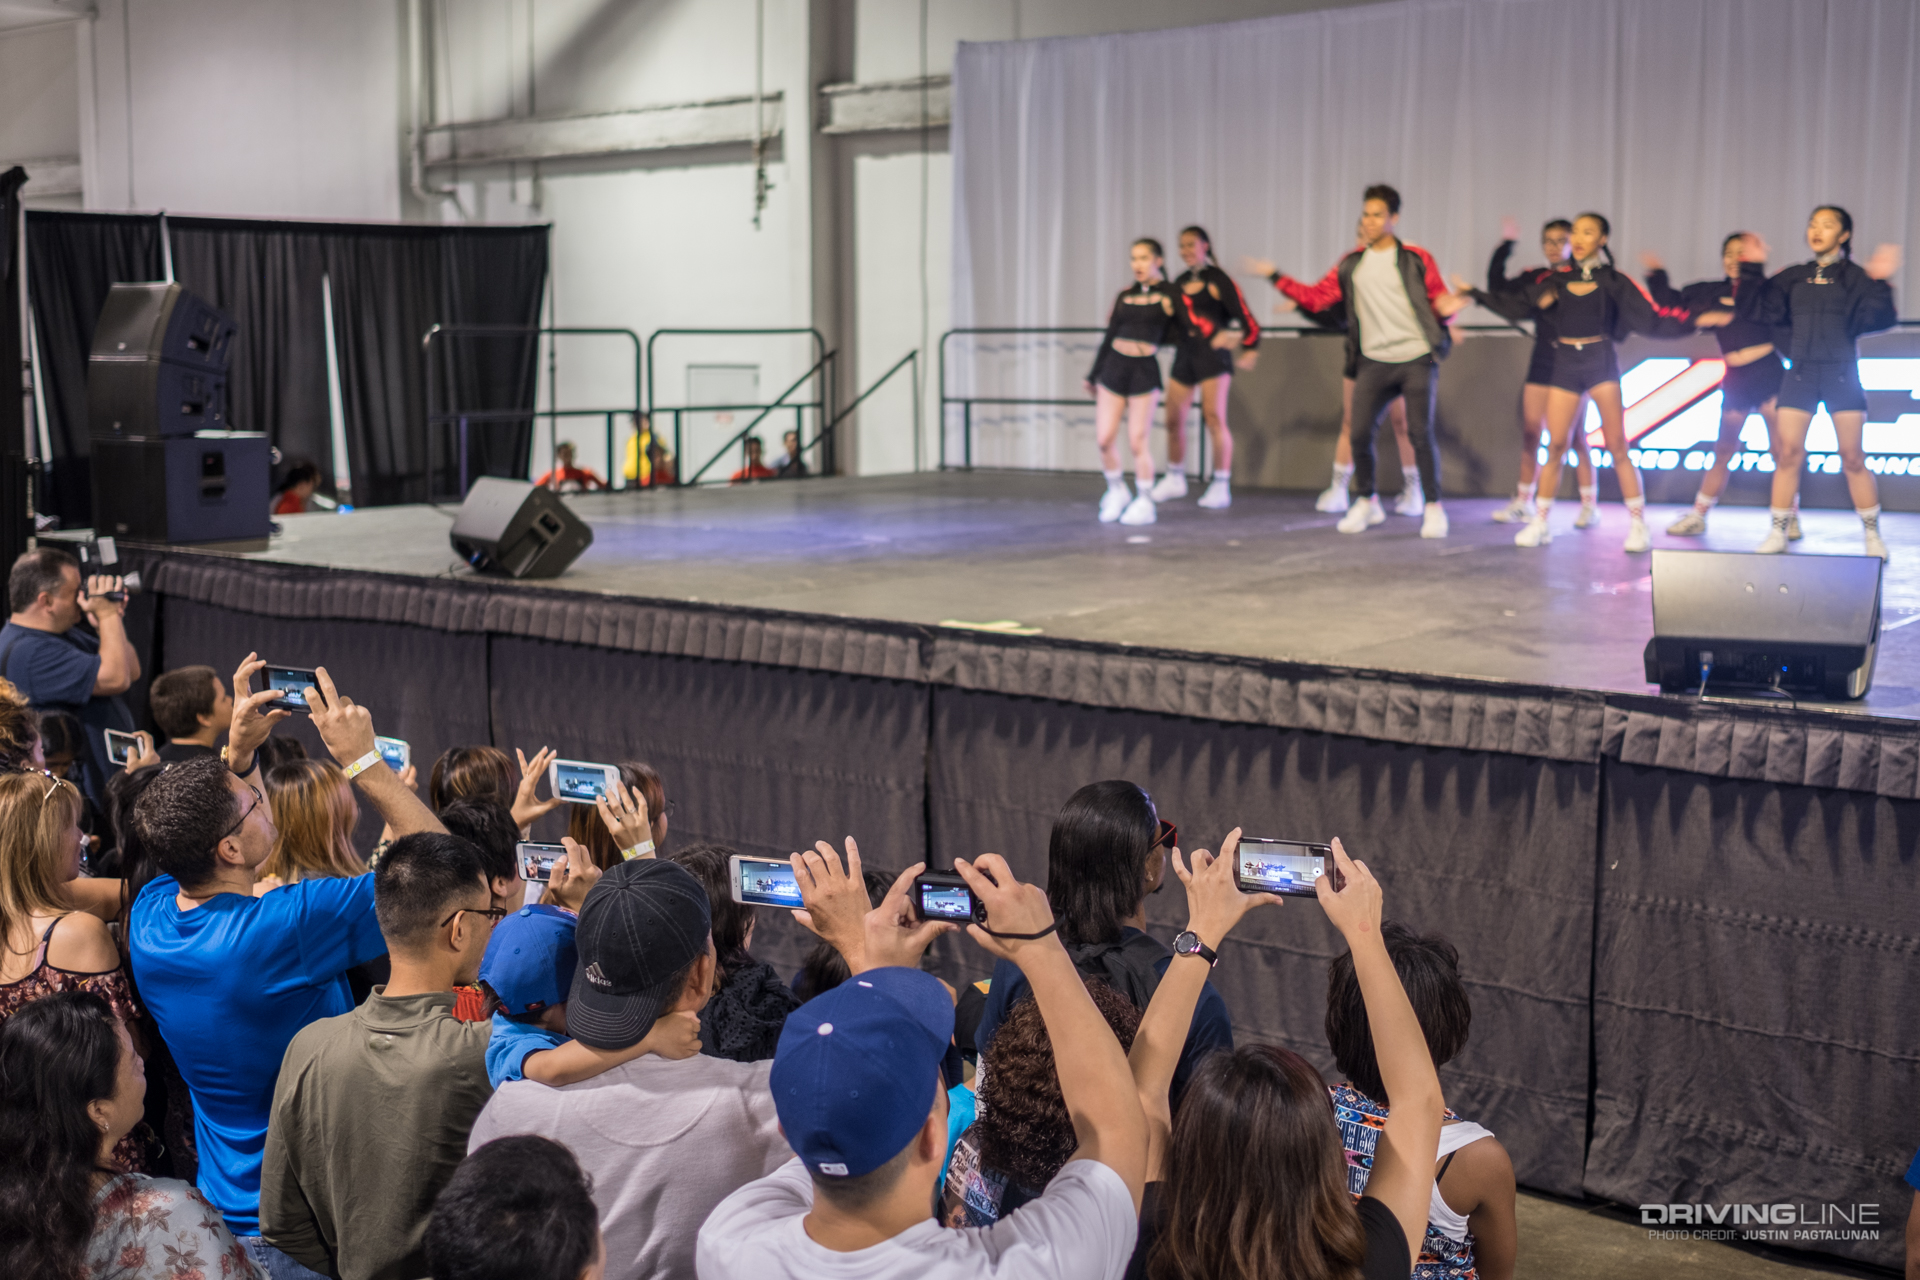
The rest of the time can be spent getting seat time with the Project Cars 2 video game, shooting hoops with Meister Watches, winning prizes with State Farm or seeing what other vendors have to offer. The model lounge is always fun to check out, assuming we can fight through the crowds. And when the DJ drops the beat, it's time to set our attentions to the stage and watch the dance competition.

There's so much to see and do at Spocom! Check out the photo gallery above to get a sampling of what you missed out on.

New Product Spotlight: MSD Performance Coil Packs for Ford EcoBoost Engines

$
0
0

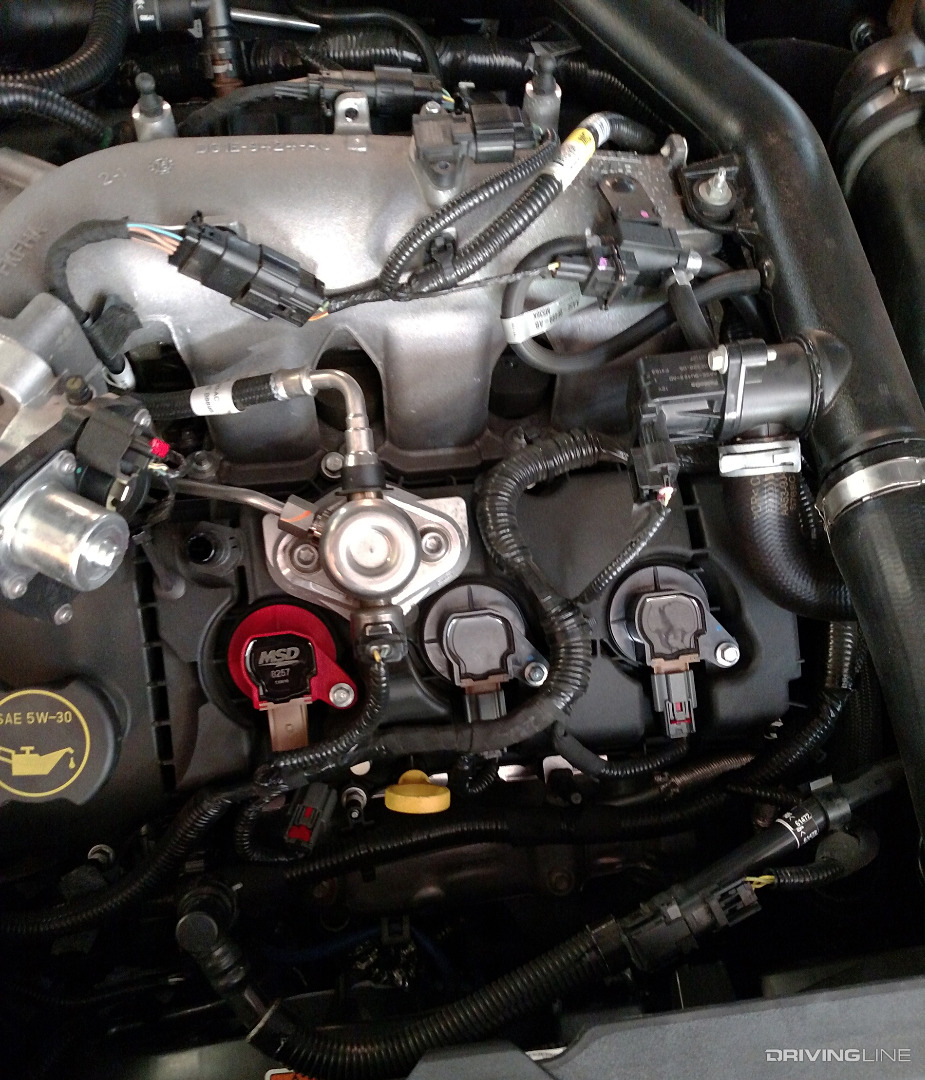
Since teaming up with Gearhead Automotive Performance — an aftermarket company that offers custom tuning for EcoBoost engines — we’ve learned that respectable performance can be unleashed from Ford’s already-potent twin-turbo, direct-injection V6 mills. Our initial testing saw 80 hp gains realized on a 2.7L EcoBoost, as well as a 60 hp increase on the 3.5L version, all by way of a few simple ECU calibration changes. Now, in conjunction with both MSD Performance and Gearhead Automotive Performance, we’re about to find out whether or not further gains can be had by running higher output coil packs.

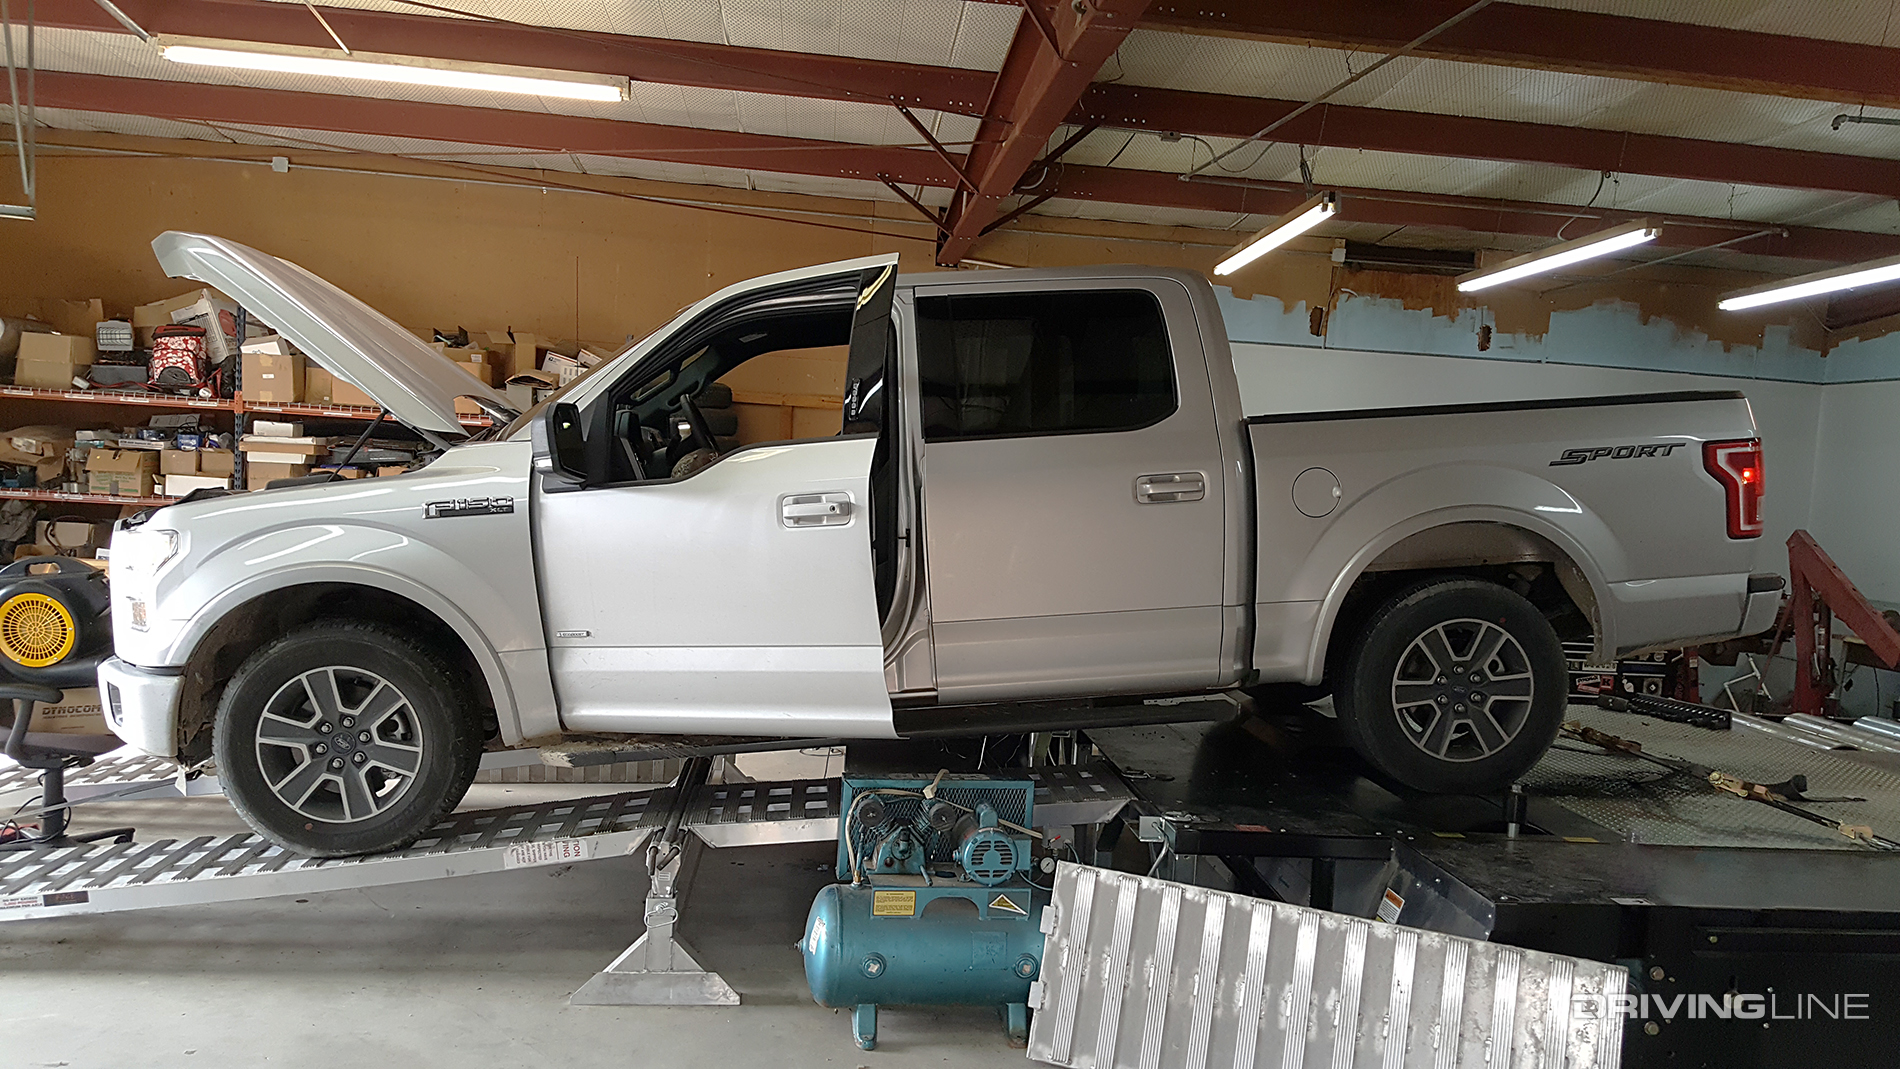
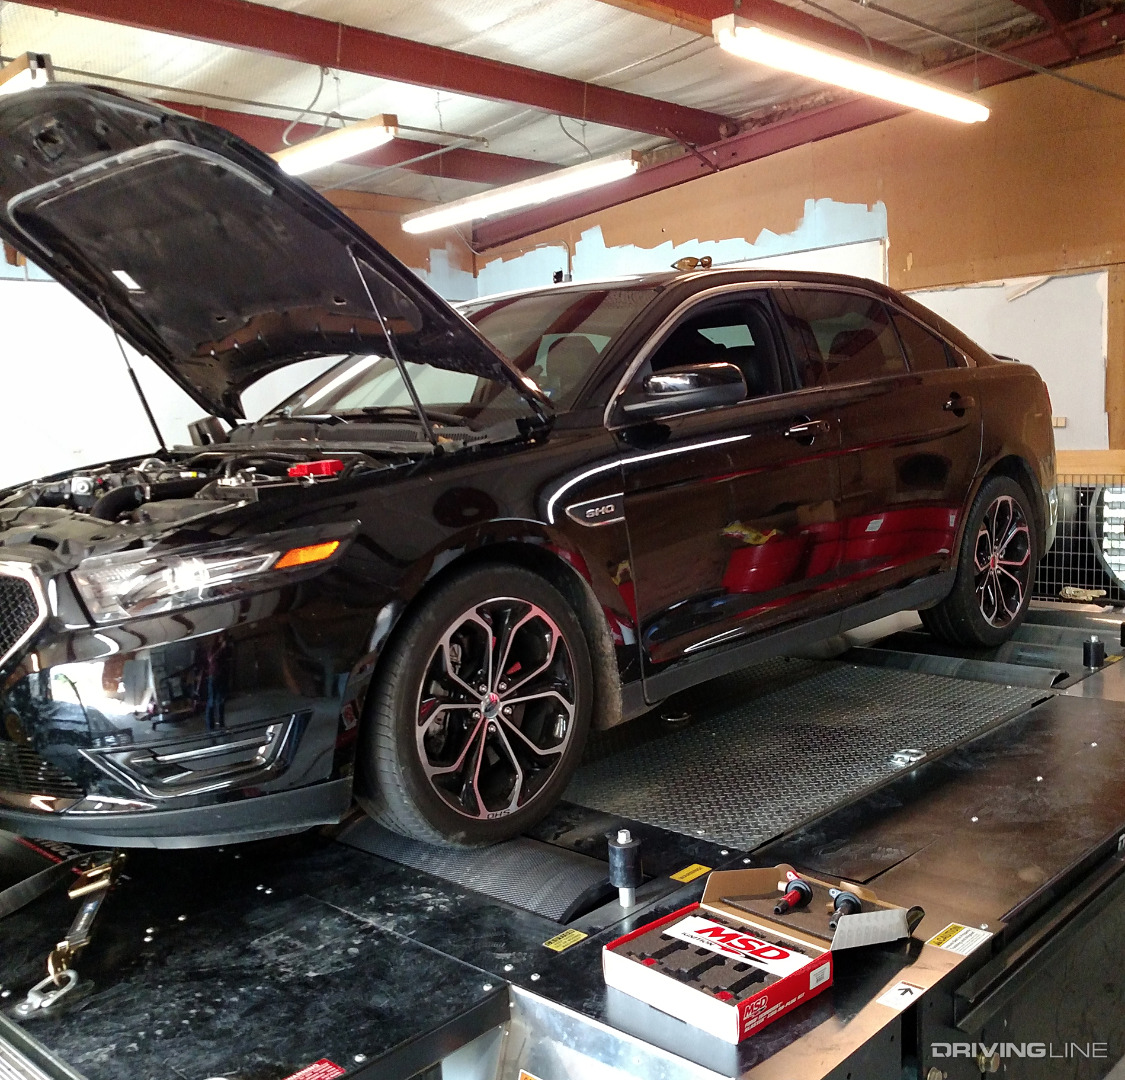
With both a 2.7L EcoBoost-powered F-150 and a 3.5L EcoBoost Taurus SHO at our disposal, we reached out to MSD Performance for a set of its Red EcoBoost 6-Pack coil packs to try on each application. After gathering baseline chassis dyno data on both vehicles, we swapped in the direct replacement MSD units, re-dyno’d and then hit the street. On the rollers, high rpm horsepower gains were made and sustained throughout the power band. Out in the real world, throttle response was improved (most notably in the 3.5L), and both vehicles saw an increase in overall drivability.

Read on for an in-depth look at all of our findings.

Dynocom Chassis Dyno

001-2016-Ford-F150-XLT-EcoBoost

The first test mule to receive MSD Performance’s EcoBoost coil packs was this 2.7L-powered, XLT trim ’16 F-150 owned by Gearhead Automotive Performance. As was the case in our EcoBoosted series, the ECU in the company’s F-150 had been custom tuned. Once the truck was strapped to Gearhead’s Dynocom 15000 all-wheel-drive chassis dyno, a tuned baseline of 361-rwhp was achieved at 5,200 rpm.

Bolt-In Replacements

002-2016-MSD-Performance-82606-EcoBoost-Coil-Packs

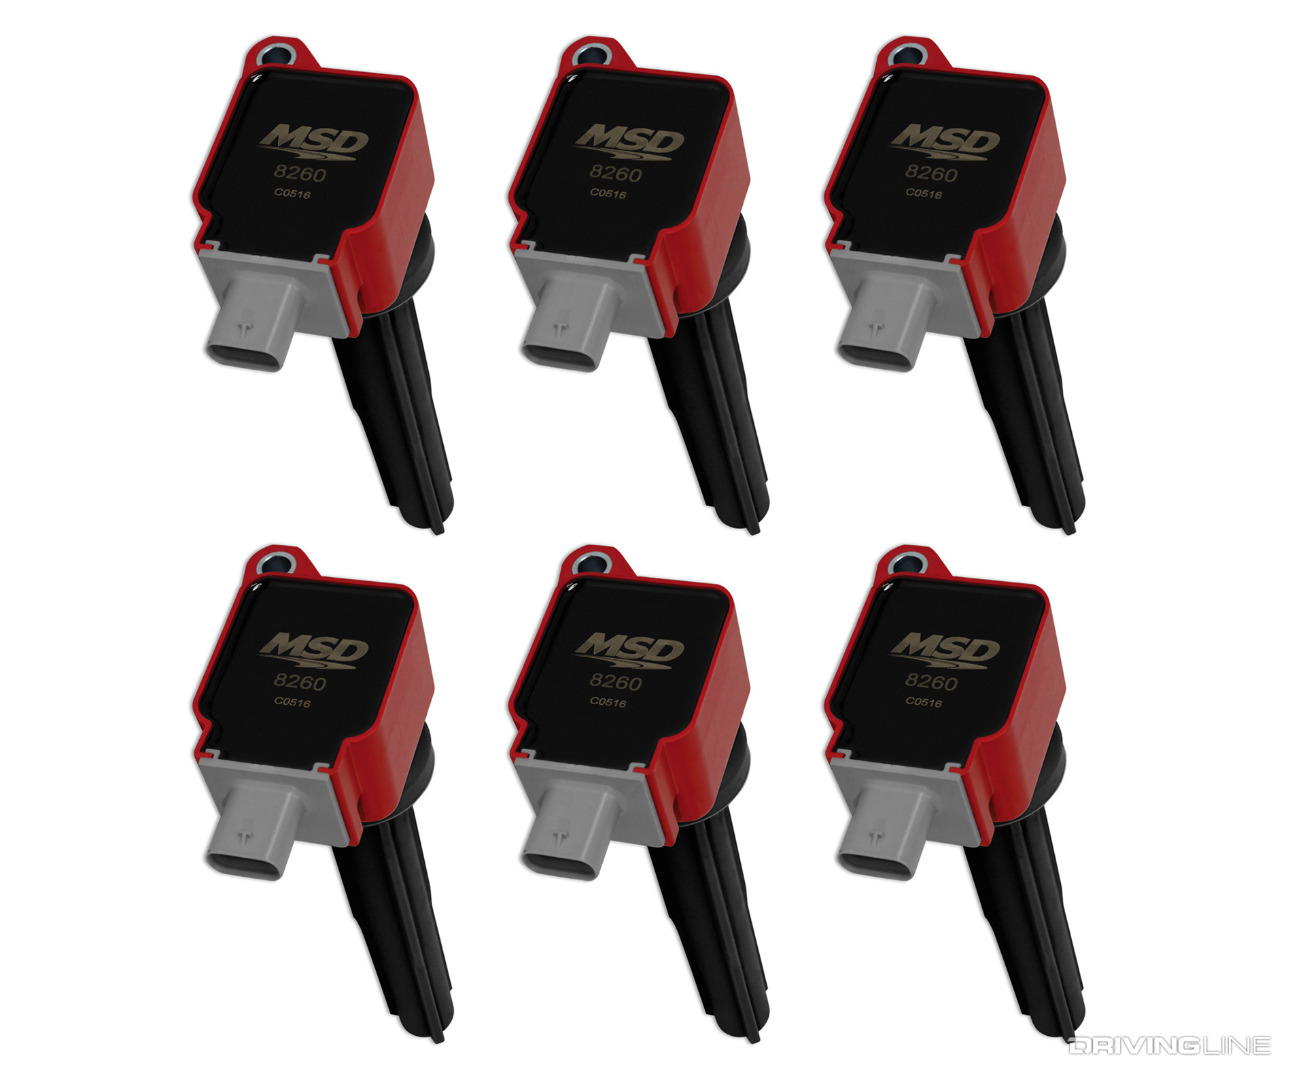
In business since 1970, MSD Performance is renowned for its high-quality ignition system components. For more than two decades, upgrading coil packs (coil on plug, or COP) on a gasoline power plant has been the norm rather than adding an aftermarket distributor and plug wires. If you want a hotter spark for your late model gasser, installing aftermarket coil packs like these is the only way to get you there. A stronger spark (i.e., more joules of energy) offers the potential to see improvements in throttle response, high-rpm performance, startups and even fuel economy. The coil packs shown for the 2.7L EcoBoost (PN 82606) retail for $247.95, are direct, bolt-in replacements for the OEM coil packs and can be installed in minutes.

Gains Across the Board

003-2-7-Ford-Eco-Boost-Dyno-Comparison

As mentioned, the F-150 test mule was uploaded with a custom performance tune from Gearhead — along with the factory recommended SP542 spark plugs with the gap set for 0.028-inch — at the time of testing. With just the tune on the truck, 361 hp was achieved at 5,200 rpm. Once the MSD coil packs were in the mix, the peak number jumped 5 horsepower to 366 hp. While that might seem marginal, those that study dyno graphs will note that an additional 5-to-8 hp is on tap from 4,300 to 5,800 rpm with the MSD coil packs onboard.

Seat of the Pants

004-Ford-F150-EcoBoost-Test-Drive

On the street, throttle response was subtly improved, but not as noticeably as what the folks at Gearhead find in older vehicles (due to the somewhat lazy throttle action from the drive-by-wire systems used in said older vehicles). However, power gains on the 2.7L EcoBoost are good enough to warrant adding the upgraded coils. And even though the gains found on the 2.7L seem small in comparison to the gains seen on first-generation 3.5L EcoBoost engines, it’s mostly due to the fact that the 2.7L’s factory coils have approximately 40-to-45 percent more energy than what is used on first-generation 3.5L EcoBoost engines. The same higher energy coil packs used on the 2.7L EcoBoost are now being employed on the second-generation 3.5L EcoBoost (on both the F-150 and Raptor), as well as on the EcoBoost Mustangs.

005-EcoBoost-SP542-Spark-Plug

Higher energy coils open the 2.7L EcoBoost engine up to room for improvement in the fuel economy department as well. In theory, with more coil energy on tap, one can utilize a wider spark plug gap, which almost always nets better fuel efficiency. To find the best balance of performance and fuel economy, one would need to experiment and determine the widest plug gap possible (before power began to drop off) while testing on the dyno. Then once the optimum gap had been determined, the plug gap would need to be closed an additional thousandth or two to ensure that the amount of spark available would be adequate throughout the life of the platinum/iridium spark plugs.

SHO-Time

006-2016-Ford-Taurus-SHO-EcoBoost-Dyno

Our 3.5L EcoBoost testing would be conducted on this completely stock ’16 Ford Taurus SHO, which was also equipped with a custom tune from Gearhead Automotive Performance. Making use of the Dynocom 15000’s all-wheel drive functionality, the SHO would lay down 338 hp at 5,100 rpm. After a short cool-down period, we pulled the engine shroud and began removing the factory coil packs.

Cheaper Than a Cold Air Intake…

007-MSD-Performance-82576-EcoBoost-Coil-Packs

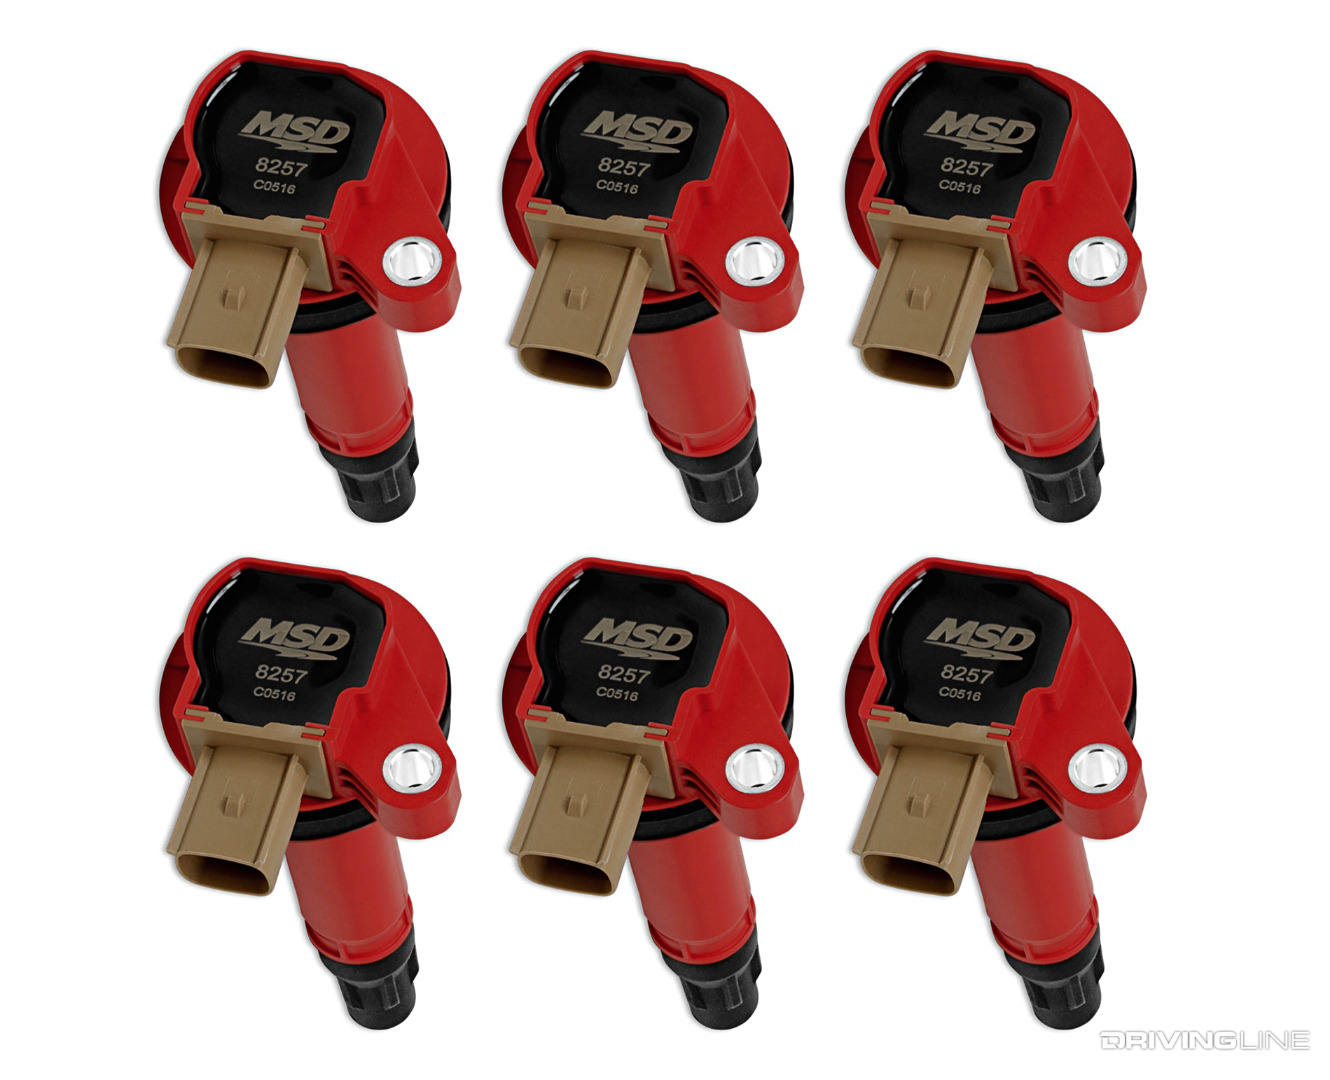
The red coil packs we tested on the 3.5L EcoBoost (PN 82576) fit the ’11-’14 F-150, ’13-’15 Explorer, ’13-’16 Taurus SHO, ’13-’16 Flex and ’13-’14 Lincoln MKT. Like the units tested in the 2.7L EcoBoost, they’re very affordable (with these specific packs retailing for $259.95), are direct, bolt-in replacements for the OEM coil packs and are a breeze to throw in.

Easy Install

008-MSD-Performance-Ford-Taurus-EcoBoost-Coil-Pack-Install

With a few basic hand tools (namely a ratchet, an extension and a few sockets), the MSD Performance coil packs can literally be installed in five minutes’ time. We simply removed the engine cover, moved the red connector lock, disconnected the electrical plug and pulled the coil pack’s retaining bolt to extract the stock packs, and then reversed the process when installing the MSD units.

We’ll note that the SHO was already equipped with Gearhead’s recommended SP542 spark plug (gapped to 0.028-inch), which has a heat range colder than the factory SP534 plugs. This was done (at an earlier date) to help ward off any pre-ignition concerns under high boost conditions.

More Top-End Pull

009-2016-Ford-Taurus-SHO-EcoBoost-Dyno-Results

Picking up 9 horsepower at its peak (347 hp at 5,150 rpm vs. 338 hp at 5,100 rpm) thanks to the MSD coil packs, the Taurus SHO saw the majority of its gains above 5,000 rpm — and with an almost constant gain of 9 horsepower. These gains stem from better combustion at the existing 0.028-inch spark plug gap. Further gains may be on the table by going to an even tighter gap, but none were tested here (in an attempt to make an apples-to-apples comparison).

Better Drivability

010-2016-Ford-Taurus-SHO-MSD-Test-Drive

Driving on the street, the SHO was much more responsive under higher engine loads. Perceived engine response saw a night-and-day improvement, and it was evident that the extra power came from the MSD coils’ ability to more reliably fire the existing 0.028-inch gap spark plugs under high demand.

Lessons in Grip: Nitto NT05s Under a BRZ

$
0
0

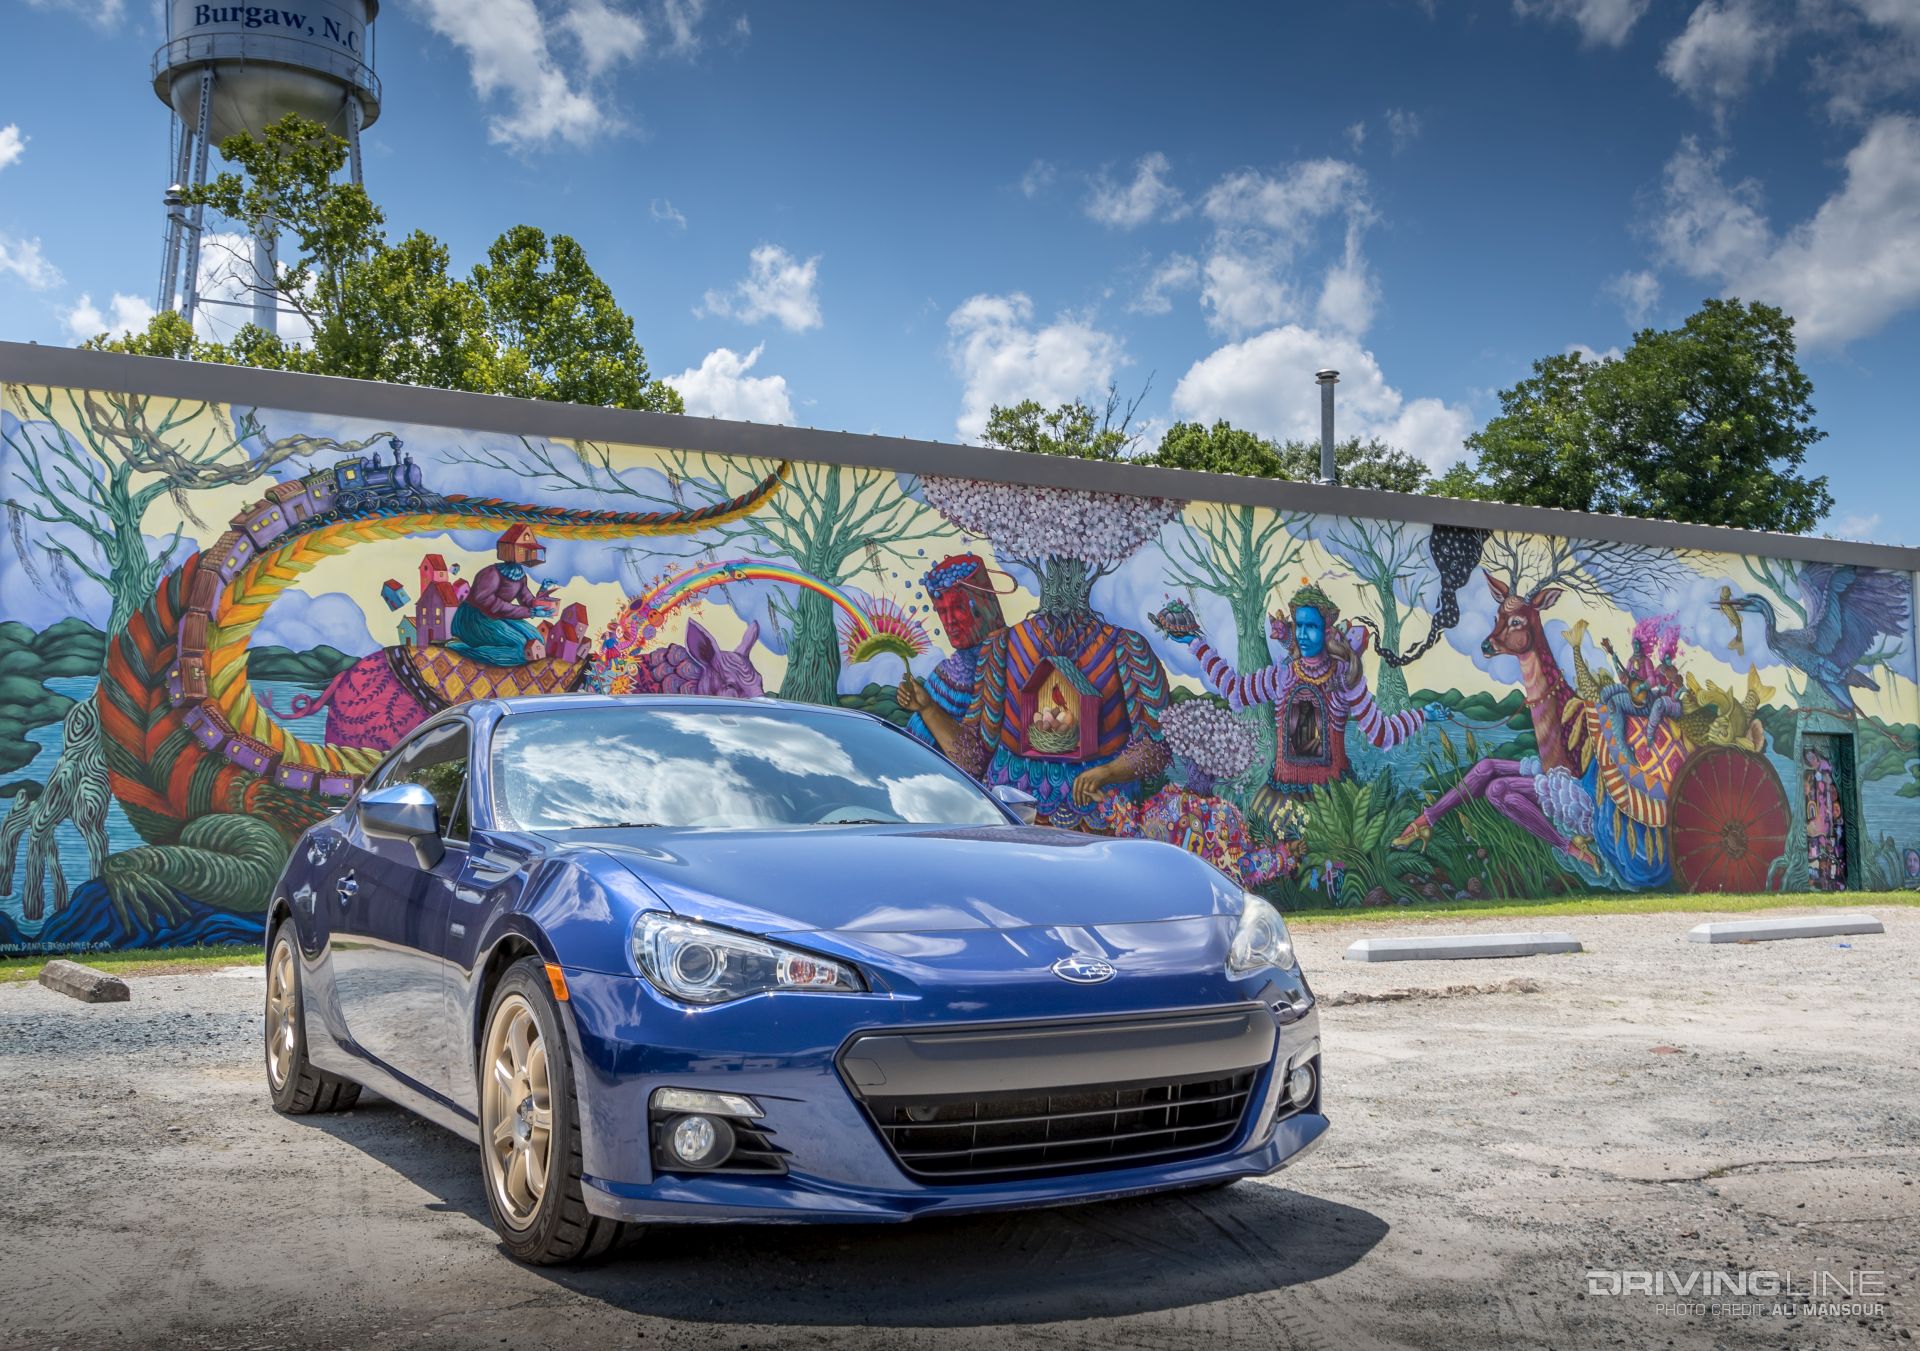
When we last visited our 2013 Subaru BRZ project, we had upgraded to a new set of 225/75R17 Nitto NT05 tires, which we secured to 17x8 Revolts from MB Wheels. While we had put a few miles on the treads at that time, we’ve finally logged some substantial hours behind the wheel. From road trips to dodging cones at our local autocross, we’ve learned a lot about the NT05s and how they’ve changed the BRZ.

2013-subaru-brz-nitto-nt05-autocross

Moving from the OE tires to the wider 225/75R17s has made a noticeable difference in the car's cornering abilities. We spent a little time at a local autocross to see how much harder we could dive into turns and accelerate out. Since the NT05 has a 200 treadwear, it remains SCCA legal to use at sanctioned autocross events.

2013-subaru-brz-nitto-nt05-autocross

Without question, the car was lightyears better. Where the previous tires would allow the rear of the car to constantly step out, the NT05s kept the BRZ planted.

2013-subaru-brz-nitto-nt05-autocross

Adjusting the air pressure can make a noticeable difference. We found that for autocrossing, going with a bit more air up front helped tighten up the front of the car and reduce wear on the outer edge of the tire.

2013-subaru-brz-nitto-nt05-autocross

In terms of daily commuting, the tires have been wearing slowly and evenly. We haven’t notice a change in fuel economy, nor have we had issues with driving the car in the occasional rain storm. We still prefer our Ridge Grapplers under our Raptor for inclement weather, but the BRZ’s fuel economy is quite attractive when compared to the Ford’s thirsty 6.2L V8.

2013-subaru-brz-nitto-nt05-autocross

The BRZ is a car we’d define as buzzy, meaning mostly that it’s not the most refined sports car we’ve ever owned. Despite that, we enjoy getting behind the wheel. Sure, the car could use some extra horsepower, but it’s not absolute necessary to enjoy spirited driving.

2013-subaru-brz-nitto-nt05-autocross

Want more power from your BRZ? Find out how forced induction can help.

5 Things You Should Know About the Amazing World of VR Racing

$
0
0

If you follow the world of video games at all, then you've probably heard about the virtual reality boom that's happening right now. After years of development, the first iteration of true consumer ready VR headsets is on the market, and they have shown the potential to change the face of video gaming as we know it. What does this have to do with cars and car culture? Three words: VR racing sims.

While it's fair to think the VR is the next gimmick to go the way of 3D televisions or other failed consumer goods, just a few minutes in a properly configured VR racing simulation might convince you otherwise.

Prices for virtual reality headsets have already started to drop, be it the PC-based Oculus Rift and HTC Vive or Sony's console-based Playstation VR. After seeing how affordable a VR setup can be, I bit the bullet and picked up an Oculus Rift headset a few weeks ago and have spent much of my spare time lately with the headset on turning laps in a variety of VR-compatible racing sims — including "Assetto Corsa," "iRacing" and "DiRT Rally."

Here are five observations from my time as a virtual reality race car driver.

1. A steering wheel is a must.

Chances are if you're even somewhat serious about playing racing games on console or PC, you already own a steering wheel and pedals — but in VR it basically becomes a requirement. There's really no way to get a natural feel of driving while using a keyboard, mouse or gamepad, and this becomes even more amplified with the added immersion VR brings.

Having the physical steering wheel, pedals and gear shift in front of you is one of the main things that makes racing games one of the best ways to experience VR, but I'll get to that in just a moment.

2. You might feel dizzy — and that's fine.

One one of the complaints or fears that many people have about VR is motion sickness. While I haven't yet felt "sick" while racing in VR, there are certainly times when it can feel a bit dizzying, like when you are attacking a stage in "DiRT Rally" that's heavy on jumps and hairpin corners.

But the way I see it, you'd likely be feeling the same sensations in an actual rally car, so it just adds to the realism in a sense. And don't be surprised after a VR race session if you've worked up a sweat that'd be similar to what you'd have on an actual race track.

3. Immersion is the name of the game.

First and foremost, racing in virtual reality is about immersion — and it absolutely delivers in this department. Sure, the resolution of the screens inside current VR headsets isn't as sharp as what you get on a normal HD display, but you won't have time to be counting pixels while driving an F1 car flat out through Eau Rouge in "Assetto Corsa."

For many years, having a triple screen setup was the best way to have a realistic racing sim experience, but VR puts that to shame with the ability to move your head freely around the car, looking ahead through corners, out the side window while drifting or at an opponent you're banging doors with.

Unfortunately, this is extremely hard to convey using words, photos or even video, but the feeling is amazing. Once the headset slides on and the head phones feel with the sounds of race cars, you almost completely forget that you are actually sitting in an office or living room.

4. Racing is the perfect application of VR.

So far, VR has been used for a lot of different genres of game with varying degrees of success, but there's really no type of game better suited to VR than a racing sim. There's a couple of reasons for that. First, you don't even need to stand up. You're seated, just as you'd be while driving an actual car. Unlike other VR games, there's no need to worry about having a big play space, getting cords tangled or bumping into things as you move around.

Second, assuming you are using a steering wheel setup, all of your main interaction with the car is done through realistic physical inputs rather than motion controls or buttons. You might not see the actual steering wheel in front of you, but its movements will be accurately mirrored in your headset view. And while wearing a VR headset can feel a little unnatural in certain applications, it works perfectly in a racing game because the feeling isn't much different from the view out of a helmet. The only thing that's missing are the G-forces throwing you back and forth.

5. This is just the beginning.

Given how incredible it feels trying a proper VR racing sim right now, it's even crazier to think that this is just the beginning. There are plenty more VR-capable racing games on the way whether it's the upcoming "Project CARS 2," the PSVR-compatible "Gran Turismo Sport" or other future titles.

And even more impressive is that the VR equipment itself is still in its first generation. If it's immersive now, one can only imagine what it will be like once the technology improves even more. While there will never be a replacement for the real thing, VR racing sims are as close as we've gotten — and they should only get better.

Just a warning, though: After experiencing racing in VR, you might have trouble going to back to a "regular" racing game experience afterward. I know it's already starting to feel that way for me. Time will tell whether VR is truly the future of gaming, but it's already clear that it's a lot more than a cheap gimmick — especially if racing games are your thing.

4BT Cummins + Solid-Axle Swap = The Dodge Dakota of Your Dreams

$
0
0

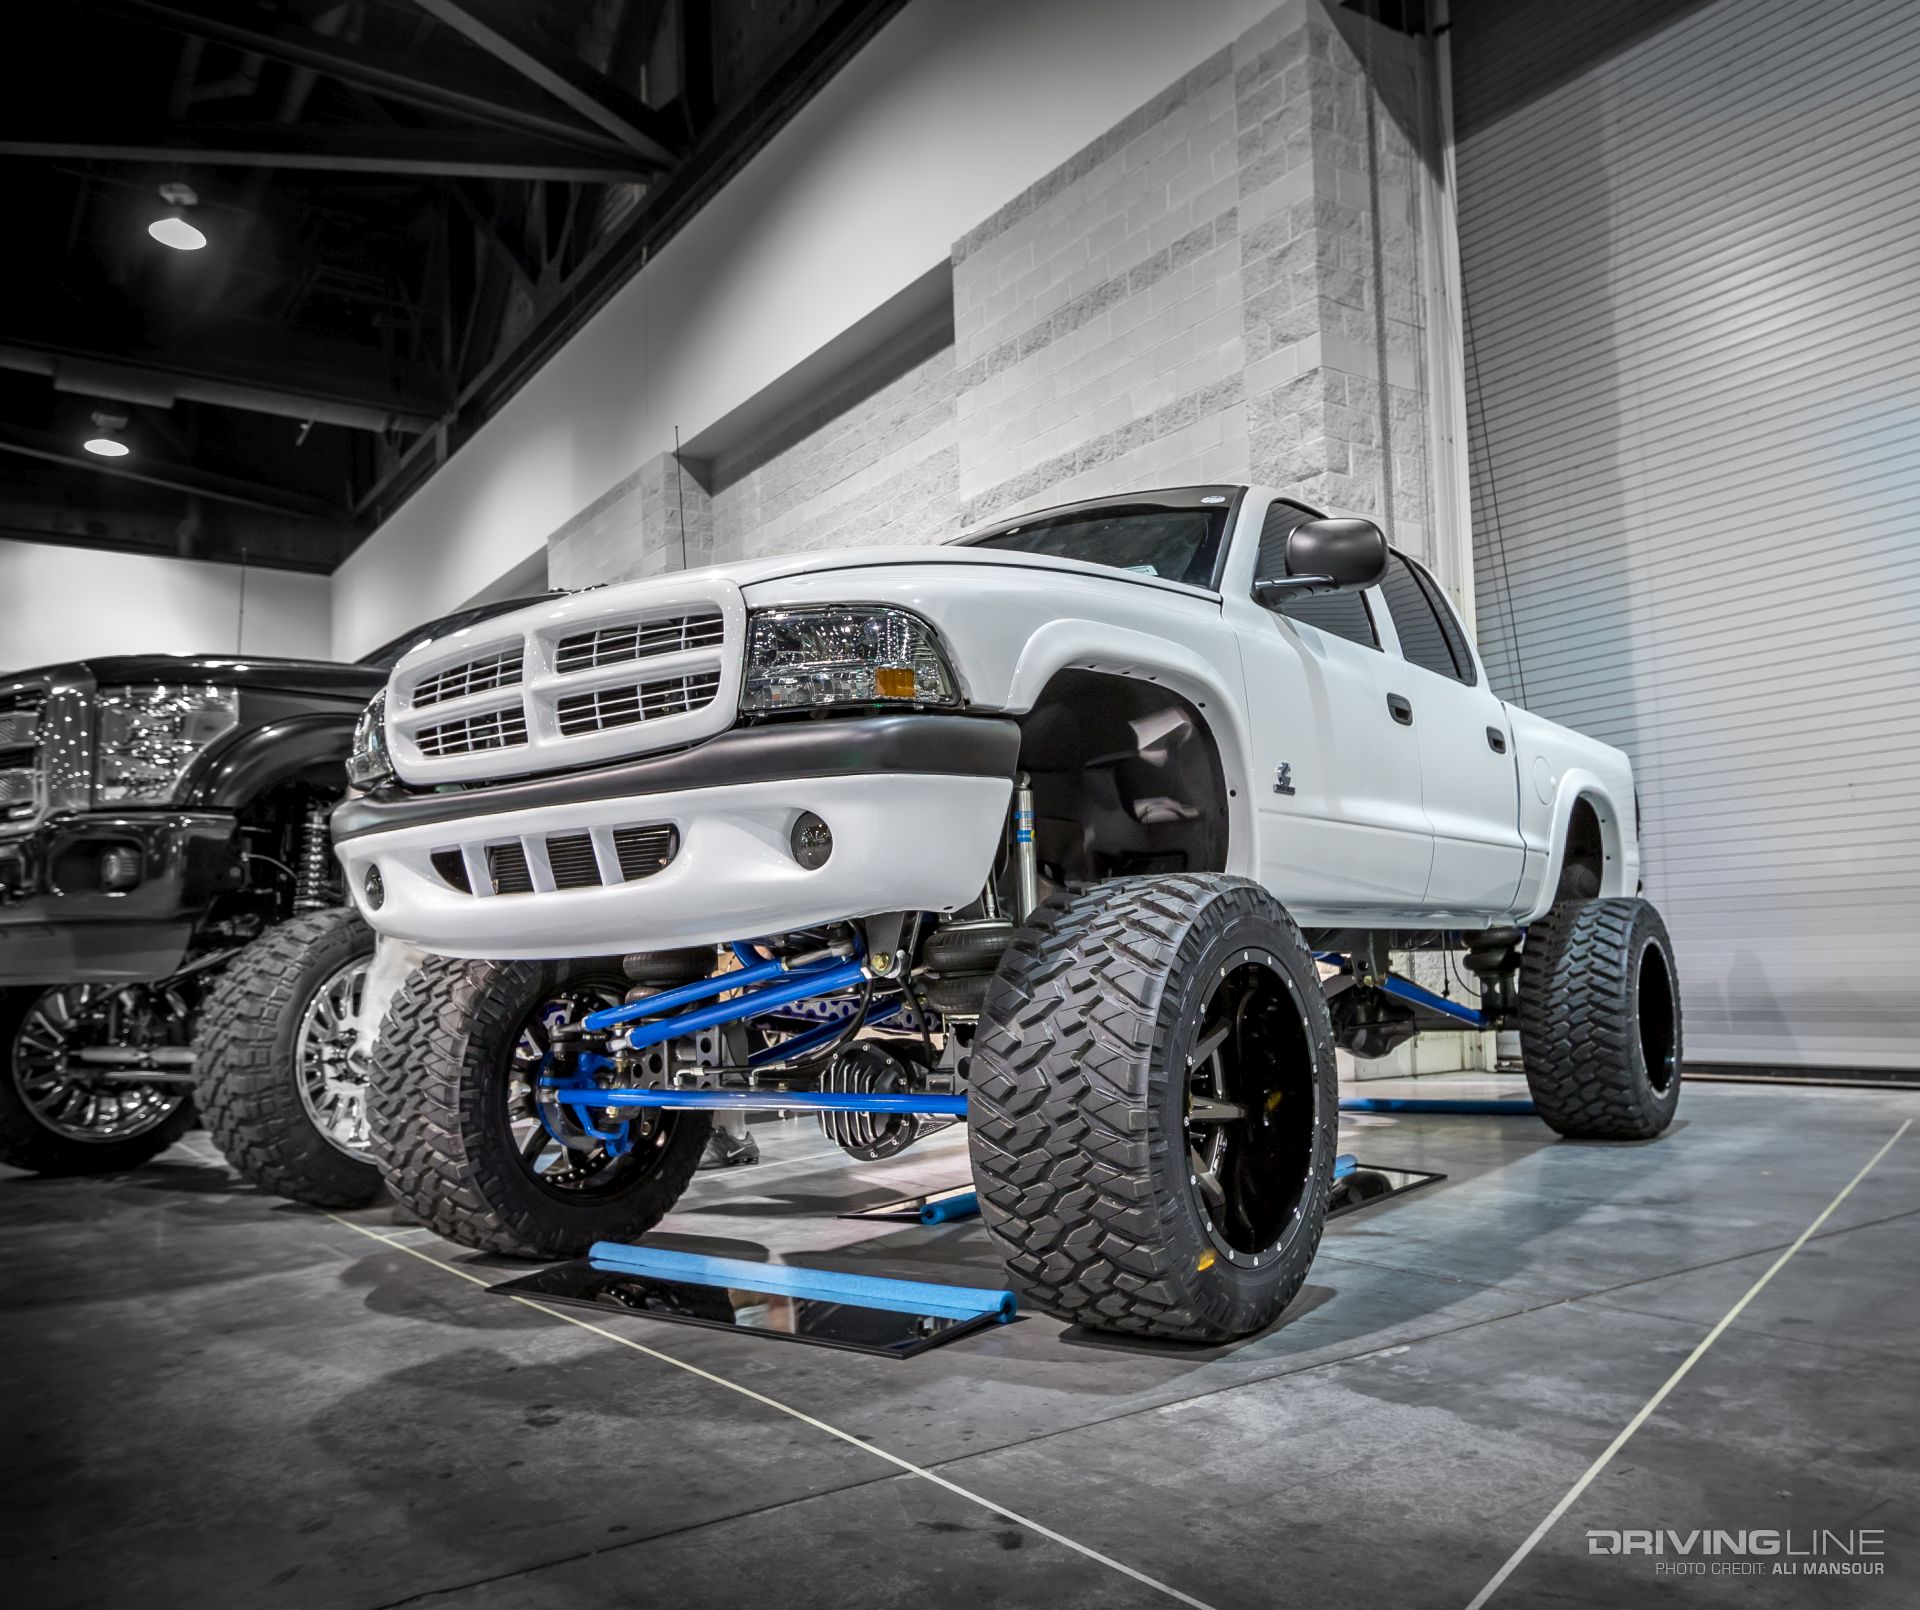
When you’re surrounded by hundreds of incredibly modified trucks, it can be difficult to stand out in the pack. Unless however, your truck happens to be a Cummins-powered Dodge Dakota sporting a custom air-ride suspension and solid-axle conversion! When we were perusing the 2017 Daytona Truck Meet, we came across Ben McWhorter’s 2000 Dodge Dakota quad cab. Having owned a few Dakota pickups over the years, Ben knew all of the truck’s weak links extremely well.

For this build, he made sure to take his time and get everything exactly as he wanted. After compiling parts for two years, Ben connected with Cole Sercer of Sercer Machine to make his truck dreams a reality. Although Ben had collected parts for some time, it wasn’t until 10 weeks before the Daytona Truck Meet that the Dakota build would be kicked into high gear.

The video above offers a glimpse into the build from the owner himself, while we’re diving even more into the details in the feature breakdown below.

001-2000-dodge-dakota-solid-axle-4bt-trail-grapplers

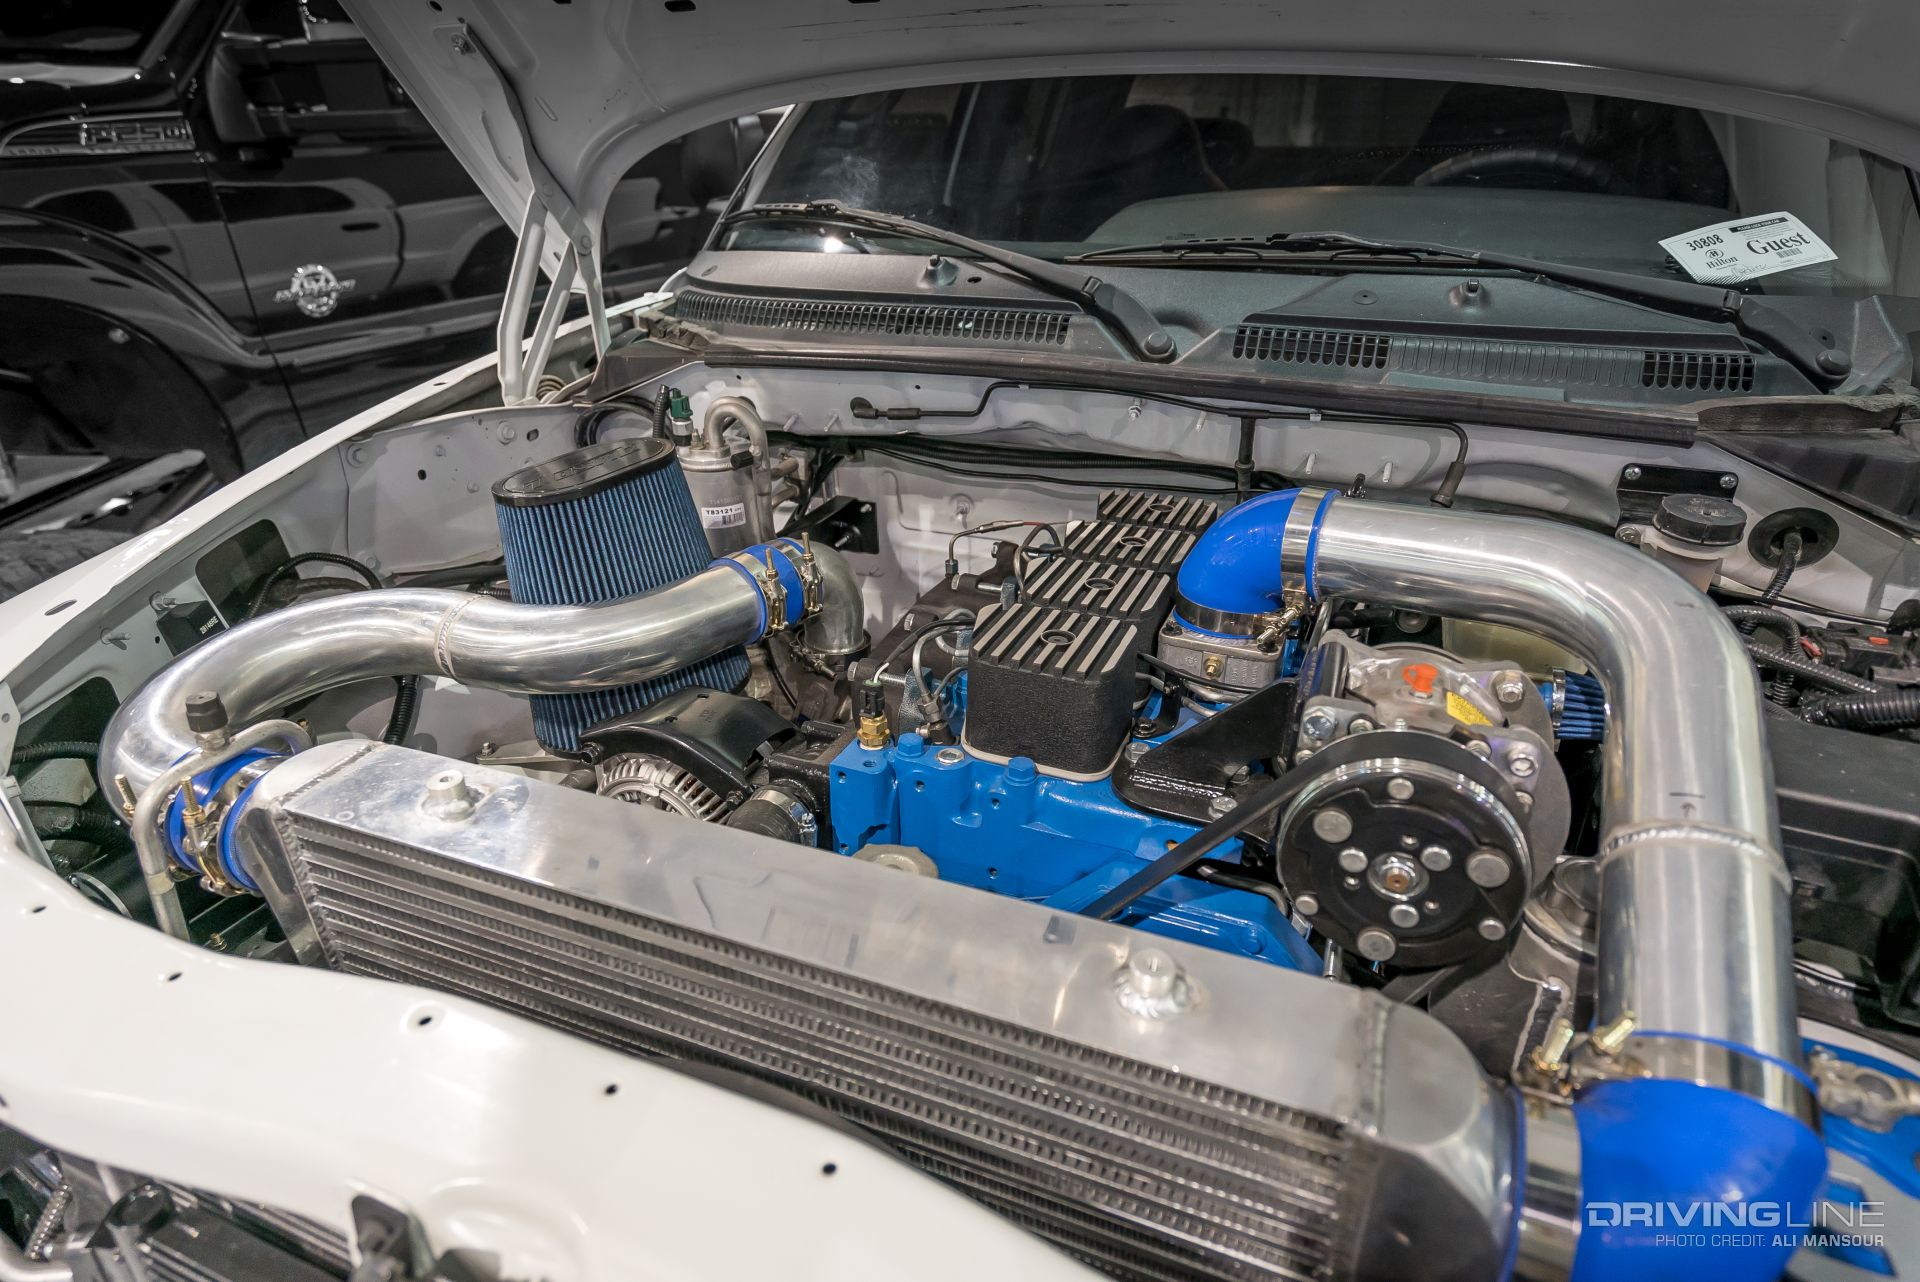
Though you could get a Dakota from the factory with a 5.9L V8, there was never a diesel option. Looking for more torque and fuel efficiency, Sercer Machine dropped in a 3.9L Cummins 4BT turbodiesel. With a relatively large engine bay, the revamped and intercooled diesel engine was made to look as though it rolled off the showroom that way.

002-2000-dodge-dakota-solid-axle-4bt-cummins-39l

The Dakota’s original independent front suspension doesn’t have a great track record off-road. To ensure the truck had a more durable front end, a high-pinion Dana 44 was sourced from an older Ford F-250. The eight-lug axle was paired with a PSC Motorsports hydraulic assist steering kit, which works with the custom crossover steering system.

003-2000-dodge-dakota-solid-axle-dana-44-air-suspension

Supporting the front end is a custom air bag setup that’s dampened via Bilstein 5100 series shocks. The bag system uses an under-bed mounted holding tank, which is filled via an engine-driven air compressor.

004-2000-dodge-dakota-solid-axle-air-suspension-bilstein-shocks

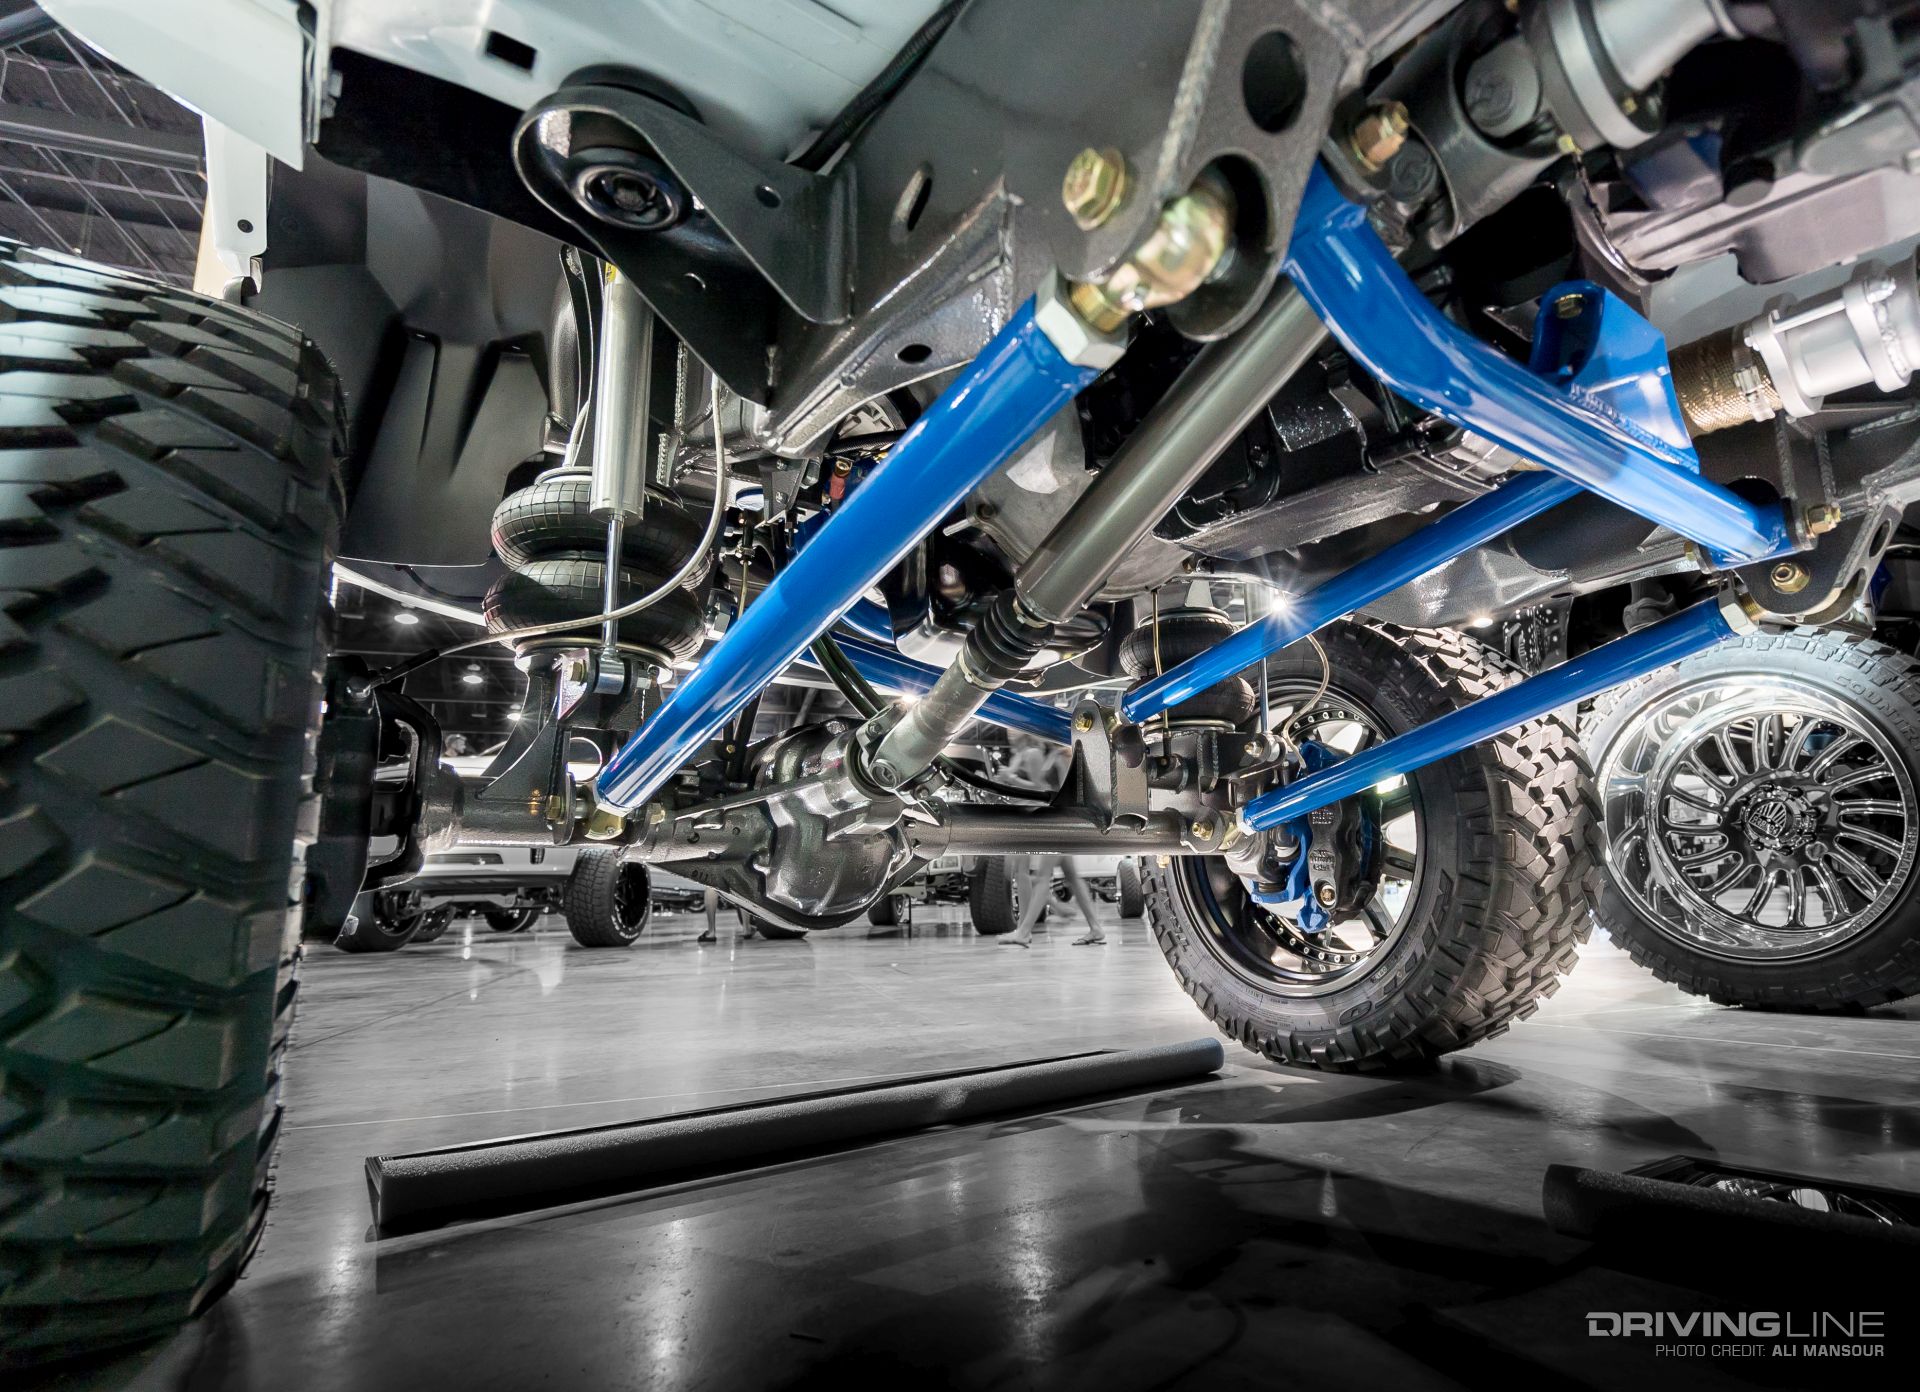
Packaging a solid-front axle under a vehicle that never came with one can be especially challenging. To get the travel and control they were looking for, a custom three-link was fabricated. The tubular crossmember you see is supporting an NV4500 manual transmission which is connected to a NP241 transfer case.

005-2000-dodge-dakota-solid-axle-3-link-sas

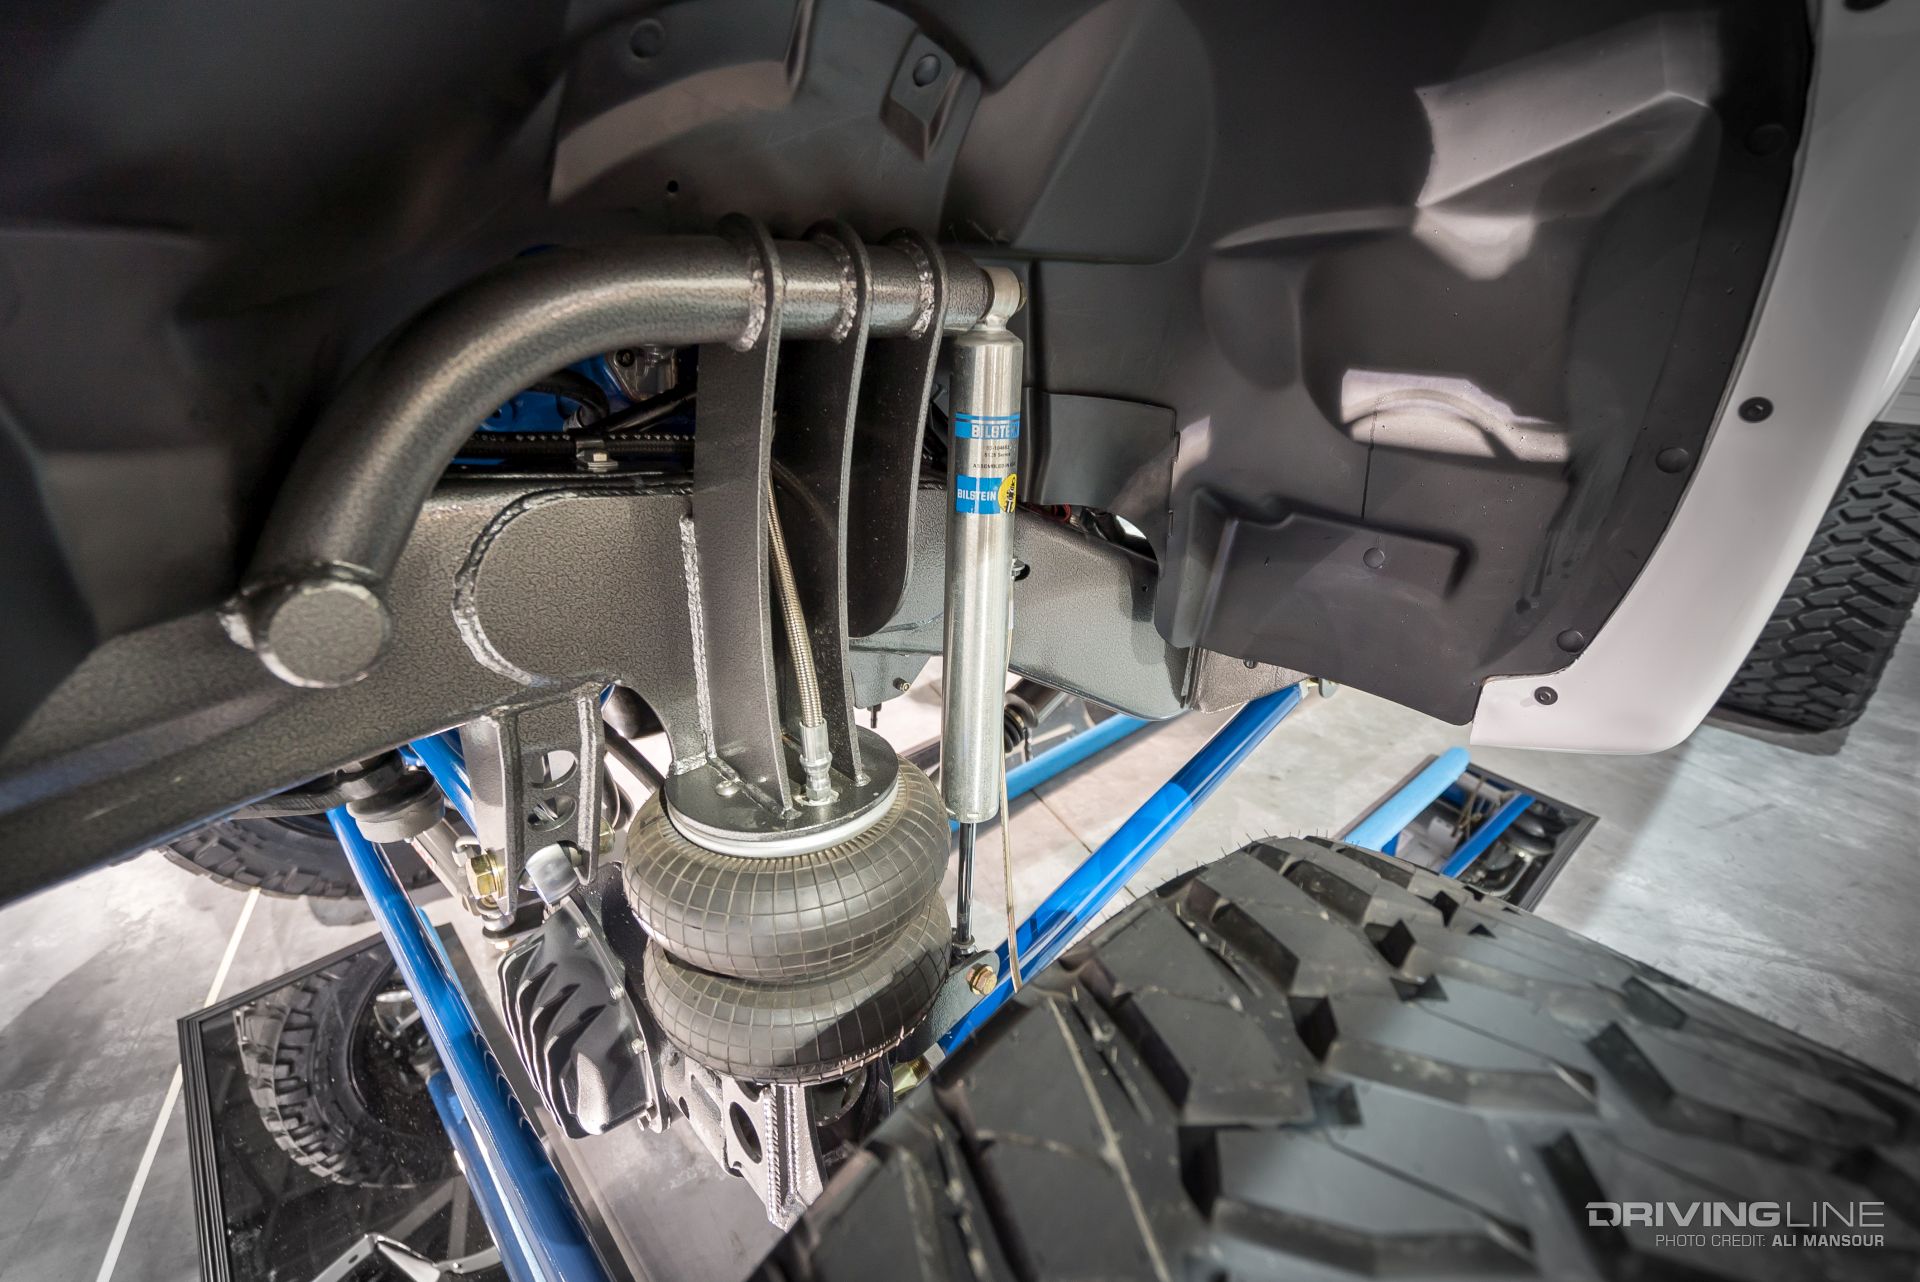
Out back, you’ll find a semi-float Dana 60 plucked from a Ford E-Series van. Gone is the original leaf-sprung suspension, and in its place is a triangulated four-link with air-bags and Bilstein shocks. Just as impressive as the custom suspension is the fact that this build was taken all the way down to the frame. This allowed for the entire chassis to be powder-coated once the fabrication was completed.

006-2000-dodge-dakota-solid-axle-e-series-ford-4-link

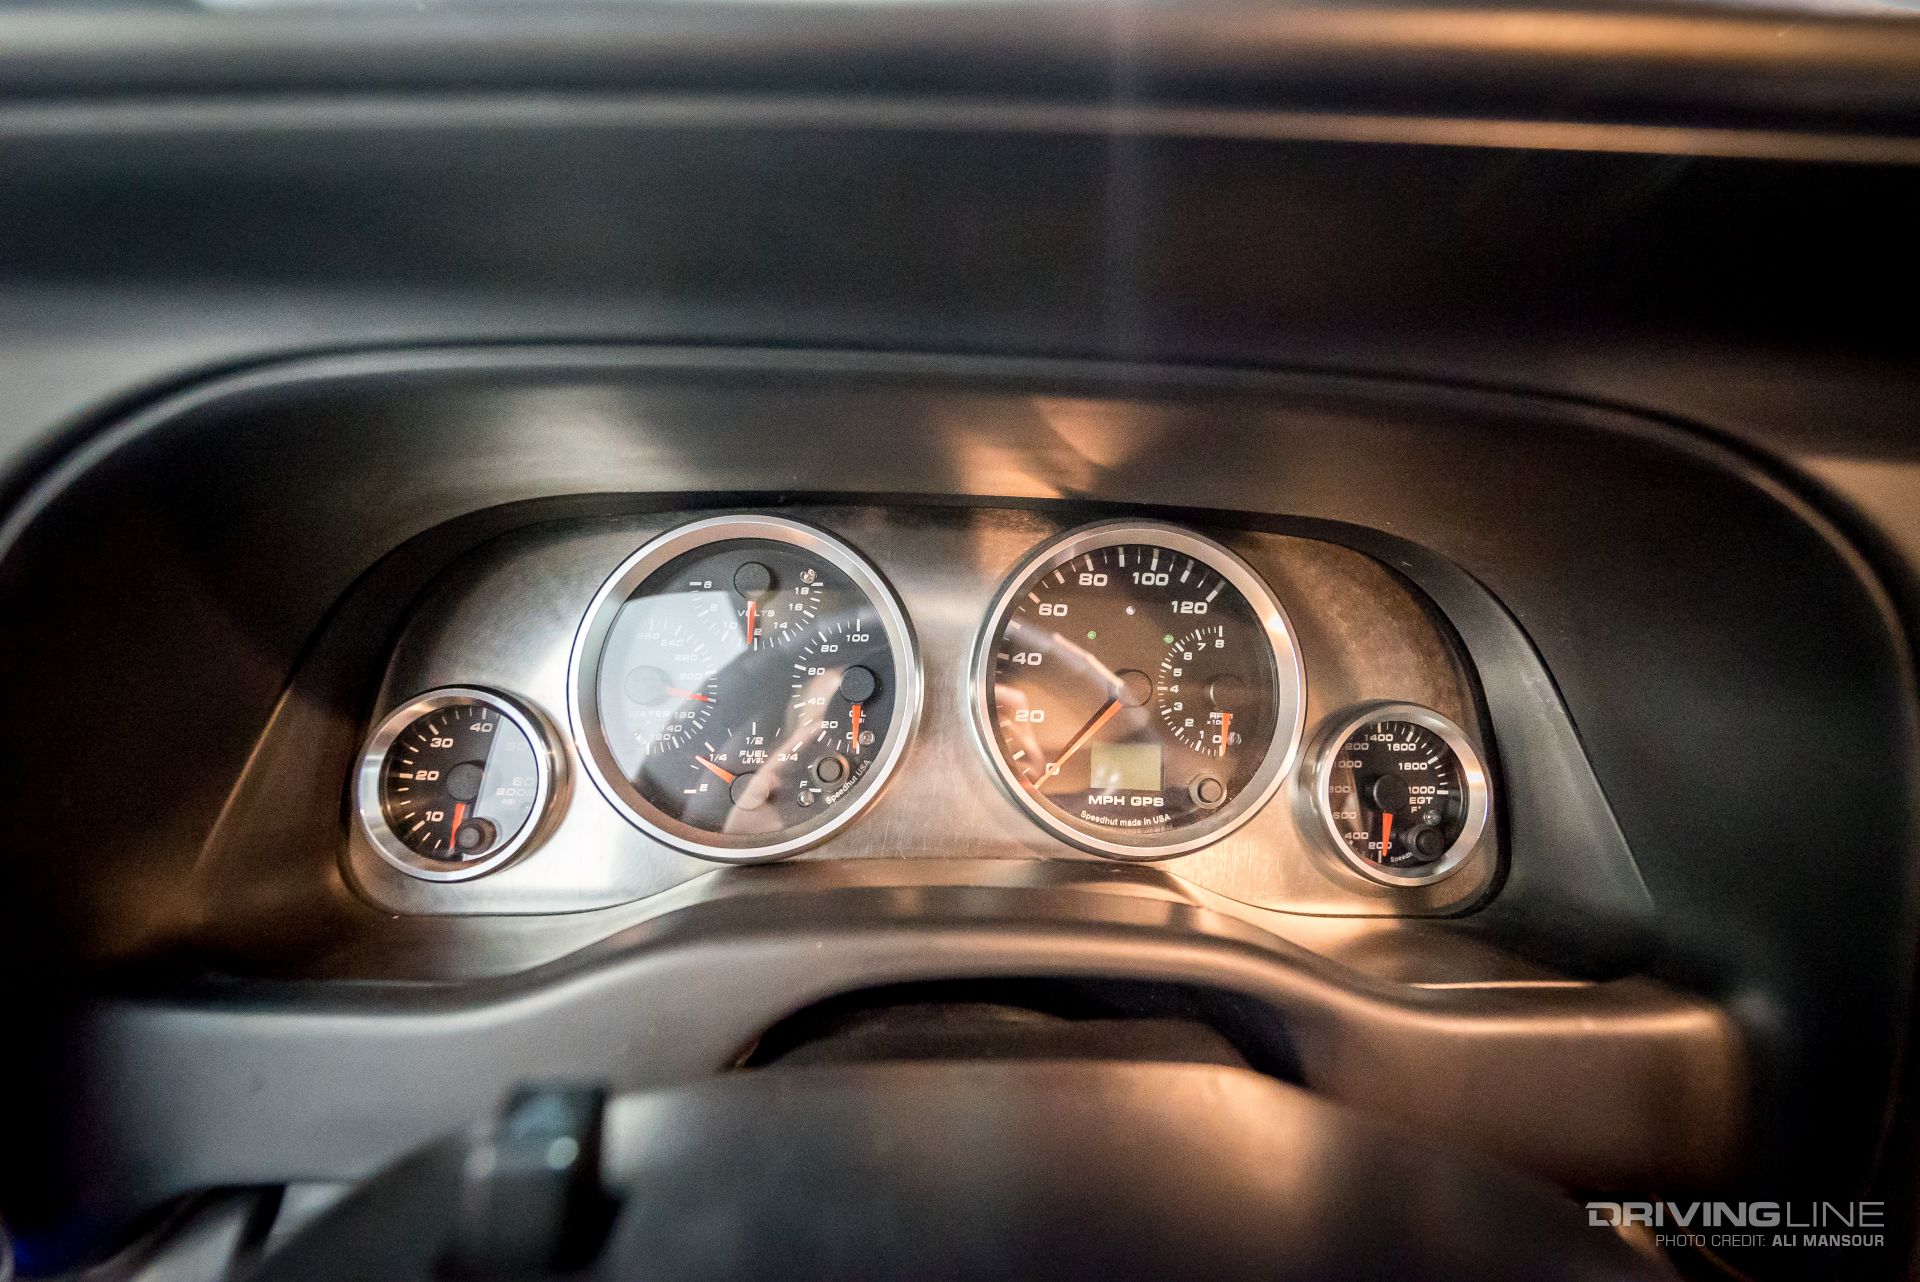
Since Ben liked the interior as it was, most of it was left stock. One custom feature the Dakota does have is this one-off instrument cluster.

007-2000-dodge-dakota-solid-axle-4bt-custom-dash

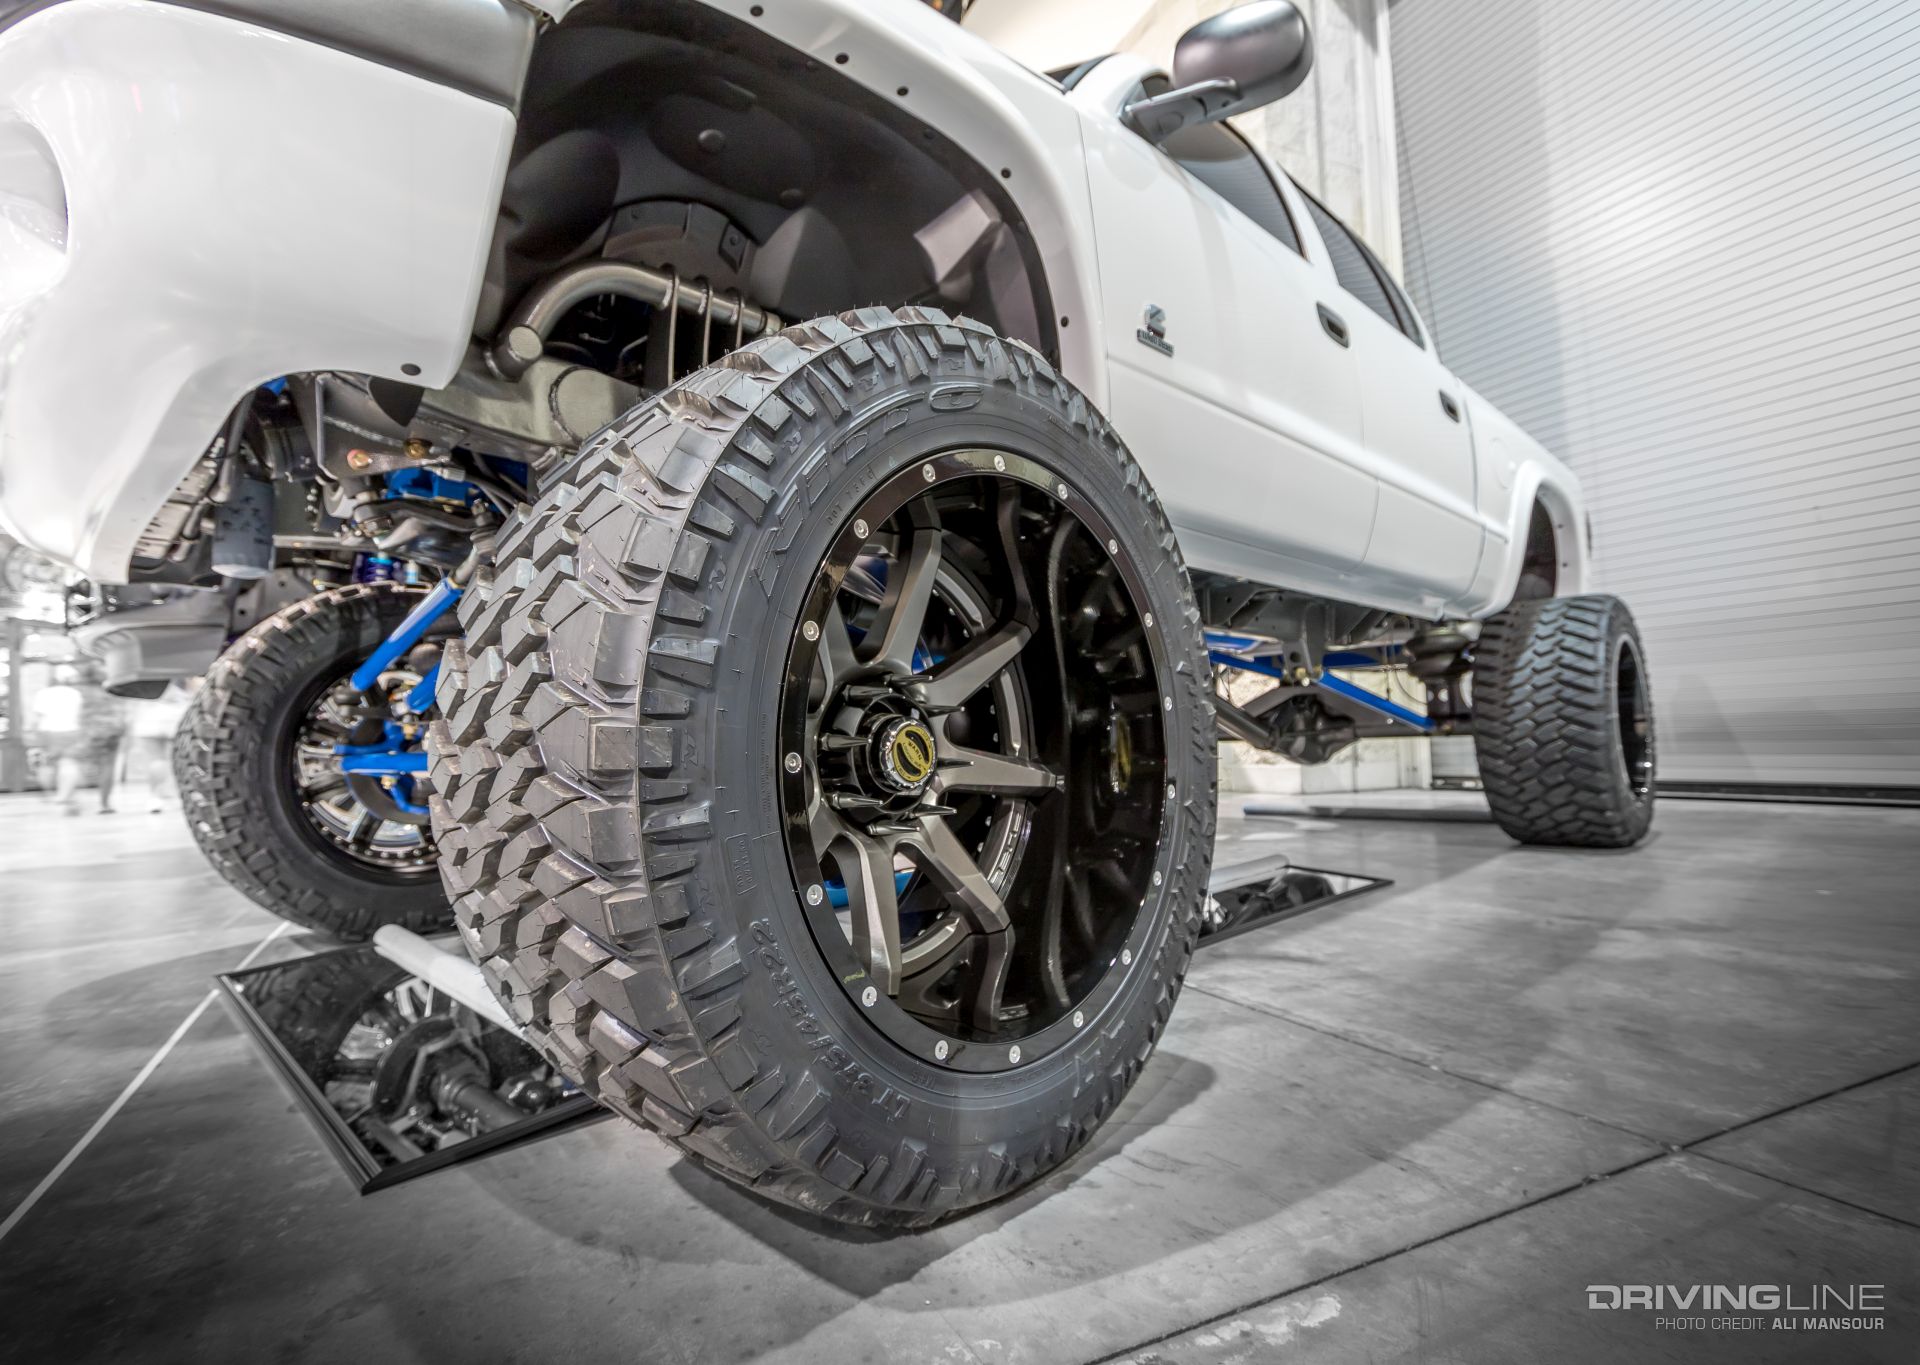
For tires and wheels, a set of 375/45R22 Nitto Trail Grapplers were wrapped around 22-inch Fuel wheels. Wrenching right up to the moment he had to leave for the show, Ben states that he was a little nervous about the 160-mile maiden voyage. Thankfully, the tires rolled smoothly, and the truck performed flawlessly to Daytona Beach and back to his home in Georgia.

008-2000-dodge-dakota-nitto-trail-grapplers-22-fuel-wheels

Be sure to check out more photos of the build in our gallery below.

Bloody Good: GT Style 2006 Lexus IS F

$
0
0

The Innovation Cup is an event that showcases new car modification styles similar to what you would see in an automotive "fashion show" — with a lot of wild ideas that seem pretty impractical, and just a few hidden gems in which I could see myself driving down the road. As I made my way through the rows of these concepts, I eventually came upon one of those cars that I wouldn't mind being spotted in.

First Impression

Parked in what would be the equivalent first seat of the orchestra was a beautifully executed 2006 Lexus IS F. With nothing blocking the view, I was able to take it all in; although wild, it was perfectly balanced. With the owner nowhere to be found, I walked the show a bit more, but the only thing on my mind was the IS F.

Ishiyama Lexus IS F

After giving it a few minutes I returned, determined to find the owner. Luckily enough, some others in attendance were able to point me in the right direction. Eventually, I was able to introduce myself to Mr. Ishiyama, and he kindly agreed to meet at a later time for a photo shoot.

Junk in the Trunk

Fast forward three months, and we were able to finally able to meet in the outskirts of Chigasaki, Japan. Mr. Ishiyama, along with his wife, were kind enough to meet me at the train station and take me to the location for the shoot. I was a bit worried about stuffing all my gear in the car, but it wasn't an issue. This is a car that gets driven.

Ishiyama Lexus IS F

As we made the way through the small town streets, I found the ride to be really comfortable, thanks to the air suspension. The number of monitors and the entertainment system are nothing short of what I would expect in car like this. (However, the fact that the monitors are in the place of rearview mirror did concern me a bit.)

VIP Interior

The interior is nothing short of plush with a mix of custom wrapped red felt and white vinyl. The passenger side drink holder is something I normally associate with vans, but it seems a natural fit in the IS F. In the rear, the stuffed NOS bottle hints to what resides in the trunk.

Ishiyama Lexus IS F

Every panel seems to have been filled with monitors or gauges. In the A-pillars are air meters and various audio meters. The panels that don't have any sort of monitor or gauge are carefully wrapped in transparent carbon sheets. The interior is finished off with a real carbon steering wheel and a Death Grip shift knob.

Drop It Low

After arriving at the location, Mr. Ishiyama had some concerns, as it was the type of location he wouldn't typically choose for a shoot. However, it turned out to provide a great setting in contrast to the cleanliness of the IS F. Mr. Ishiyama took out his remote and set the Ideal Air Suspension to its "max low" setting, tucking the Work Seeker CX wheels perfectly into the fenders.

Ishiyama Lexus IS F

The stuffed NOS bottle in the back seat matches the NOS bottle that Mr. Ishiyama uses as the air tank for the suspension — a nod to the American style he has incorporated into his IS F.

With 18x10s in the front and 18x11s in the rear all wrapped neatly in Nitto Tire NT555s, the size and style complement the overall appearance perfectly. Rounding off the suspension are a set of T-Demand arms, Weber caliper covers and VOING brakes.

Ishiyama Lexus IS F

GT Inspired

Taking design cues from abroad and combining them with his own, Mr. Ishiyama's goal was to make a unique GT style. This started with a full set of AIMGAIN body parts, including front and rear bumpers plus side skirts.

Accommodating the wheel and tire setup when the suspension is at its lowest are Lexon fender flares. Considering the fact that the flares, bumpers and side skirts aren't designed as a set, getting them to match seamlessly proved to be the most difficult part of the build.

Ishiyama Lexus IS F

Blood Dip

The whole body is wrapped in blood red by Rubber Dip, which had been expertly sprayed on the car. The rubber dip looks and feels like paint, and I was a bit surprised to find out it was a plastic dip. The finish looked very candy-like, but the slightly matte finish does not create reflections like standard paint, making the cars color pop in most settings.

After one moves past the color, some of the finishing details come into focus, including the URAS front carbon fiber front flap and Jet carbon fiber canards — which add to the intended GT styling. An Effector rear spoiler is the cherry on top to Mr. Ishiyama's GT look.

Ishiyama Lexus IS F

Fumes & Illumination

Seibon carbon fiber hood hides a factory stock engine setup with a painted engine cover for some dress-up. To keep things comfortable and reliable, the only engine performance modification is an AIMGAIN loop muffler.

Ishiyama Lexus IS F

One thing that Japan tuners probably do best are customizing their lighting, and Mr. Ishiyama's is no exception with his custom headlights and taillights by 78Works.

Future Plans

With the car pretty much finished, Mr. Ishiyama originally wanted to end with some additional audio modifications, but he recently chose to depart from his IS F and start a new project instead.

Ishiyama Lexus IS F

Special Thanks

Mr. Ishiyama worked closely with his builder Mr. Ota to turn his ideas into reality and would like to extend his appreciation. I hope to meet up with both of them soon to see what projects they may have cooking.

See more of Mr. Ishiyama's bloody good Lexus IS F in the gallery below.

Summer Fun at the 2017 Jeepers Jamboree [Gallery]

$
0
0

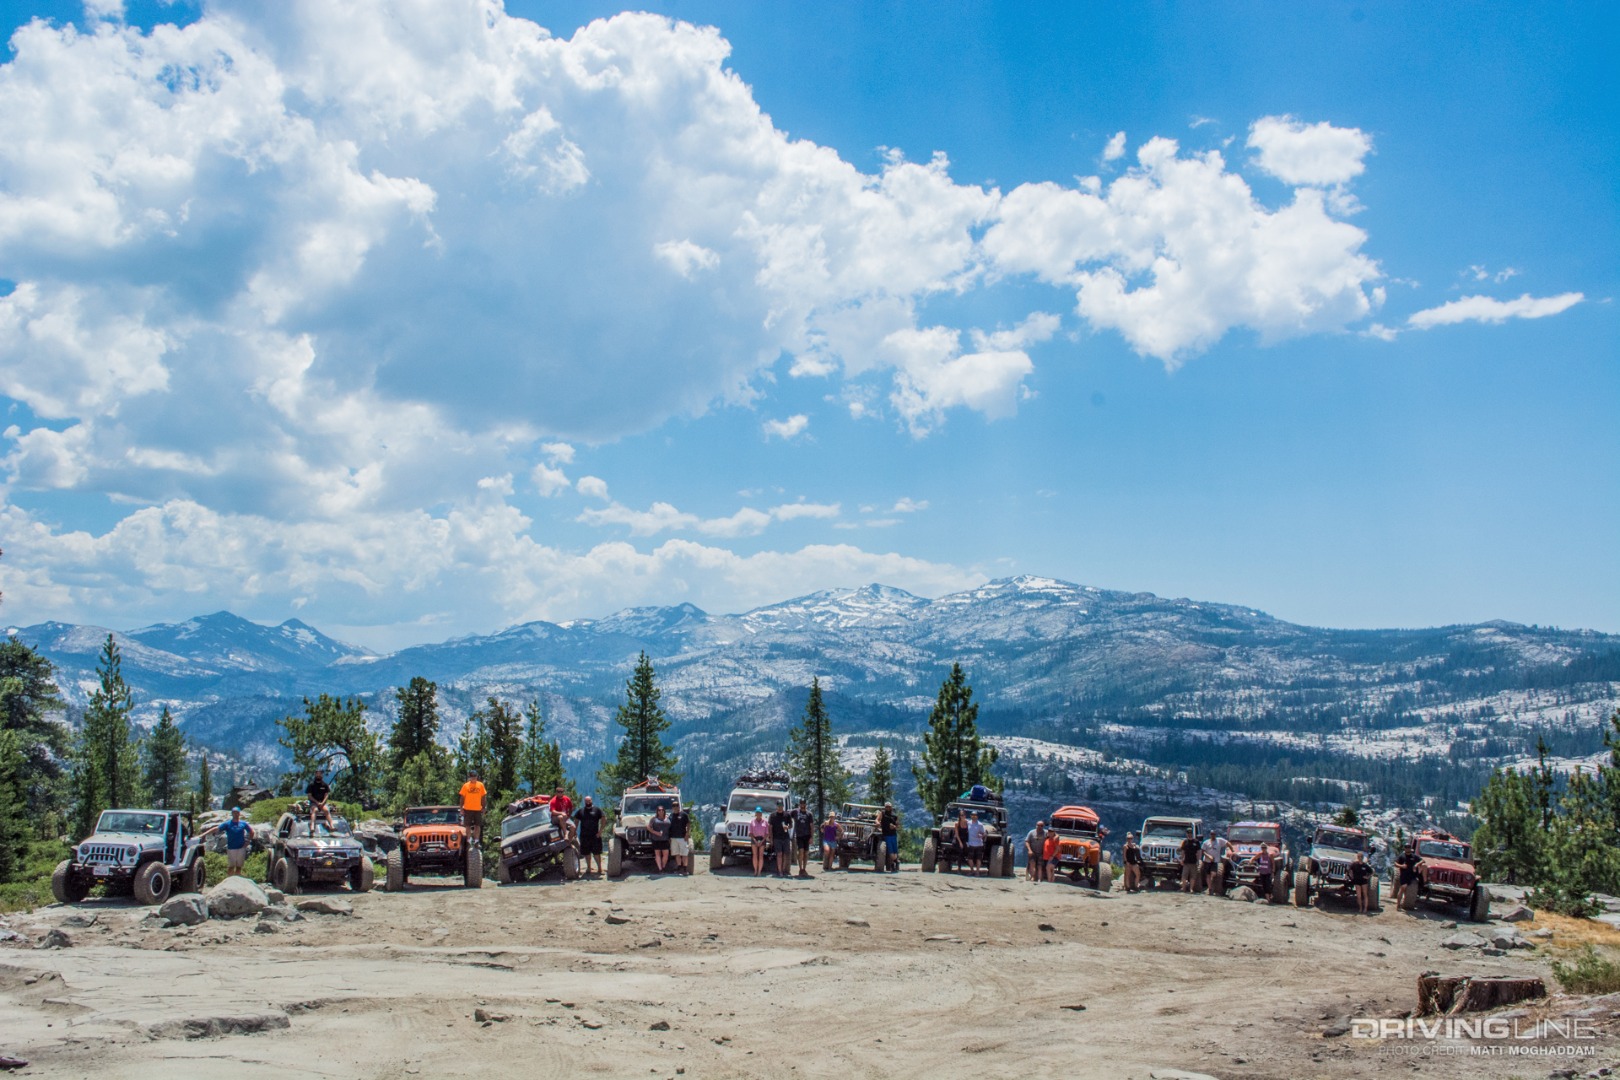
The 2017 Jeepers Jamboree Powered by Nitto Tire took place last weekend on the Rubicon Trail, from the gold rush town of Georgetown to Lake Tahoe, California. For 65 years, Jeepers Jamboree has invited Jeep and other 4x4 owners to trek 12 miles along the trail, stopping in Rubicon Springs for a few days of summer fun by the river.

Jeepers Jamboree

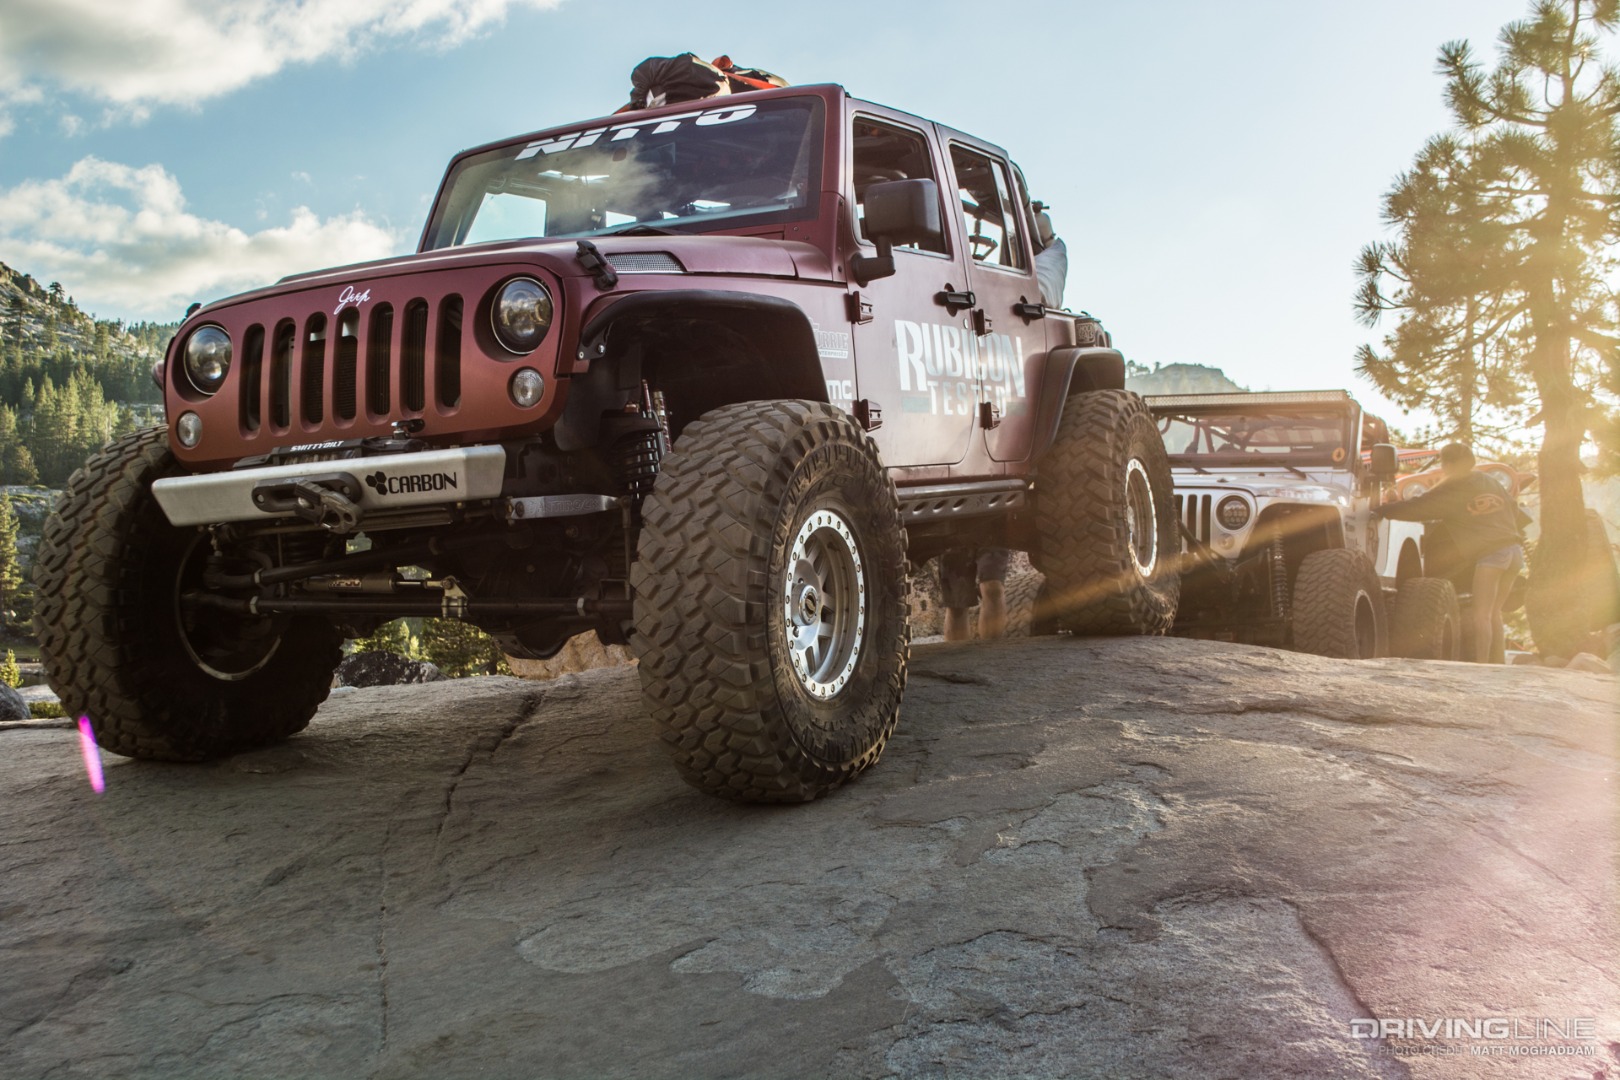
This year the trip attracted over 1,500 attendees and hundreds of vehicles. As always, Jeepers Jamboree provided freshly cooked meals for the days at Rubicon Springs, made possible by a group of volunteers from the American Legion Post 119. I hopped in with the Stobaugh family, owners of Off Road Brands, and veterans of the Jeepers Jamboree trail. Their stable included Austin's red Rubicon Tested JKU, Ron's white Carbon JKU and Courtney's freshly built stretched TJ.

Rubicon Tested JKU at Jeepers Jamboree

With challenging rock gardens, deep-blue natural lakes and granite slabs as far as the eye can see, it's no wonder the mighty Rubicon Trail is on every 4x4 owner's bucket list.

Jeepers Jamboree

See the rest of the amazing Jeepers Jamboree views in the photo gallery at the top. Stay tuned for the full trip report!


Power to the P-Pump: Injecting New Life Into a 24-Valve Cummins

$
0
0

If you own a ’98.5-’02 Dodge Ram 2500 or 3500 powered by the 24-valve version of Cummins’ 5.9L inline-six diesel, chances are you’ve suffered a failed injection pump, replaced a lift pump or even experienced an ECM gremlin or two. Chances are also good that your old Dodge struggles to keep up with newer trucks, even though you’ve added more power via programmer, larger injectors or a different turbo.

By now you know that the VP44 injection pump is limited in its high-rpm fueling abilities — that it’s left you stranded in the past (and likely will again) — and you’re ready to throw in the towel. But what if there was a way to improve injection system reliability and add considerable horsepower at the same time? Instead of trading in your old workhorse for a brand new, $70,000 steed with common-rail injection and all the other modern day bells and whistles, there is a relatively inexpensive fix for the 24-valve Cummins’ injection system woes. The solution? A P-pump swap.

That's right — reverting back to the mechanical injection system that made the ’94-’98 Dodge Rams so legendary. For starters, a P-pump (Bosch P7100) adds dependability and hundreds of horsepower to the equation. On top of that, in the case of the ’98.5-’02 trucks, the added fueling and rpm capabilities afforded by the P7100 are combined with the higher flowing 24-valve cylinder head, resulting in vastly improved drivability.

Follow along as we highlight key components required in pulling off a P-pump conversion. This is how you make a 24-valve Cummins worth keeping!

Victim of Circumstance

​​​​

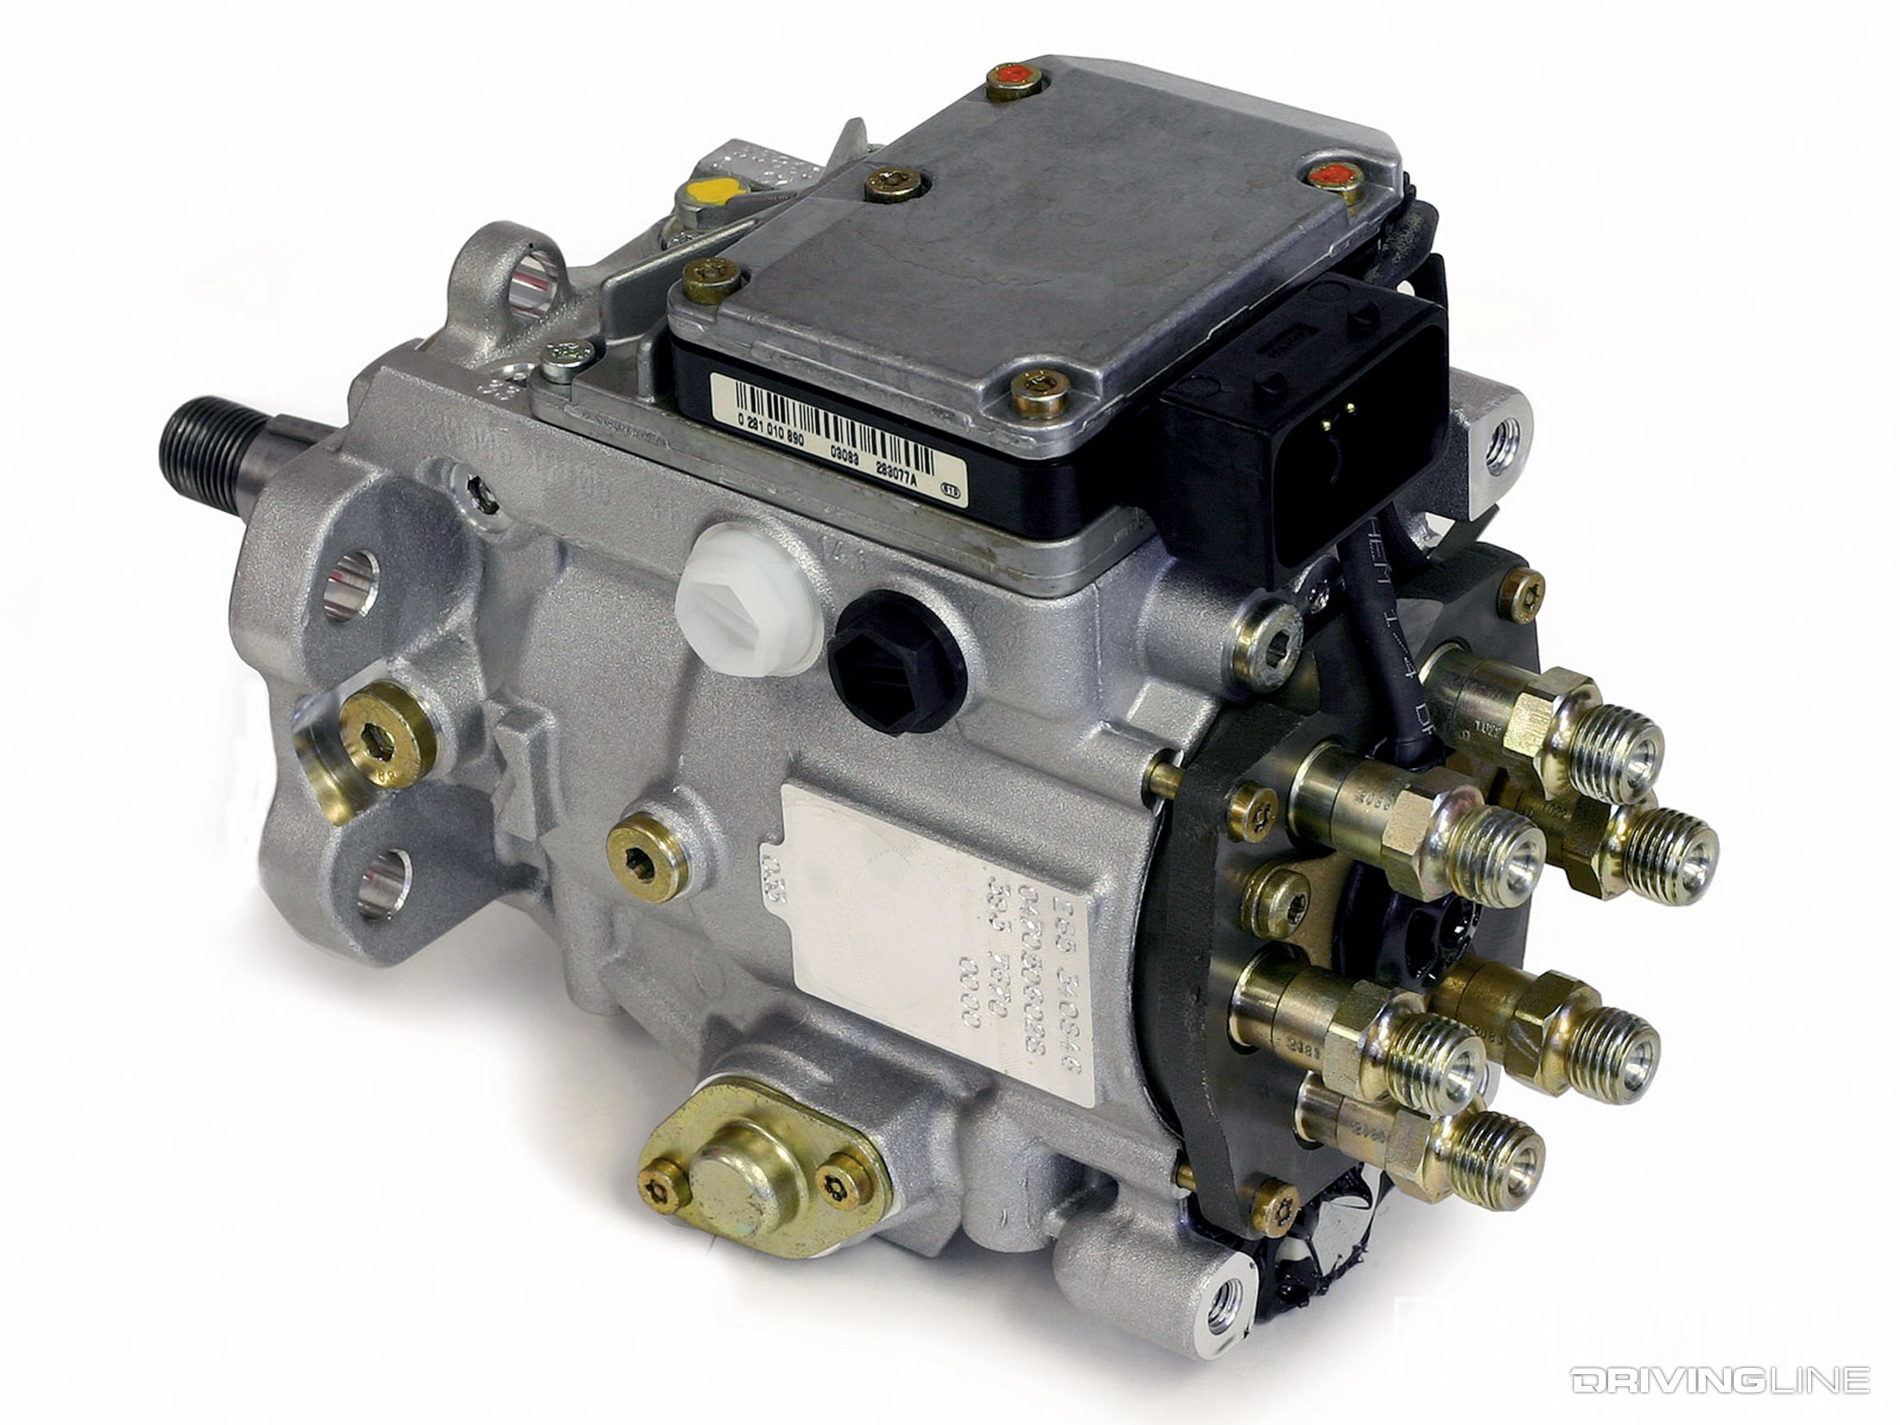
This is a Bosch VP44, the factory injection pump employed on all ’98.5-’02 24-valve 5.9L Cummins engines. It’s an electronically controlled and regulated, distributor-style pump (also known as a rotary type) that was chosen to fuel the 24-valve due to its ability to meet the emissions standards of the late ‘90s. The VP44 is equipped with a computer (EDC) married to the top of it, which monitors and precisely adjusts in-cylinder fueling. Fuel metering is performed independent of engine speed.

Zero psi = Zero Chance of Survival

002-Bosch-VP44-Fuel-Injection-Pump-Pressure

From a reliability standpoint, the VP44’s Achilles heel is the sub-par lift pump that supplies its lifeblood: diesel fuel. While it’s widely accepted that the VP44 is unreliable, in reality it’s the factory lift pump that’s to blame for its early (100,000 to 150,000-mile) demise. Once the factory lift pump no longer provides adequate fuel supply pressure to the VP44 (and when it sees 0 psi for extended periods of time), the EDC atop the VP44 is exposed to extreme heat and eventually fails.

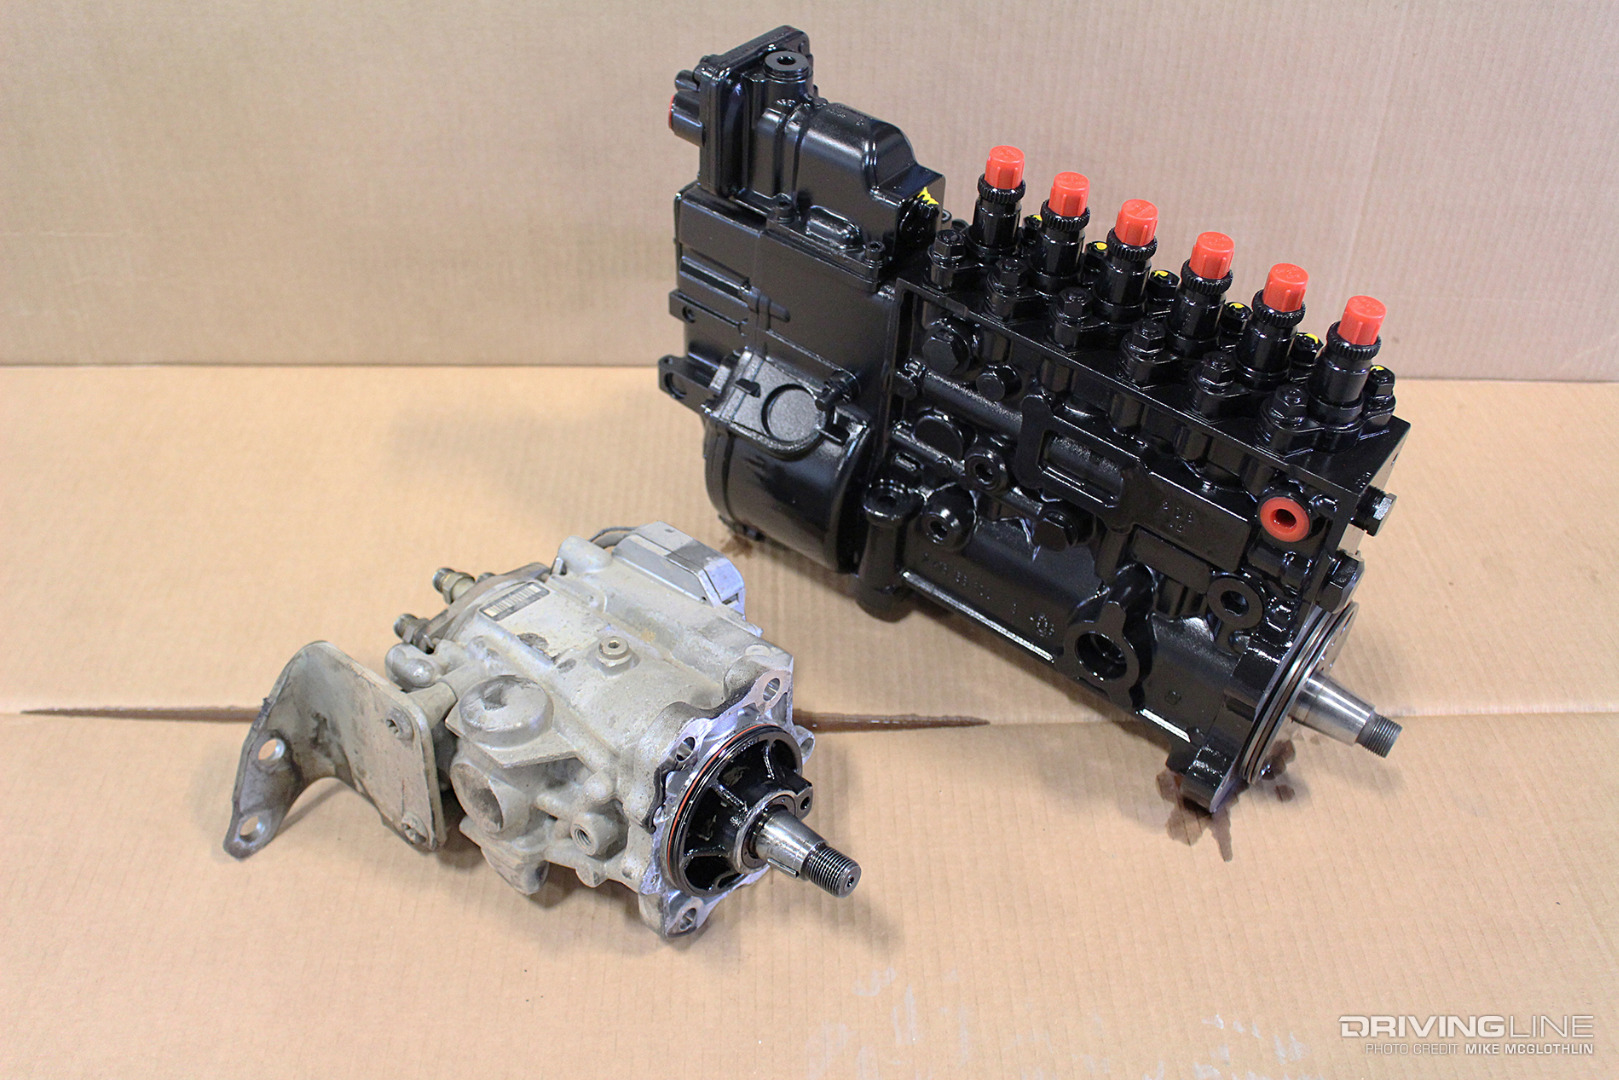
P-Pump vs. VP44

003-Bosch-VP44-vs-P7100-Fuel-Injection-Pump-Cummins

There is no question that the P7100 can outperform the VP44 in every way (fueling, rpm capability, reliability), and the photo above is worth a thousand words (VP44 on the left, P7100 on the right). Even in the case of an extremely modified VP44, roughly 600 cc's worth of fuel volume is on the table. By comparison, a stock (albeit modified) P7100 still utilizing the factory 12 mm plungers and barrels can flow as much as 650 cc’s worth of fuel. Larger plungers and barrels (i.e., 13 mm), a quick-rate cam and a plethora of other internal upgrades can get the P7100 pumps to flow 850 to 950 cc’s — enough fuel to make north of 1,800 horsepower.

Complete Bolt-on Kit

004-Scheid-Diesel-P7100-Conversion-Cummins

So what’s involved in the P7100 swap? Dozens of different parts, quite a bit of time and a lot of work! Luckily, Scheid Diesel offers complete conversion kits to make the process as seamless as possible. While the P7100 conversion is by no means a cheap proposition (the Scheid kit starts at just under $2,300, less than the pump), the folks interested in performing the swap have either completely had it with the VP44/electronic system or are primarily after making more horsepower with their truck.

Digging In

005-Cummins-24-Valve-P7100-Conversion-Lifter-Dowels

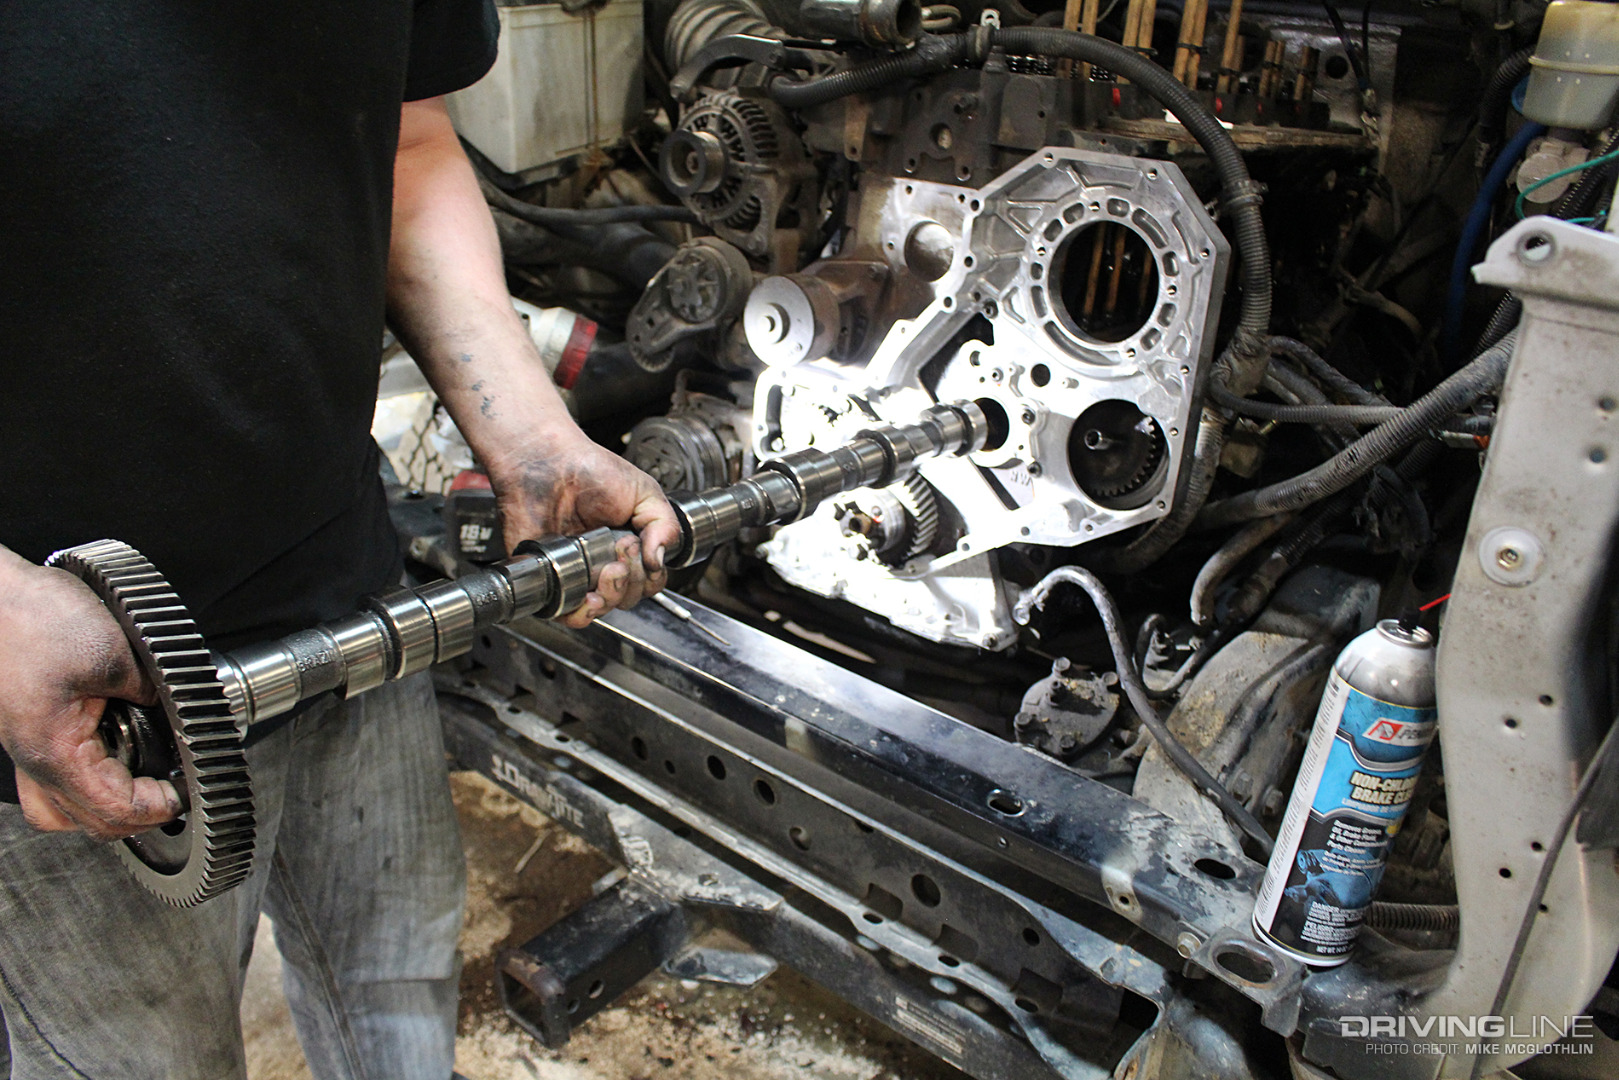
In order to accommodate the P-pump, a gear housing off a ’94-’98 12-valve engine has to replace the ’98.5-’02 version. The twist is that housings can’t be swapped without first removing the camshaft. This means that everything in front of the engine has to go, which includes the front bumper, radiator, intercooler, fan and fan shroud, even vacuuming down the A/C system. Then once the valve bridges, rocker arms and push tubes have all been pulled, the lifters have to be held in place above the cam while it gets removed and reinstalled. This calls for the use of ½-inch diameter wooden dowels, which grab ahold of the lifters (in pairs), suspending them in place (shown above).

Cam Extraction

006-Cummins-24-Valve-P7100-Conversion-Camshaft-Removal

Because the cam has to be pulled for a P7100 conversion, some enthusiasts use the project as the perfect opportunity to upgrade to an aftermarket unit. To further capitalize on the higher rpm capability that comes with running a P-pump, many competitors opt for a cam intended to shine at elevated engine speeds (above 4,000 rpm). On a related valve train note — and because P-pumps almost always increase both the amount of boost and rpm an engine sees — it also pays to install stiffer valve springs (if the owner hasn’t already done so) during a P-pump swap. Hamilton Cams is a great source for camshafts, stronger push tubes and upgraded valve springs for the 5.9L (and 6.7L) Cummins mills.

If Time Is Money…

007-Cummins-Bosch-P7100-Gear-Housing

As mentioned, a 12-valve gear housing has to be bolted to the 24-valve Cummins’ block in order to furnish the P7100, but you’ll also need the correct pump drive gear, the appropriate throttle linkage, a cam sensor adapter, P-pump support bracket, P-pump oil feed line and a whole host of other miscellaneous components. As you can imagine, trying to source all of these parts individually could take a while, which makes the all-inclusive kit offered by Scheid all the more appealing.

Mildly Modded = 700 HP Capability

008-Cummins-24-Valve-Bosch-P7100-Injection-Pump-Conversion

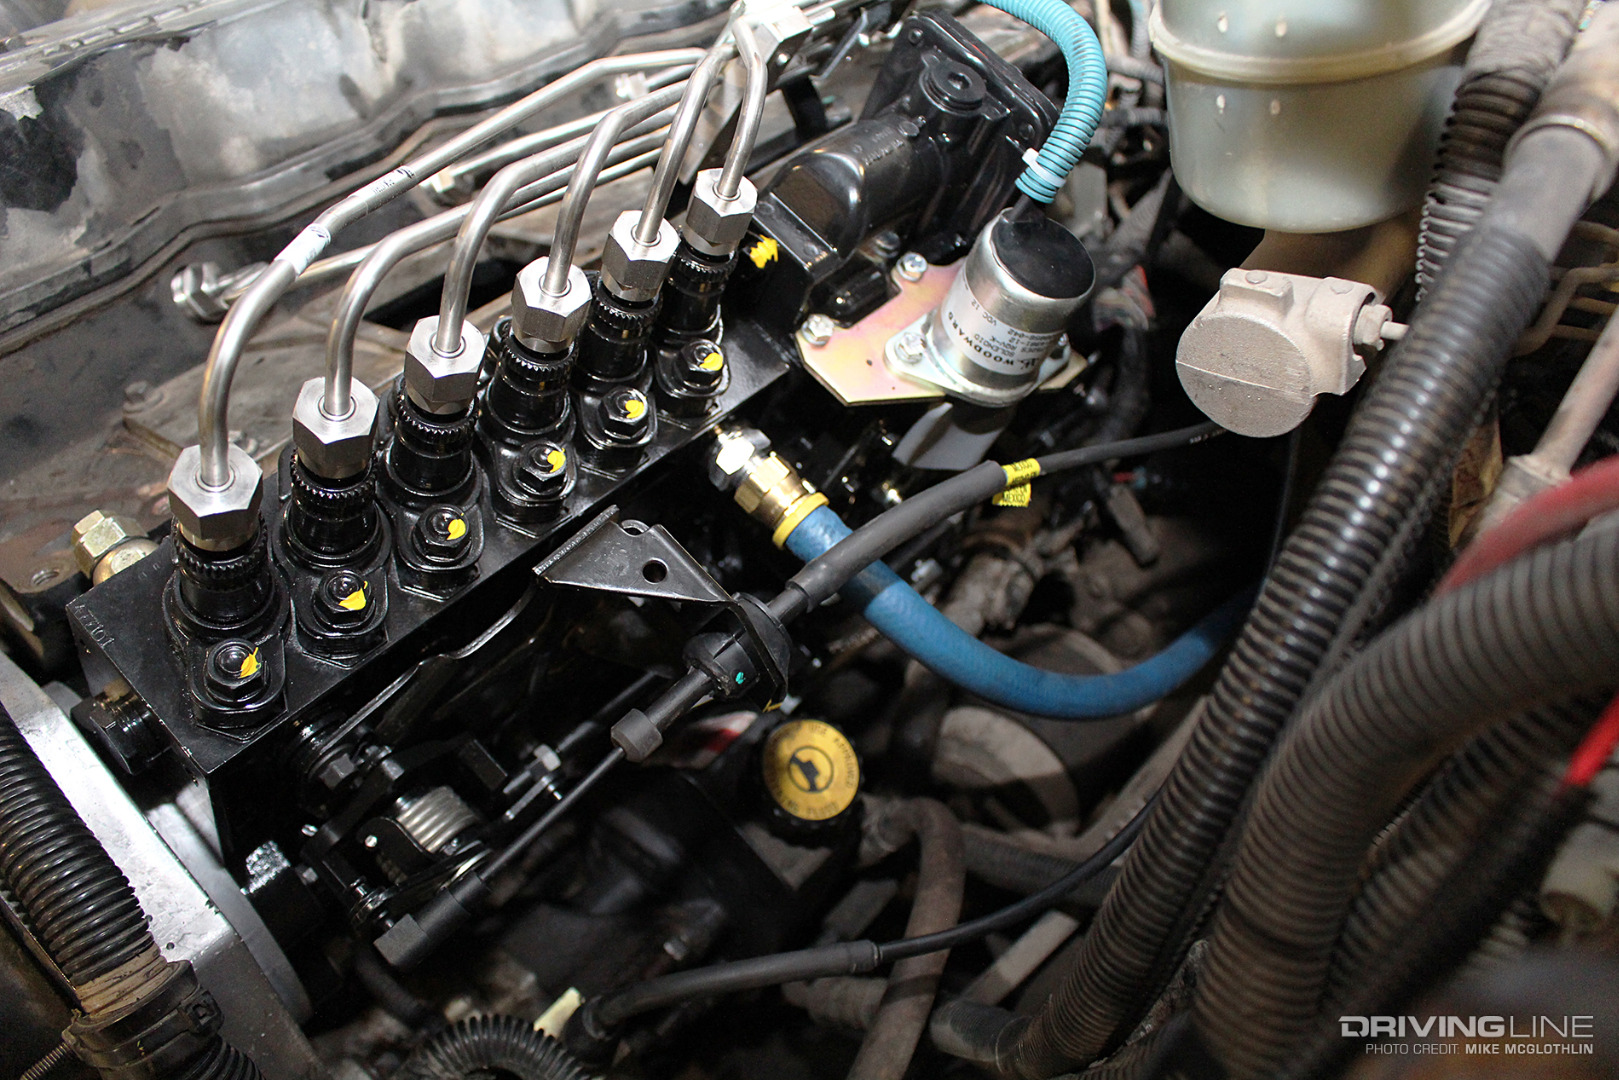
For a street-driven P-pumped 24-valve application (such as the one shown here), even a mildly modified P7100 can net 650-to-700-rwhp with the right turbo. The pump pictured above will do just that, as it’s based on the highly desirable 215hp P7100 model (a pump with a more aggressive cam profile), features 4,000-rpm governor springs, a custom fuel plate and has been set to 18 degrees of timing advance. This pump has also been treated to a fuel shut-off solenoid (bolted to the rear of the pump), which is ideal for daily driven or street use. The shut-off solenoid is in charge of allowing and stopping fuel flow to the P-pump (i.e., what kills the truck when you turn off the ignition).

Different Injection Lines

009-Scheid-Diesel-Cummins-P7100-Conversion-Injection-Lines

Because the fuel lines spanning from the injection pump to the fuel injectors are different between a P-pumped Cummins (’94-‘98) and a VP44-equipped version (’98.5-‘02), 12-valve lines are in store. Once again, Scheid Diesel’s P7100 conversion kit saves the day here, and what’s more is that it includes a billet 1-inch thick spacer, which allows the 12-valve lines to clear the ’98.5-’02 intake elbow. Scheid’s stainless steel, 0.093-inch diameter injection lines are shown, which come (pre-clamped, even) with the P7100 conversion package (larger, 0.120-inch lines are optional).

The Missing Link

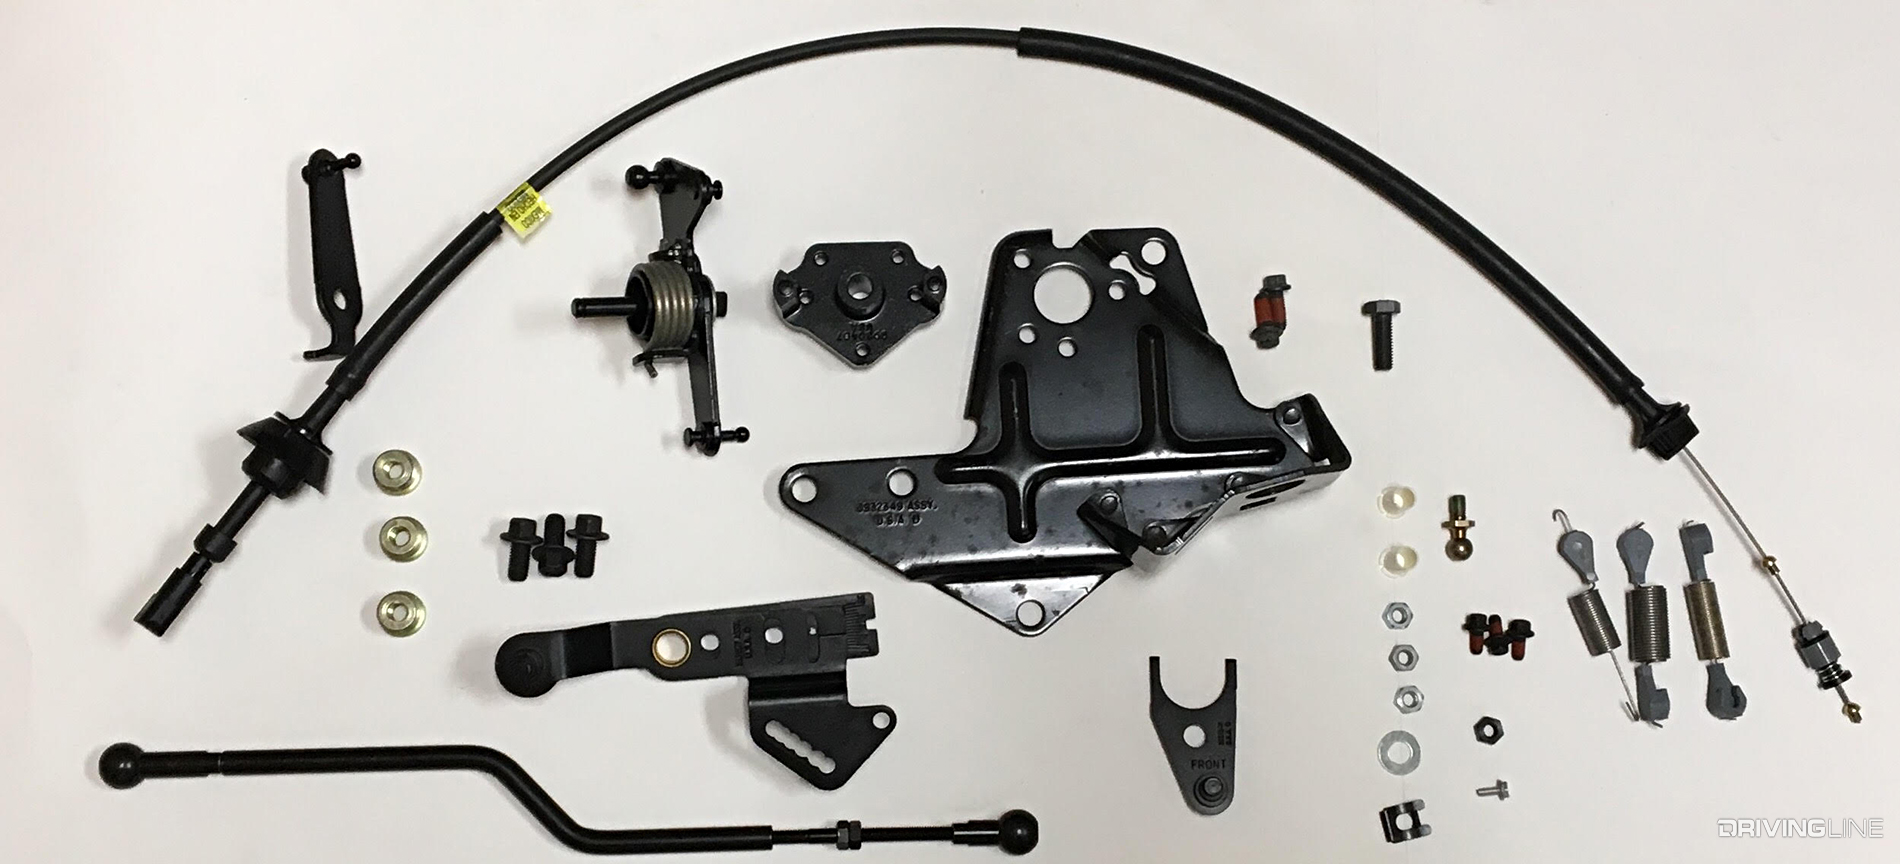
010-Scheid-Diesel-24-Valve-Cummins-P7100-Conversion-Throttle-Linkage

A reworked throttle linkage is warranted in a P-pump swap as well. This version incorporates the throttle position linkage ball from the 24-valve application into a linkage assembly originally designed for the 12-valve engine. It too is included in the Scheid Diesel P7100 conversion kit.

ECM Relocate

011-Cummins-24-Valve-ECM-Relocate

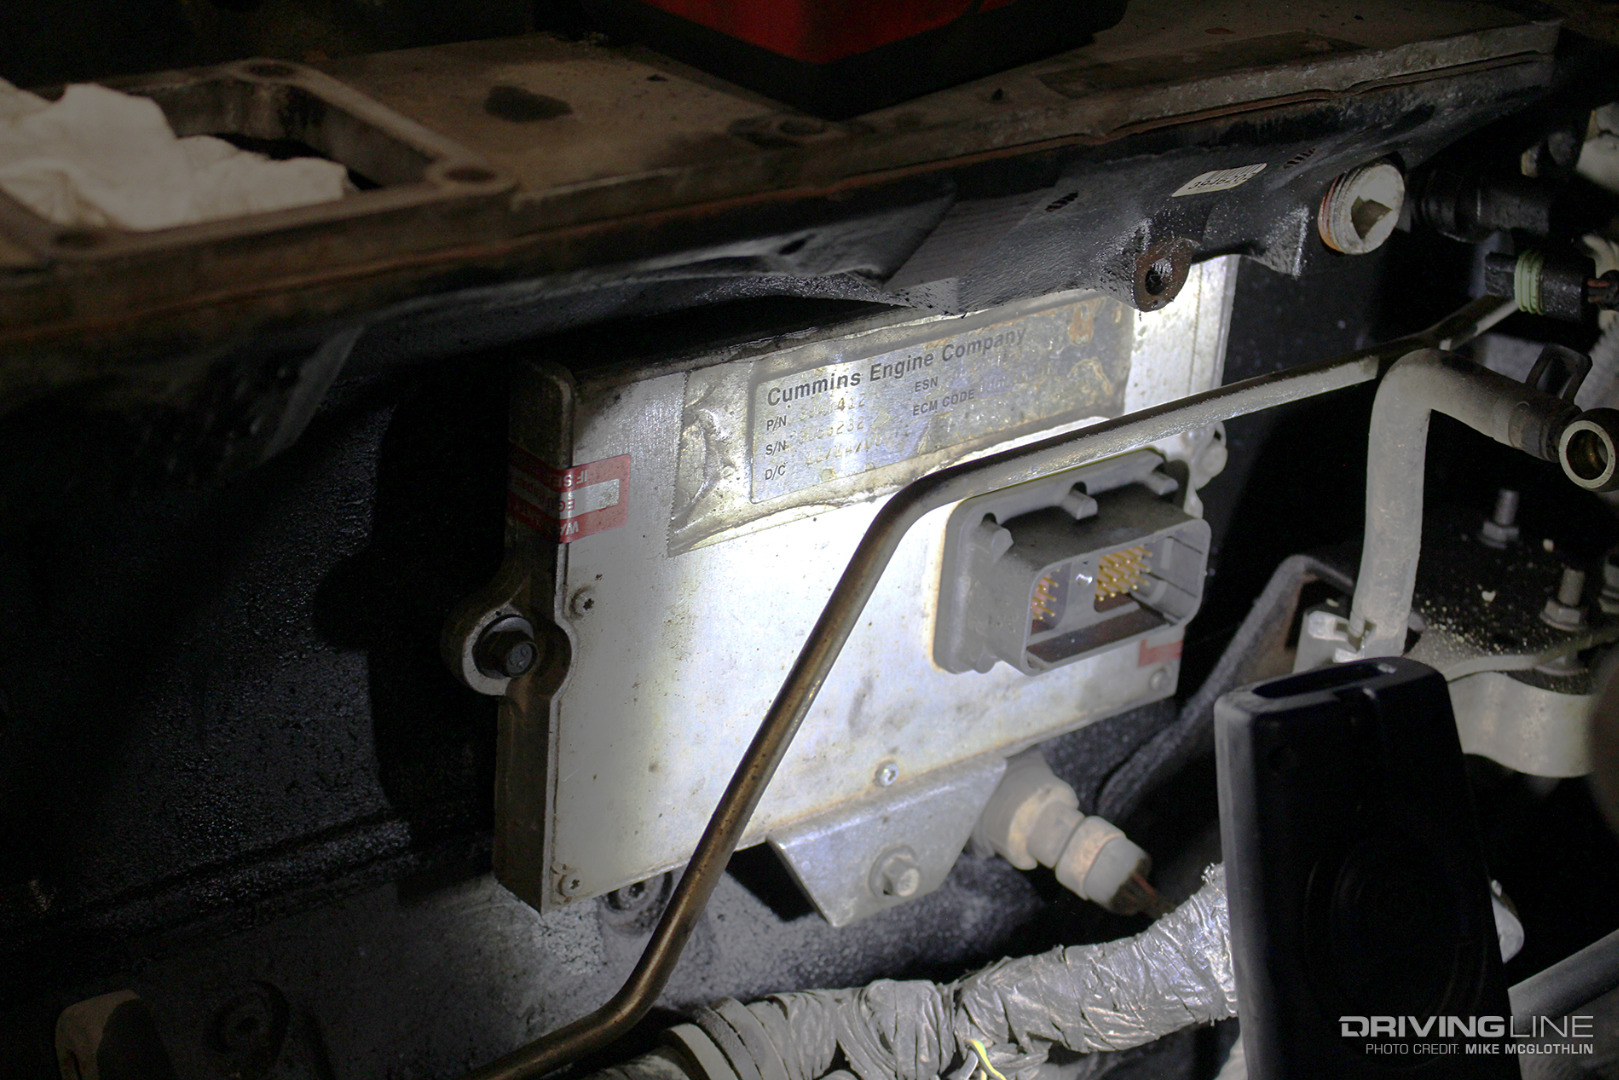
Some novice enthusiasts are surprised to learn that the ’98.5-’02 ECM has to be retained in a P-pump swap. This is because, although it will no longer have anything to do with the injection system, it’s still needed in order for items like oil pressure and water temp sensors to continue to function properly, as well as the gauge cluster. It’s common for the ECM to be relocated further toward the firewall than it was from the factory (due to the immense size of the P7100), although most installers opt to leave the ECM on the driver side of the block.

Up the Pressure

012-FASS-Cummins-Diesel-Fuel-Supply-System​

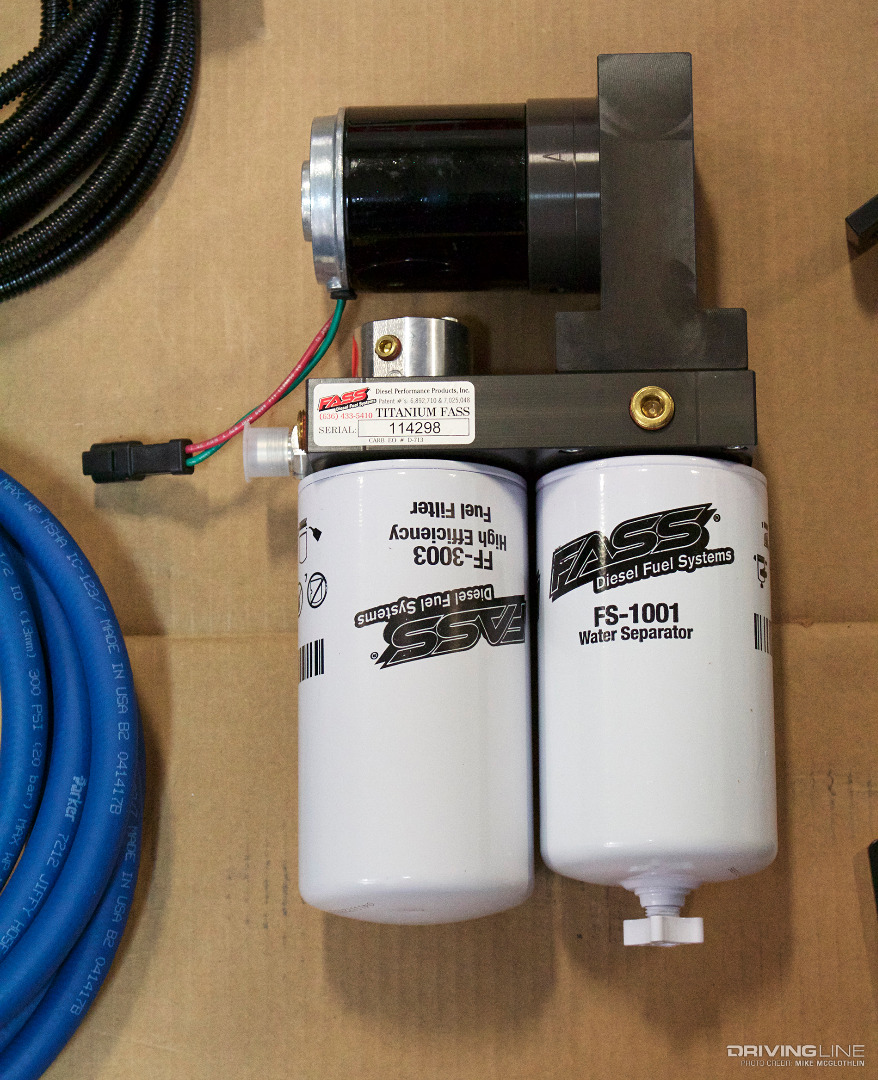
The last item of business is making sure the correct lift pump is being utilized to feed the P-pump. Unlike the VP44, which requires 8-to-10 psi worth of fuel pressure, a P7100 needs to see between 25 and 30 psi at all times, and even more than that if the owner is making big power. FASS and AirDog both make all-inclusive aftermarket fuel supply systems specifically for P-pump applications, which will tack another $700 to $900 onto the overall cost (depending on which system you choose).

500 HP to 700 HP (Night and Day)

013-P-Pump-Cummins-Dodge-Ram-2500-Diesel

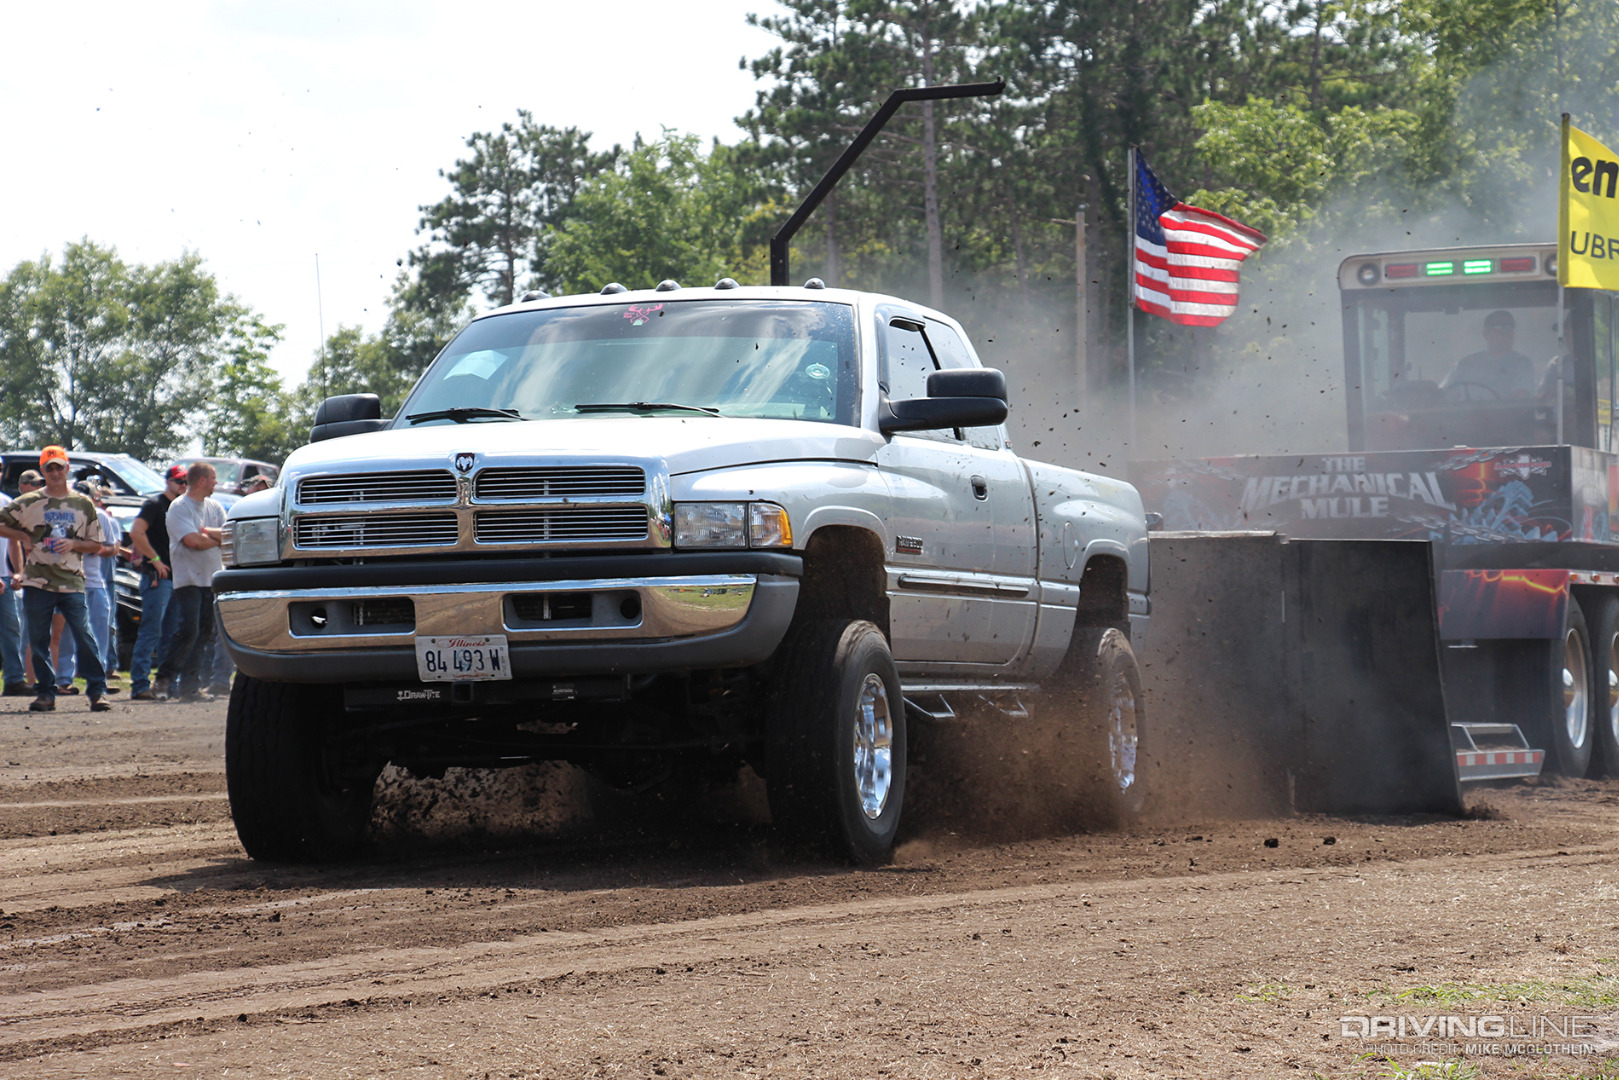
So, what’s it like to add a P7100 to a 24-valve Cummins? In this particular truck’s case, it means another 200 hp is on the table. With the VP44 in the mix, the owner was having a hard time cracking the 500-rwhp barrier — even with larger injectors and a bigger turbo feeding the engine. Now with the same injectors and turbo, considerably more boost is on tap, traction can be unheard of (at times) and an estimated 700-rwhp makes it to the ground. Of course, the truck also emits that one-of-a-kind note only a P-pumped 24-valve can produce.

Find out more flaws of the B-Series Cummins diesel engine.

Driven: 2017 Mazda MX-5 RF Grand Touring

$
0
0

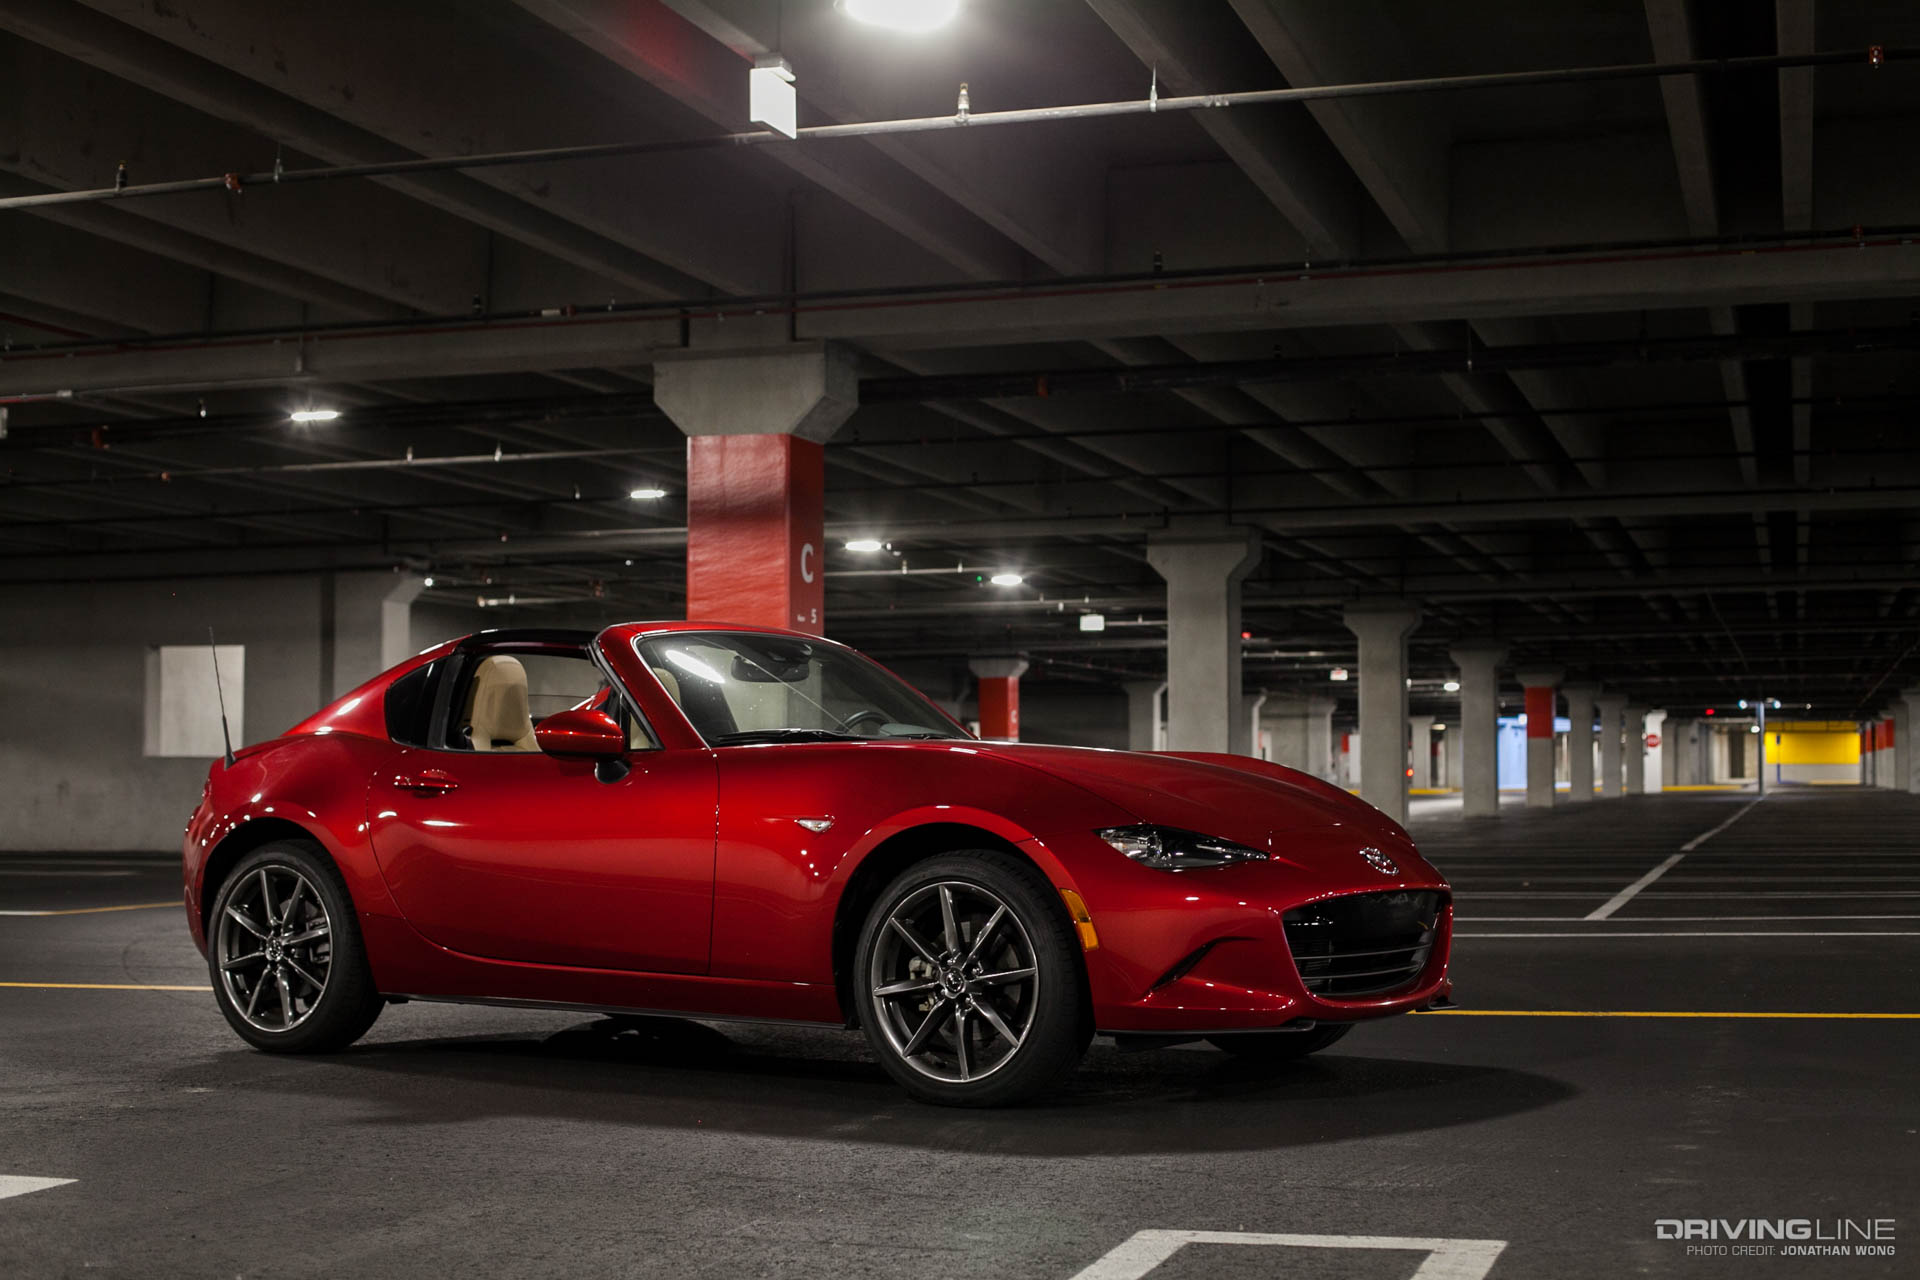
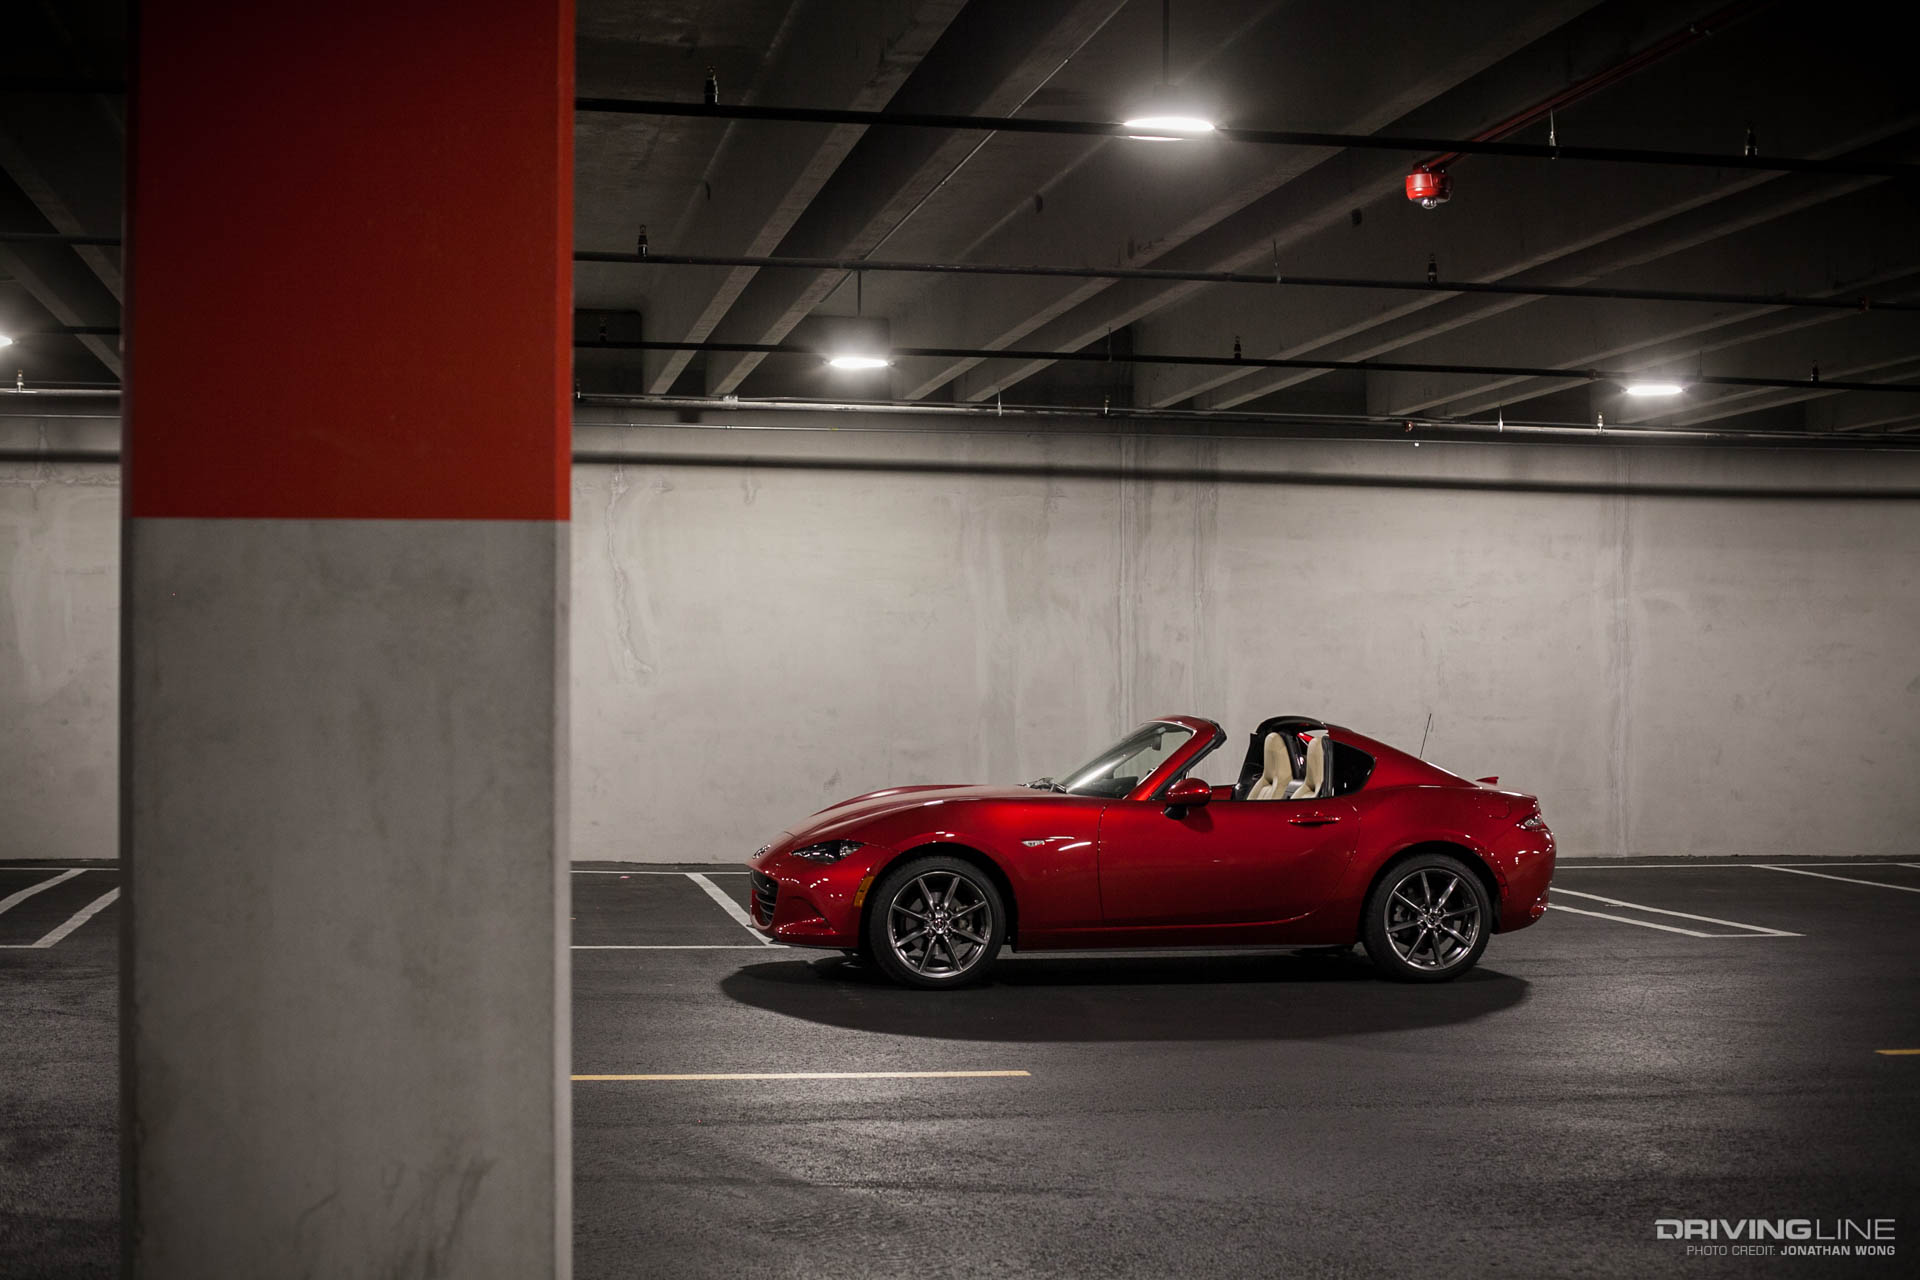
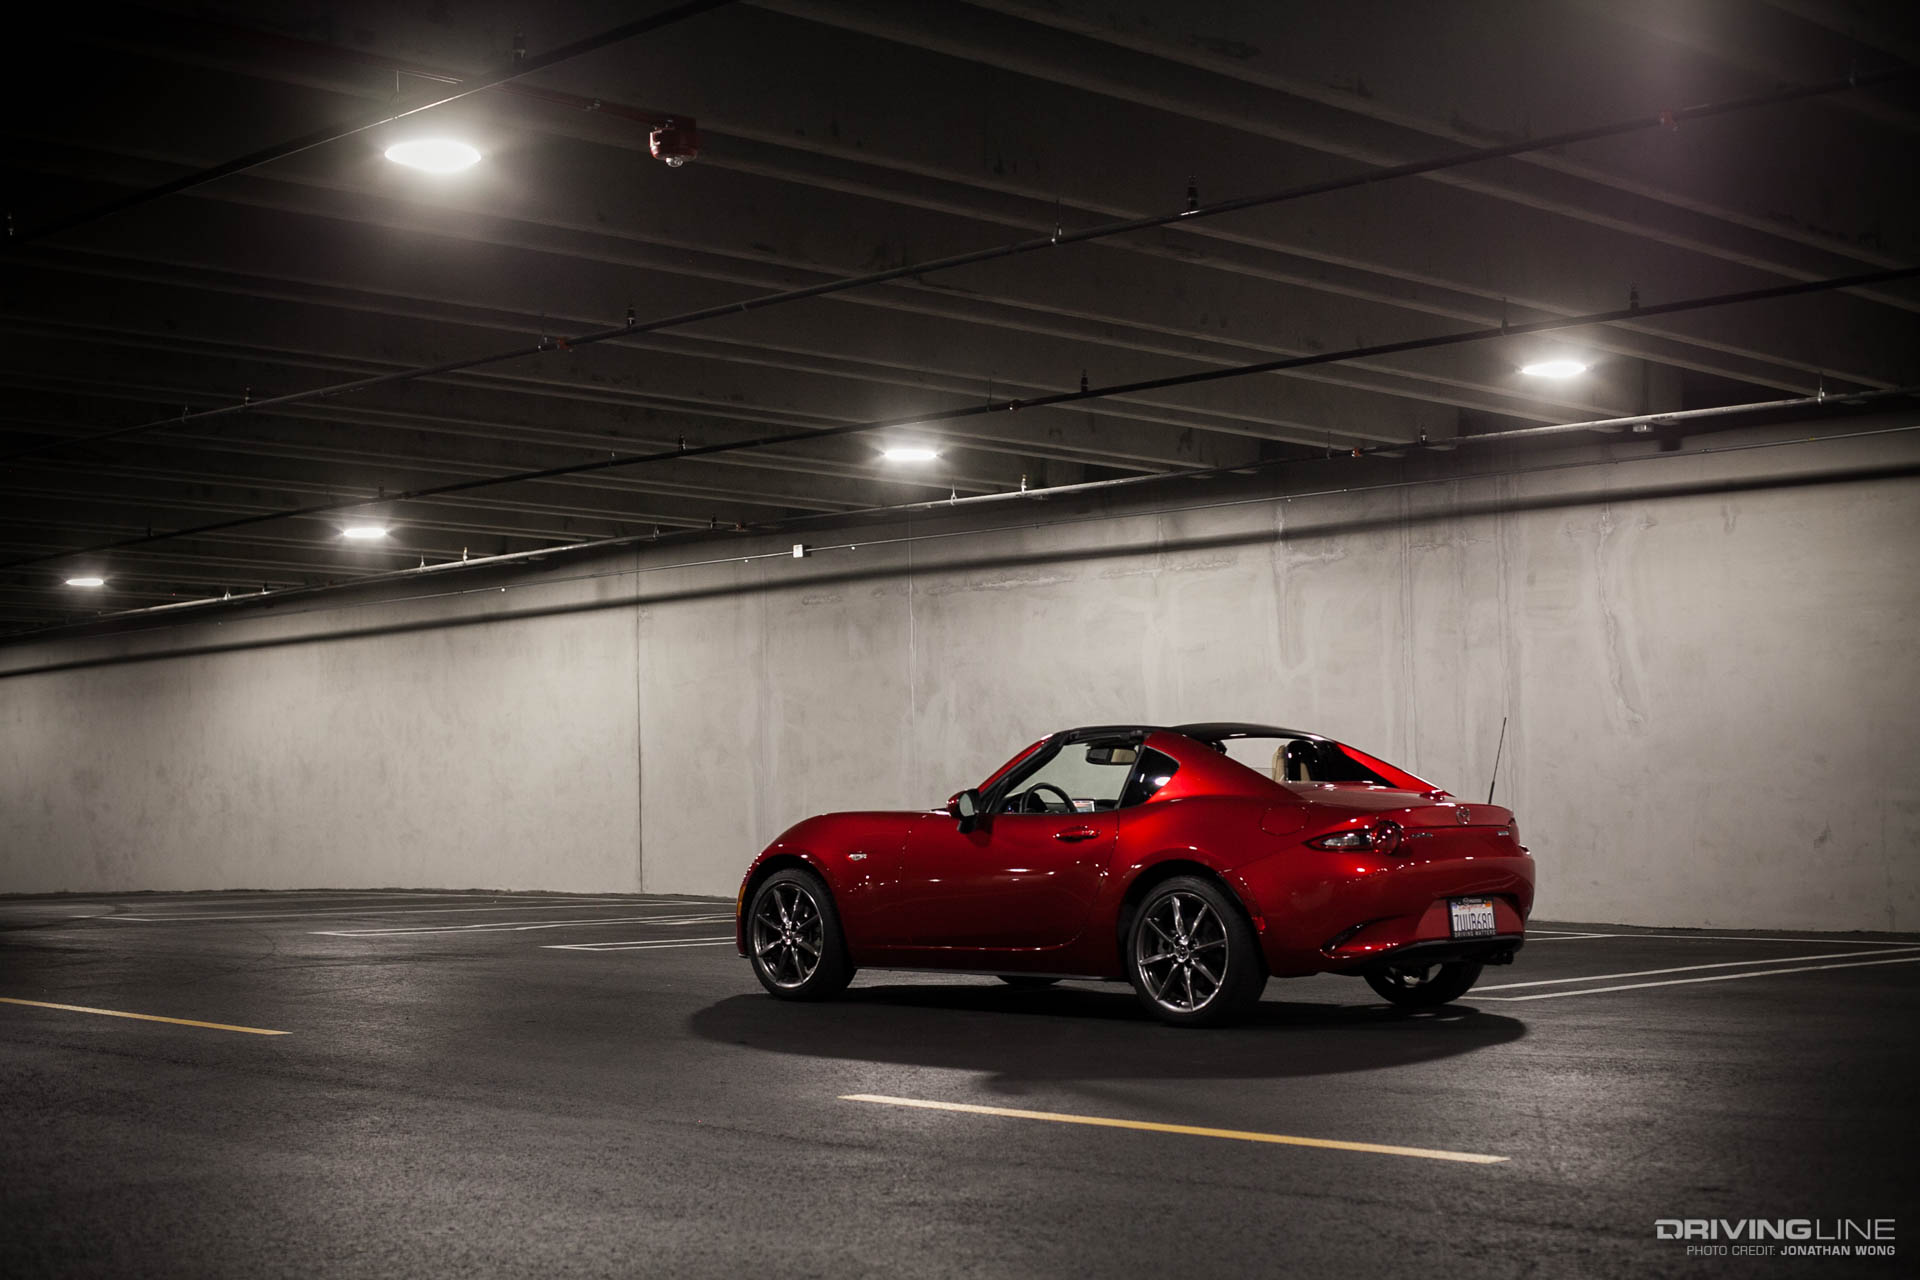
Early last year, Mazda announced its plans to add another MX-5 to its lineup with one special twist: a retractable hard-top with the RF moniker (RF for "Retractable Fastback"). The early renderings and vehicle launch had us very excited, as if the sporty roadster wasn’t exciting enough — but a hard-top? That's pretty hard to beat (pun intended).

MX-5

It took a little while to get some seat time, but the wait was worth every second. Let’s reexamine which features of the MX-5 RF we liked and how they stacked up in real life:

1. Retractable Hard-Top

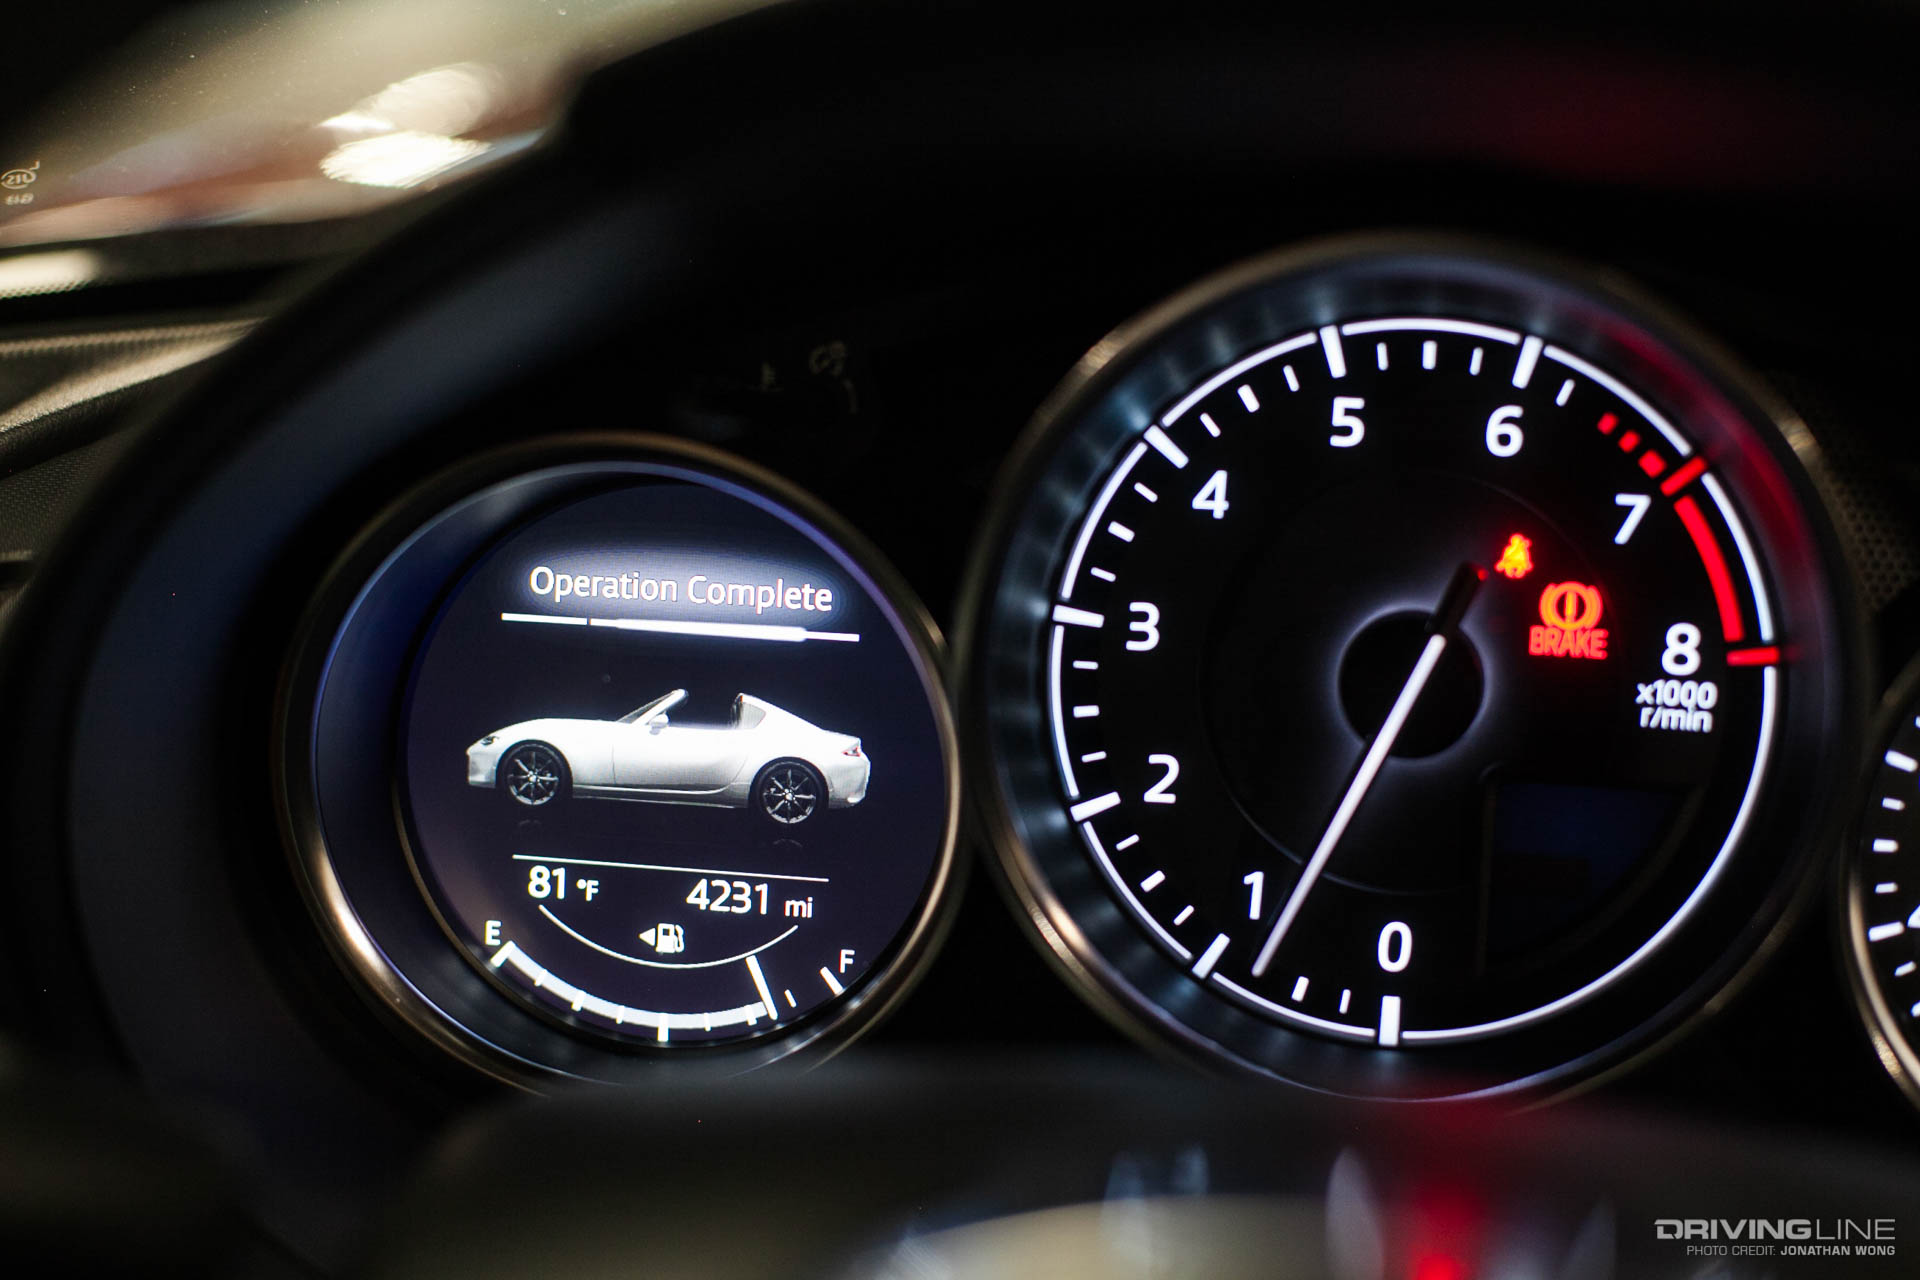
The big, obvious feature of the RF is the vehicle’s greatest selling point: the retractable hard-top. Activated with a switch down in the center console by the shifter, the instrument cluster displays an animated graphic of the opening/closing of the hard-top as it’s (as you can guess) opening or closing. The entire operation happens within seconds, much more quickly and quietly than expected.

Verdict: Swiped right.

2. Refined Interior

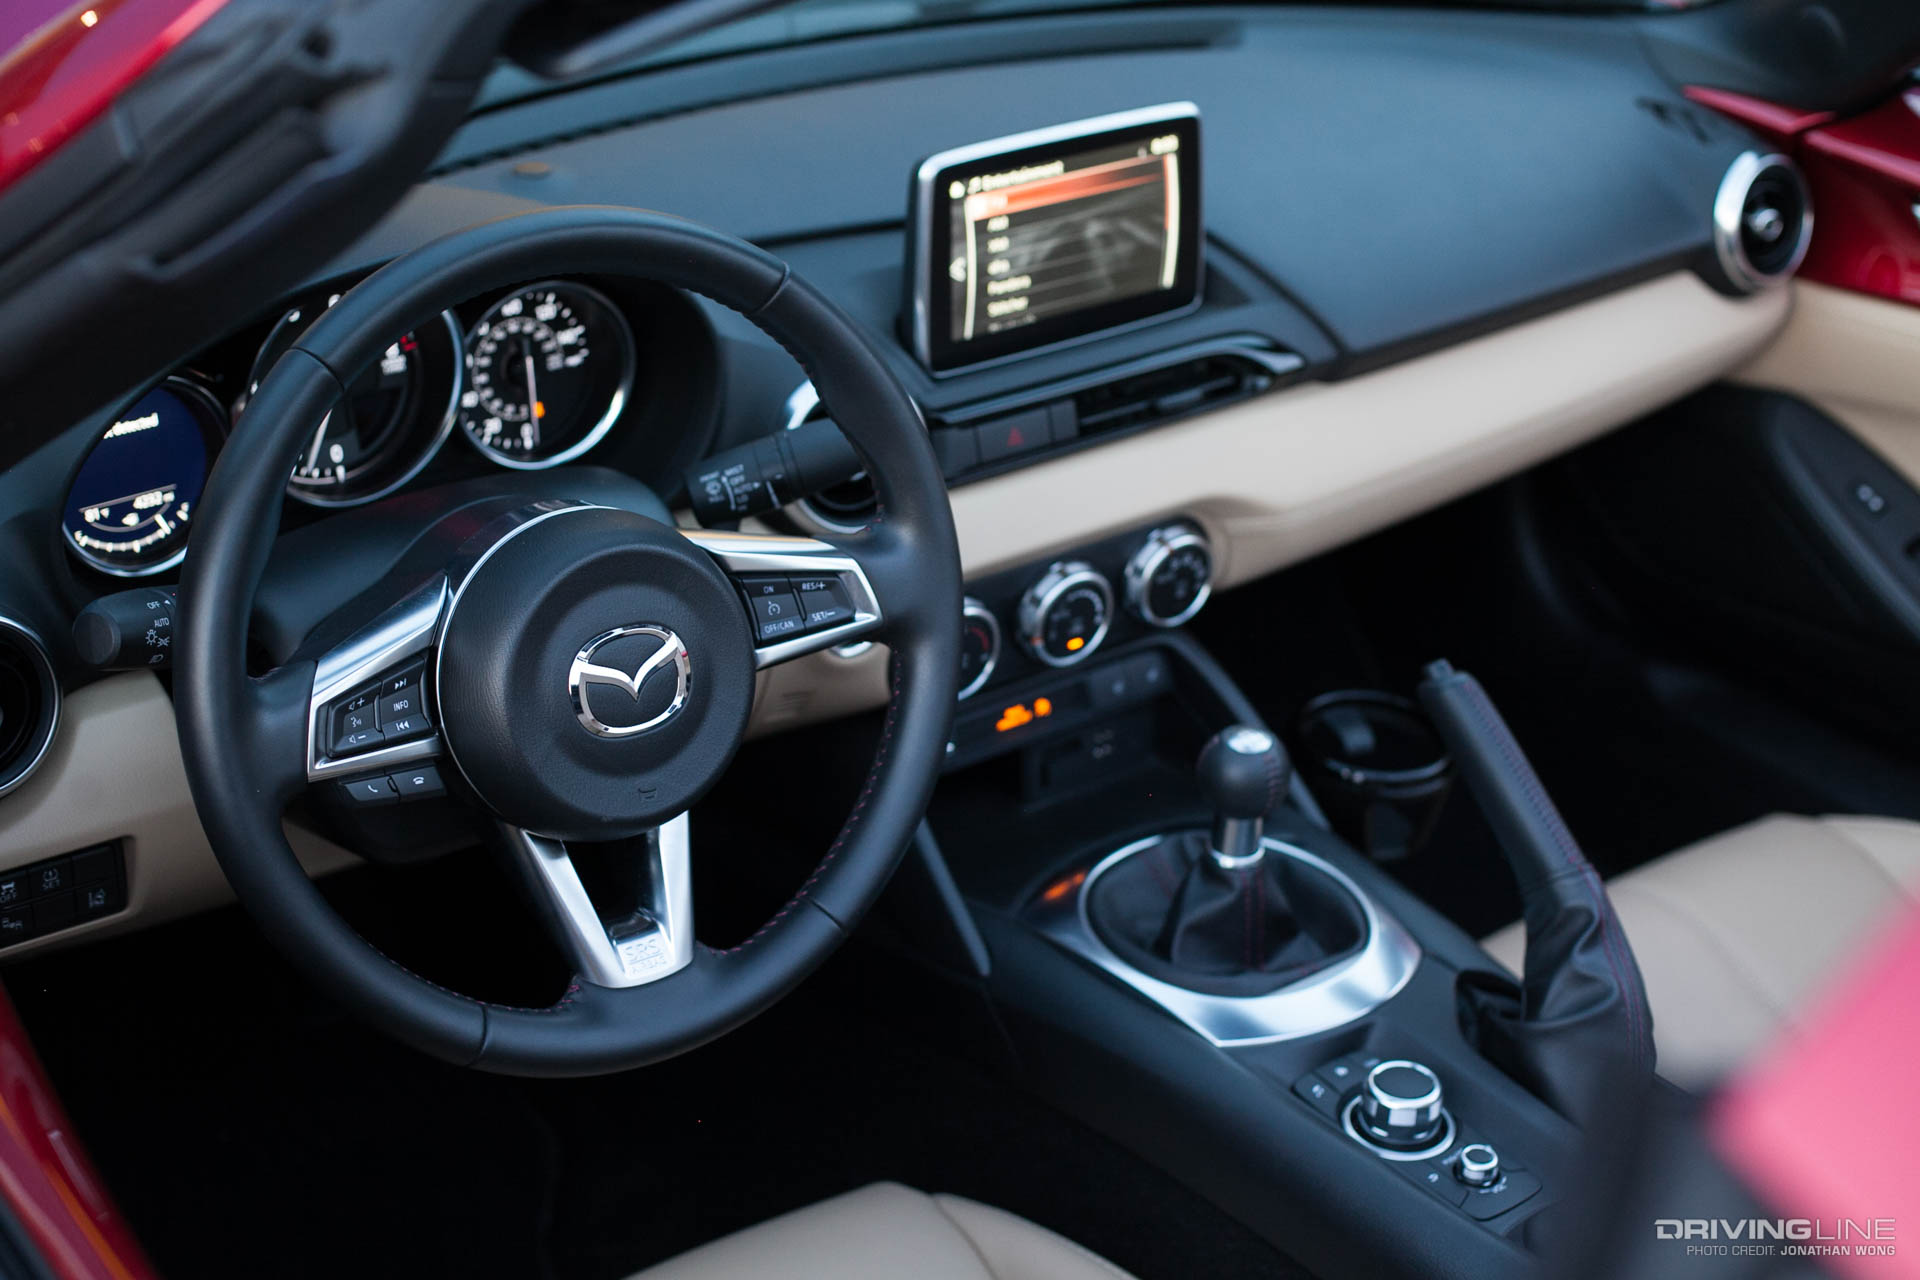
In comparison to the soft-top model, the RF features a full color, high resolution instrument cluster (as opposed to black and white) to display your essentials (tachometer, speedometer, fuel and engine temp). Plush Nappa leather comes standard, so the seats and dashboard have a more luxurious touch and feel.

We noted there would be improved acoustics to not only provide more premium sound, but to also compensate for the open air. Though to be honest, the top was left down for local driving with the radio off, while the top was up during highway commutes with the radio on. We preferred having the music off to focus more on the driving and listening to the engine’s acoustics instead.

Verdict: Swiped right (not once, but three times).

3. Back-Up Sensors

One big safety features on the RF model (that comes only on the Grand Touring MX-5 otherwise) are rear blind spot sensors. Depending on your seating position, backing out in the RF can be challenging as the hard-top blocked my direct line of sight (with the top up), so the warning alerts were useful in many situations.

Verdict: Swiped right. Obvi.

4. The Overall Drive

Performance-wise, nothing’s changed — the MX-5 RF is every bit as enjoyable to drive as its soft-top counterpart. The seats are still low, you feel like you’re in a race cockpit that’s been lifted up with premium materials (because it has) and there’s a solid six-speed transmission to mash the gears with.

But it's the sporty suspension that really shines through. Mazda’s engineers reworked some of its components to compensate for the added weight and to give more balance. The handling’s so precise, it’s almost scary how much more connected to the road we were while maneuvering through tricky roads. That’s how great it felt to drive the RF.

Verdict: Do we really need to spell this out? (Swiped right.)

Clearly, we liked it, a lot.

The RF gets plenty of attention from both non-car people and enthusiasts alike, and soft-top owners can’t help but give you the nod of approval (and likely a bit of jealousy even). The only things we need now are more modified versions of both.

See more photos of the MX-5 in the gallery below.

Beating the Heat With Cool Trucks at Summer Madness #31

$
0
0

Bakersfield, California, is a place that's known for getting ridiculously hot during the summer months. This time of year the afternoon temperatures regularly pass the 100-degree mark, and even at night it can still hover in the 80s and 90s. Needless to say, "pleasant" probably isn't a word too many would use to describe the weather conditions.

So why, then, do hundreds of custom pickup trucks gather at Bakersfield's Kern County Fairgrounds every year in late July? Summer Madness. That's the name of a three-day-long event that's been happening since 1986.

Originally starting as a vanning event before expanding to include the booming minitruck scene, Summer Madness is one part car show, one part campout and several parts fiesta. It draws trucks not just from California but from all over the western United States.

We rolled in early on Saturday morning hoping to avoid the heat, but there was no such luck. Temps starting climbing as soon as the sun was up, and we immediately felt like hopping into one of the many inflatable pools brought out by showgoers.

But soon thoughts about the weather took a backseat as we took in the hundreds of pickups spread across the Fairgrounds, with many more lining up outside still waiting to make their way into the event.

Rather than being a highly competitive show, Summer Madness is a laid back event that welcomes all types of trucks — and the participants ranged from lightly modified daily drivers to full-on show trucks that arrived on trailers.

And while there were some lifted trucks taking part, Summer Madness is mainly about the lower side of the spectrum, with static lowering jobs, airbag setups and extreme body drops representing the biggest slice of the pie.

But that doesn't mean there wasn't variety to be found. Among the group was everything from brand new trucks to vintage builds and even some really cool minitruck builds proving that scene still has plenty of life.

The classic Chevy C10 in particular was a very popular choice with one club dedicated specifically to these old-school pickups. There's just something about those lines, isn't there?

Speaking of old-school, we also dug this pair of Silverados — both sporting wild custom paint jobs that spur flashbacks of the late '90s and early 2000s.

One our favorite vehicles at all wasn't even a pickup truck, but this heavily customized Kenworth big rig sporting a slammed stance that would put many show trucks to shame.

It may have been scorching hot at Summer Madness 31, but the coolness of the trucks more than made up for it.

And best of all, you can now enjoy the event gallery below from the air-conditioned comfort of the indoors.

2017 Formula Drift Pro 2: First Half Season Recap

$
0
0

Formula Drift Pro 2 doesn't quite get the fanfare as the top tier "Pro" class, but tomorrow’s future stars are now required to drive through the Pro 2 ranks to earn a Pro license. As the link between the regional Pro-Am series and the national Pro series, the class acts as a strategic stepping stone to give drivers the experience of driving in front of the same judges on the same tracks as the top class, but with a reduced schedule to help ease the costs.

The first two rounds of this year’s Formula Drift Pro 2 schedule took place at Orlando Speed World and Road Atlanta, just two weeks apart from each other. After those two events just 500 miles from each other, there would be a three-month break until the third round of Pro 2 at Evergreen Speedway in August.

In the interest of giving these drivers their own spotlight, we delayed the coverage of the first two events until now as a refresher for those who are anxious to see how the final two events play out. The Pro 2 class champion will be granted free entry fees for the 2018 Formula Drift Pro event series, which is a great reward for the hard work and dedication that these drivers put in over the season.

ORLANDO: UNCHARTED TERRITORY

Qualifying

Thursday’s qualifying session took place with clear conditions, although temperatures started dropping rapidly due to a pending thunder storm in the area. Twenty-four drivers showed up to the inaugural event on the 2017 Pro 2 schedule, with only the Top 16 earning a slot in the tandem elimination bracket on Friday.

Randall Waters at Orlando

The top of the qualifying charts was fairly contentions, with just 10 points separating the top qualifier from Q10. Luis Lizardi, Randall Waters, Brody Goble and Kevin Lawrence took the Top 4 positions, with each driver scoring just one less point than the driver ahead of them. All four drivers competed on the 2016 Pro 2 circuit, while Travis Reeder in Q6 was the top driver who was new to the Pro 2 circuit this season.

Brody Goble

Top 16 Tandem

Historically, qualifying has had little correlation to results in the tandem battles, and this season would be no different. Lizardi would lose the first tandem battle out of the gate to Brandon Schmidt, showing that any driver in Pro 2 can beat any other driver in any given battle. Lizardi would be the lone upset in the Top 16 round as the higher qualified drivers won all other battles.

Brandon Schmidt and Luis Lizardi at Orlando

Schmidt would defeat Hungarian driver Gyorgy Szilveszter in the Top 8 to earn a Top 4 appearance as the 16th qualified driver — a first in the history of the Pro 2 class. Local Floridian Kevin Lawrence would defeat Dirk Stratton, Australian Josh Robinson would defeat Waters, and Reeder would defeat Goble in the other Top 8 tandem battles.

Gyorgy Szilveszter and Brandon Schmidt at Orlando

Josh Robinson and Randall Waters at Orlando

The semifinals in Orlando featured some of the best drifting we saw all weekend, with both battles getting the crowd excited for very different reasons. Schmidt vs. Lawrence would take two “one-more-time” battles before being decided, while Reeder vs. Robinson was exciting due to Reeder losing a tire mid-run but still winning the battle.

The first semi-final between Schmidt and Lawrence would also determine one of the podium positions due to how third place is decided. If Lawrence lost the battle, he was guaranteed third place due to being the top qualifier, while a loss from Schmidt would have guaranteed he finished of the podium due to being the lowest qualified driver.

Brandon Schmidt and Kevin Lawrence at Orlando

After a pair of tied tandem battles, a mistake from Schmidt in the lead position was enough to give Lawrence the win in front of his hometown crowd. Reeder’s win against Robinson was quite unusual due to the lost tire. Had Reeder lost the tire in the first half of the battle, he would have been unable to run the second half due to Formula Drift rules which restrict a driver from replacing a tire between runs. However, since it happened in the second half of the battle and Reeder was able to still apply pressure sans one of his rear tires, the judges awarded him the win. Robinson would still earn third place thanks to his superior qualifying position over Schmidt.

Orlando podium

In the final, Lawrence had a very strong chase run, and likely an advantage heading into the second run. In the second run, Lawrence started the run off a bit lower on the bank in chase, but continued to apply pressure through the entire run and was awarded the event win. As a sophomore in the Pro 2 class and driving at his home track, Lawrence was the clear driver to beat throughout the event and put down consistent runs through each of his tandem battles. Heading into Atlanta, several drivers felt that Lawrence was beatable away from Orlando Speed World, and they still had plenty of room to make up valuable points.

Kevin Lawrence at Orlando

ATLANTA: ROAD TO THE CHAMPIONSHIP

Qualifying

Atlanta’s qualifying field ballooned to 30 drivers, and a thunderstorm shortly before qualifying put all drivers on neutral ground. Both the top qualifier (Lizardi) and event winner (Lawrence) from Orlando would find themselves on the outside looking in after qualifying with a pair of zeros, which was guaranteed to shake up the points standings.

Dirk Stratton at Atlanta

Formula Drift journeyman Danny George would take the top qualifying position with a score of 87, with Stratton, Robinson and Austin Meeks close behind him. Reeder, the bridesmaid from Orlando, would qualify in 11th position, while fourth-place winner Schmidt from Orlando would also miss the qualifying cut. Atlanta is long known as one of the trickier tracks on the circuit, and the Pro 2 qualifying session validated that perception.

Danny George at Atlanta

Top 16 Tandem

Tandem eliminations would again start with a bang as a mistake on initiation from George would cause him to be eliminated by the 16th qualifier Alec Robbins. While most other top qualifiers won their tandem battles, Robinson would lose to Hooman Rahimi in his battle, and underdog Reeder would defeat Andy Hately in the final battle of the Top 16. Robbins’ day would end in the Top 8 when he would fall to Matt Vankirk, Goble defeated Meeks in his battle, Stratton would fall to Waters, and Reeder would end Rahimi’s Cinderella run.

Matt Vankirk and Alec Robbins at Atlanta

Austin Meeks and Brody Goble at Atlanta

Looking at the Top 4 matchups, it was clearly anyone’s race to win. Vankirk would face Goble on the left side, while Waters would face Reeder. As the highest remaining driver, Goble would likely be seen as the driver most likely to win the event at this point, while Reeder could be seen as a favorite due to being the only remaining podium finisher from Orlando. Goble would also be guaranteed a podium finish due to qualifying results, which allowed him to be a bit more aggressive if he wanted to be.

Brody Goble at Atlanta

In the end, Goble had a very aggressive set of runs with Vankirk but dropped two tires off course in the final turn of his chase run, which gave the win to Vankirk. On the other side of the ladder, Waters slid off course after initiating too aggressively behind Reeder, although one judge wanted to see the battle go to a “one more time” battle.

Unfortunately, the final would be anti-climatic as Vankirk experienced broken parts and was unable to compete against Reeder, handing Reeder the win. Reeder now carries a 78-point lead over Goble and Waters, who are both tied for second in the standings, with Vankirk just two more points behind them in fourth place.

Travis Reeder at Atlanta

Looking ahead to Seattle, three of the top four drivers all have substantial amounts of experience at Evergreen Speedway as Reeder, Goble and Vankirk all earned their Pro 2 licenses through the Evergreen Drift Pro-Am series. Lawrence will look to avenge his DNQ from Atlanta with some big results in Seattle — a track he failed to qualify at back in 2015 when he last drove it. At the end of the season, eight drivers will graduate from the Pro 2 class with their Pro licenses, which means any of the 23 drivers who have earned points to date in the class still have a chance to move up to the top tier of Formula Drift.

FORMULA D PRO 2 STANDINGS

As of Rounds 1 & 2:

RANKCARDRIVERTOTALPTS. BEHIND
1#77Travis Reeder185 
2#12Brody Goble107-78
3#142Randall Waters107-78
4#18Matt Vankirk105-80
5#352Kevin Lawrence103-82
6#33Dirk Stratton88-97
7#530Josh Robinson87-98
9#87Gyorgy Szilveszter66-119
10#316Austin Meeks65-120
11#83Brandon Schmidt62-123
12#702Danny George48-137
13#999Trenton Beechum44-141
14#321Hooman Rahimi42-143
15#321Alec Robbins42-143
16#3Luis Lizardi26-159
17#98Andy Hately23-162
18#42Kelsey Rowlings22-163

Stay tuned for our season recap of Rounds 3 & 4!

Enjoy more photos from Orlando Speed World and Road Atlanta in the gallery below.

(Photos: Andrew Jennings, Jason Scott)

Celebrating Mopar's 80th Birthday the Mile-High Way

$
0
0

This year marks the 80th birthday of the famed Mopar brand, and what better way to celebrate the trademark's long existence than with the 38th annual Mopar Mile-High NHRA Nationals and the Mile-High Block Party at one of the NHRA's most unique racing venues. This year, we got the inside line on both!

Introduced as its own distinct brand in 1937, Mopar has provided original equipment, services and customer care under the Chrysler umbrella for eight decades. Much more broadly known as a reference to all Chrysler Group vehicles — from classic Plymouths and AMCs to new Dodge, Ram and even Jeep vehicles — the Mopar brand continues to have a following in the automotive world filled with incredible passion and dedication.

Mopar Mile-High Nationals

Every year, that passion can be seen for miles in Colorado as the ultimate celebration of the brand comes to Denver in the form of the Mopar Mile-High NHRA Nationals.

Mopar Mile-High Nationals

Kicking off the annual event is the Mopar Mile-High Block Party, held in Golden, Colorado, Thursday evening before the three-day race event at Bandimere Speedway. Now its 16th year running, this Block Party brought out thousands of Mopar and NHRA fans for a night full of muscle cars, live music and of course, some up-close interaction with some of the event's top Mopar drivers and their cars.

Mopar Mile-High Nationals

Among the racers on-site for photo opportunities and autograph sessions were legendary Funny Car drivers like “Fast Jack” Beckman, two-time Funny Car World Champion Matt Hagan and sophomore Funny Car driver Jim Campbell; Top Fuel greats, like eight-time NHRA Champion Tony Schumacher and fan favorite, sophomore Top Fuel driver Leah Pritchett; and notable Pro Stock drivers, like Allen Johnson and “hometown hero” Deric Kramer.

For many of the drivers, Denver and the Mile-High Nationals holds a special place in their hearts and drag racing careers.

“There's nothing like this track,” said Jack Beckman. “The scenery is amazing, and it's the only track that has liquid cooling tubes underneath it for traction.” Beckman has been racing at Bandimere for the Mile-High Nationals since 2007 and loves coming back, though he admits that things, such as elevation, are a bit more challenging in Denver.

“Tuning is a big deal,” he explained. “The crew chiefs all pull their hair out. We warm up the car an hour earlier than normal here, just in case it doesn't start. In full gear and strapped in a full harness, it's harder to breath at first. And the parachutes are not as effective, because there's less air to grab.”

Mopar Mile-High NHRA Nationals

For Leah Pritchett, who started in Jr. Dragsters at Bandimere Speedway, racing at the Mopar Mile-High NHRA Nationals is all about fulfilling a long-time dream.

“I have one goal; this is a chance at what I didn't do at 13,” said Pritchett, in regards to competing for and winning a Wally at Bandimere. “When I race Bandimere, it's like a personal redemption from childhood.” As far as being back where her drag racing career started, she told us it was a thrill to return, especially as the driver of the flagship Top Fuel car for Papa John's.

Mopar Mile-High NHRA Nationals - Leah Pritchett

For Pro Stock driver Deric Kramer, Bandimere Speedway is his home track, having lived his whole life in Sterling, Colorado. Kramer rose through the ranks, from Juniors up at the mountain-side track.

Mopar Mile-High NHRA Nationals

“I don't know if it's an advantage, but I do have more laps here than anywhere else, but not as many total laps as some of the other drivers,” Kramer told us when asked if he thought racing at his home track might give him some sort of home field advantage.

Though he may not have the upper hand having grown up drag racing at Bandimere, he did admit that his cheering squad might be a bit bigger at the main event than others' because of it. Regardless, there was only one thing on his mind heading into the weekend: winning.

Mopar Mile-High NHRA Nationals

“It's always nice to win in front of family and friends,” Kramer said. “I want to win. I don't show up to go home early.” While the drivers dispersed from their autograph signings, the Mile-High Block Party continued well into the night, with lines continuously growing for the Penzoil and Dodge Demon simulators.

The Steve Thomas Band played to a giant crowd, the beer and Papa John's pizza flowed, and plenty of Mopar and NHRA-themed booths stayed open late while the streets stayed full of fans.

When the party was over, the celebration of Mopar had only just begun, with three full days of NHRA Mello Yello Drag Racing Series fun kicking off just a few miles away at the Mopar Mile-High NHRA Nationals.

Browse more of the Block Party in the photos below and jump over to our coverage of the race.

Viewing all 5095 articles
Browse latest View live


<script src="https://jsc.adskeeper.com/r/s/rssing.com.1596347.js" async> </script>